Tools and Roles
Live Chat offers two distinct roles, each with its own unique perspective and capabilities.
The agent is your friendly helper, always ready to answer questions and provide support. They can see all the messages in the chat and respond directly to the customer, ensuring a smooth and helpful agent.
The customer is the star of the show, seeking assistance or information. They can chat with the agent and get the answers they need, all while enjoying a personalized support agent.
Together, they make Live chat a powerful tool for connection and problem-solving!
Customer
The customer is the person who is seeking help or information. Customers can only engage in conversations through the published chat, which includes an integrated live chat module. To get an comprehensive overview we showcase customer examples on our website, Additionally, we offer a live chat template you can download and are ready to chat in no time.
Agent
The agent is responsible for answering questions and providing support. They can view all chat messages and reply to the customer. To go to the agent view, you need to log in to the Loyjoy platform and select the "Live chat" option from the left menu.
Sign in
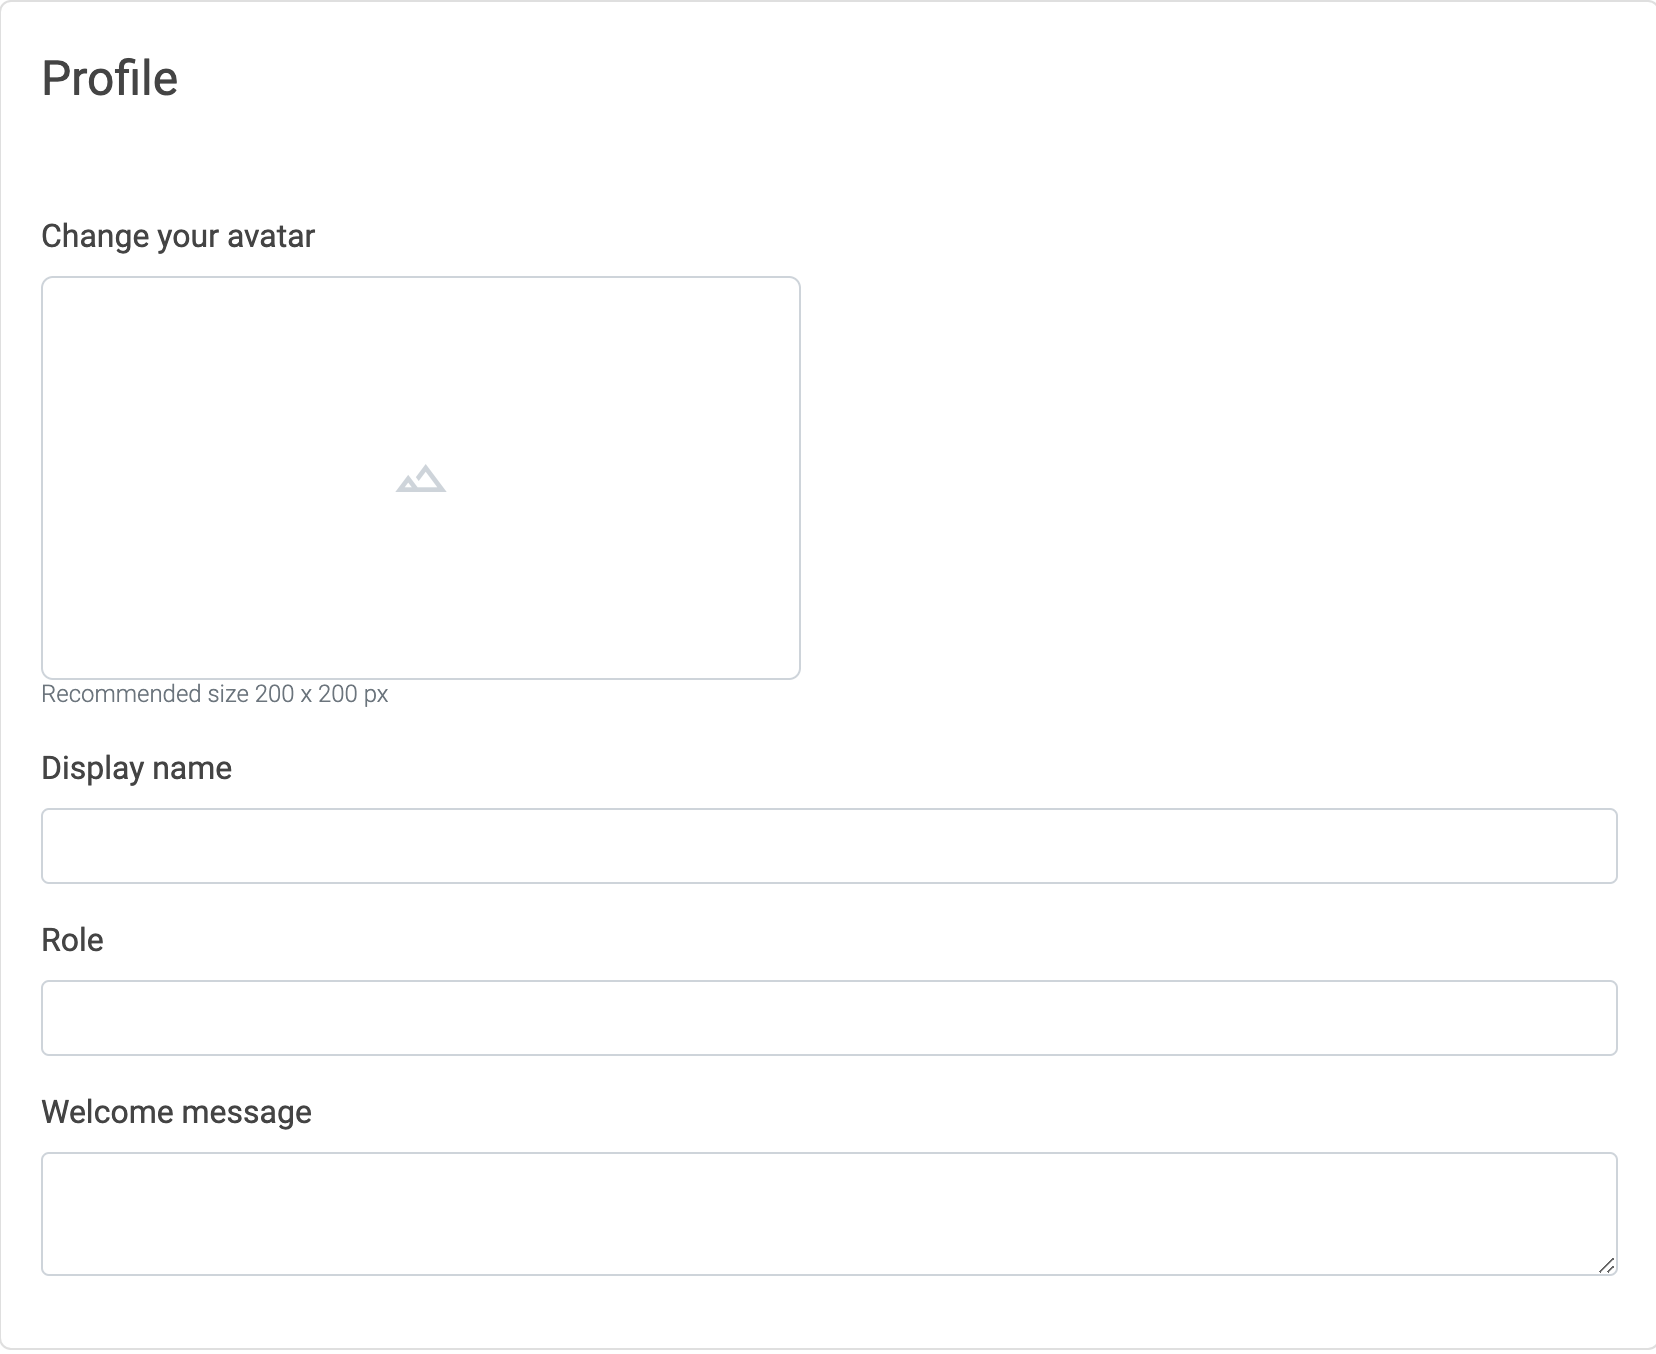
Sign in to the Loyjoy platform using your credentials. Set up your profile ans add a profile picture.
Understanding the Agent View
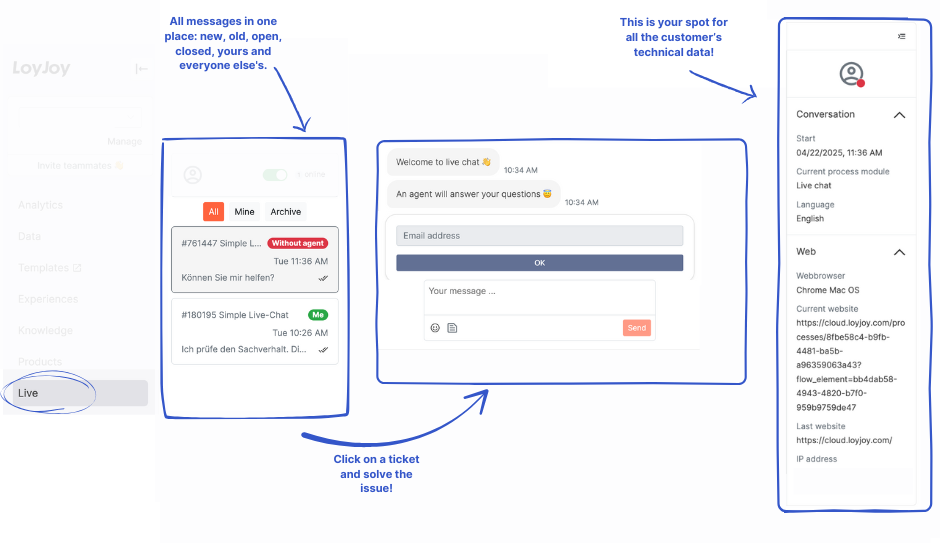
The toolbar is the main interface for the agent. It contains three main sections (left to right):
- Message Overview
This section displays all messages sent by customers and agents. You can filter them by All (or Open), Mine, and Archive. Which conversations the first filter shows depends on the visibility model of your tenant: in the Work pool model the tab is labelled Open and shows only the conversations that are still in the shared pool, and the archive shows only the conversations you worked on.
When a conversation carries the variable live_chat_topic, its value is shown as a badge next to the customer's name in the message overview. This gives Live Agents the topic of each conversation at a glance, so they can prioritise and pick up the right chats faster. Set the variable in your process to label conversations, for example by using a Questionnaire module.
-
Chat interface
-
Technicals datas
Setting Your Status
At the top right of the Live view you set your own status in a dropdown. Three statuses are available:
- Online: You are available for customers. Only agents with status Online count as available when a process reaches the Live Chat module, and only agents with status Online are notified about new unassigned conversations.
- Busy: You keep working in the Live chat, but you are not available for new customers. Your colleagues see you as active, customers are not offered a live handover because of you, and you do not receive notifications about new unassigned conversations.
- Offline: You are not available. This is the status as long as you have not selected anything else.
Your status stays as you set it. Sending a message does not set you to Online automatically, so select your status explicitly when you start and when you finish your shift.
Next to the dropdown, a badge shows how many live agents are currently active, which means Online or Busy. Hovering over the badge lists these agents with first name, last name, e-mail address, and status. A coloured dot marks the status throughout the Live view: green for Online, yellow for Busy, red for Offline. The same dot is shown for the customer of a conversation and indicates whether the customer is currently present in the chat.
Viewing Conversations from Additional Tenants
If you support customers in more than one tenant, you can show conversations from up to three additional tenants in your current Live view:
-
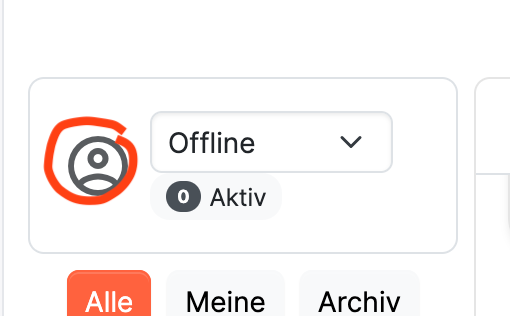
Click the profile icon next to the status selector.
-
In the Live settings, select the additional tenants whose conversations you want to see. Conversations from these tenants are displayed in addition to those from the current tenant.
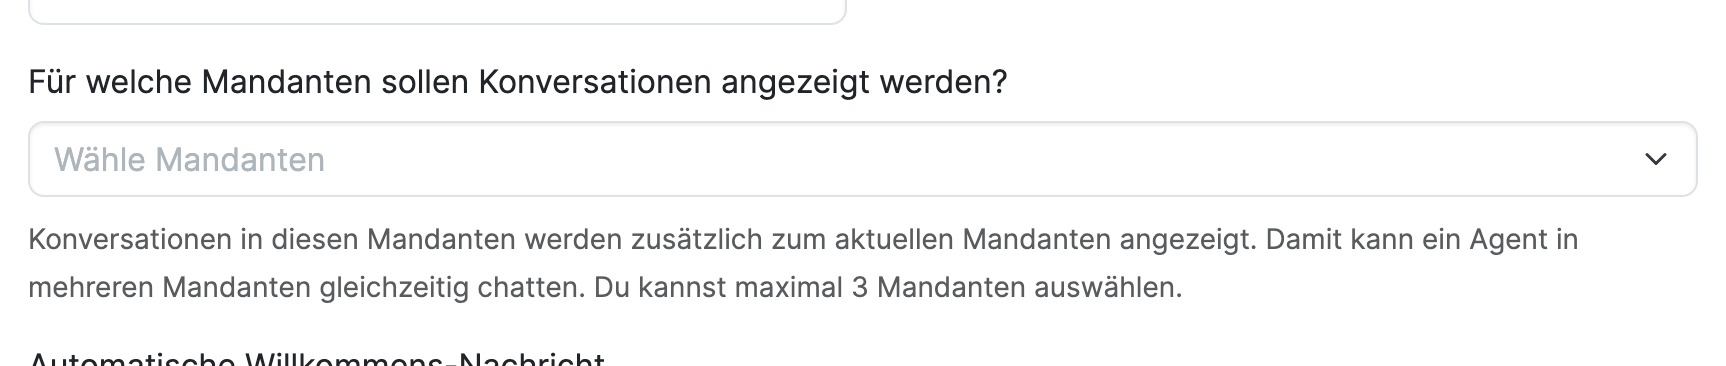
If conversations from other tenants or websites unexpectedly appear in your Live view, check this setting first. A tenant selected here intentionally adds its conversations to your current conversation list. Remove any tenants you do not want to monitor and save the settings.
Answering Customer Messages
Once your status is set to Online, you can start answering the messages.
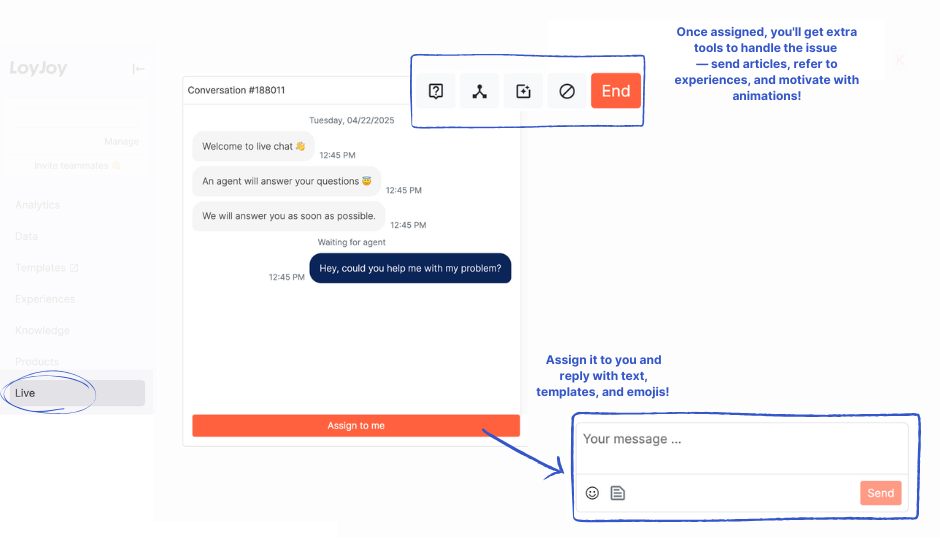
Visibility of conversations
A tenant setting decides which conversations live agents see. Two models are available:
- Open (default): Every live agent sees all live conversations, including those currently assigned to a colleague, and every archived conversation.
- Work pool: Live agents see only the conversations in the shared pool (assigned to no agent) and the conversations assigned to them. In the archive, only the conversations they worked on. Conversations assigned to colleagues are not visible in any filter, and the rule applies to every role, including Owner and Live Viewer.
The model applies per conversation, so an agent who works for several tenants sees each conversation according to the rules of the tenant it belongs to. The model and the other live chat options on this page are tenant settings. They are managed by the LoyJoy team; to change them, contact us (support@loyjoy.com).
Handing over to another agent
At the top of the chat interface, you can find the live agent switcher displaying the initials of the active agent. By clicking on it, you can see a list of all agents that are currently Online and select one to hand over the conversation to. This is especially useful when you need to transfer the customer to a colleague with more expertise in a specific area. If no other agent is online, the switcher shows "No online agents available".
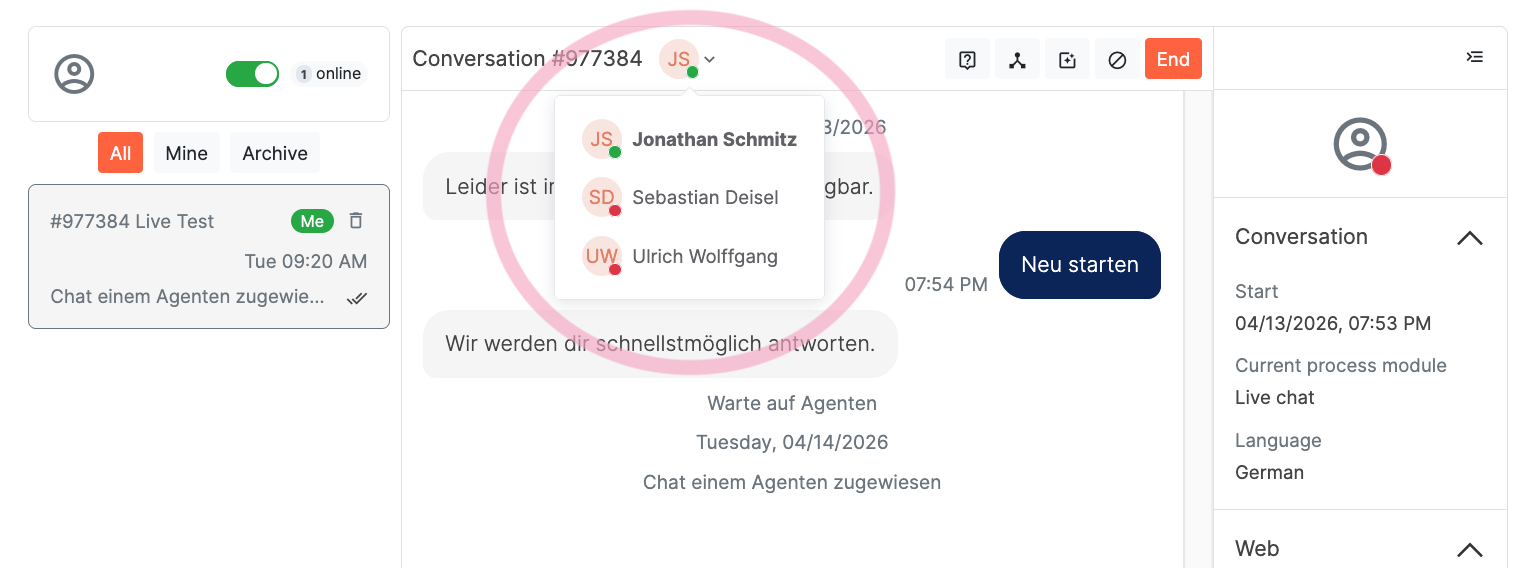
If handover is disabled for your tenant, the live agent switcher is not shown and a conversation cannot be handed over to a colleague.
Returning a conversation to the pool
The shared pool holds all live conversations that are assigned to no agent. Live agents take the conversations they can help with from this pool, and every conversation that is released returns to it.
- Release a conversation yourself: While you work on a conversation, you can return it to the shared pool at any time with the Release button in the chat header. The conversation stays live and appears as unassigned, so any online agent can pick it up. This is useful when you cannot continue, or when the customer should be served by whoever is free next.
- Release as Owner: Owners can return a conversation of their tenant to the pool without seeing its content. Open the gear menu next to the status selector in the Live view, enter the conversation id (the id in the chat link) and release it. The result is shown directly: released, not assigned, or unknown.
- Automatic return: A tenant can switch on the automatic return. When enabled, a conversation whose assigned agent is offline or has not been present in the Live view for a configurable number of minutes automatically returns to the pool (default: 10 minutes). A conversation is never released while its agent is present.
Receiving Files from Customers
If file attachments are enabled for the Live Chat module, customers can send files directly in the chat, for example photos or documents. Image attachments are shown as a preview, and every file can be downloaded via a button in the chat.
Uploaded files are not scanned for viruses. LoyJoy shows a warning next to every received file, so review file attachments from customers with the same caution as downloads from other external sources.
Sending Files to Customers
Live agents can also send files to customers directly in the chat, for example a manual, a quote, or an invoice. The same file types and size limit apply as for files uploaded by customers: images (JPEG, PNG, WebP), PDF, Word, PowerPoint, and plain text, up to 15 MB per file.