Azure GPT: Integrate Azure OpenAI with LoyJoy
For your own Azure OpenAI deployment, you need an existing Azure enterprise account that you have access to. If your company already has a normal Azure account, you can simply use it for this guide.
This guide will do following steps:
- In your Azure account create Azure OpenAI.
- In Azure OpenAI add models for
gpt-4o,gpt-4o-miniandtext-embedding-ada-002.
Step 1: Create Azure OpenAI
- In Azure type
OpenAIinto Azure search and selectAzure OpenAI - Click button
Azure OpenAI - The screen
Create Azure OpenAIshould show up.
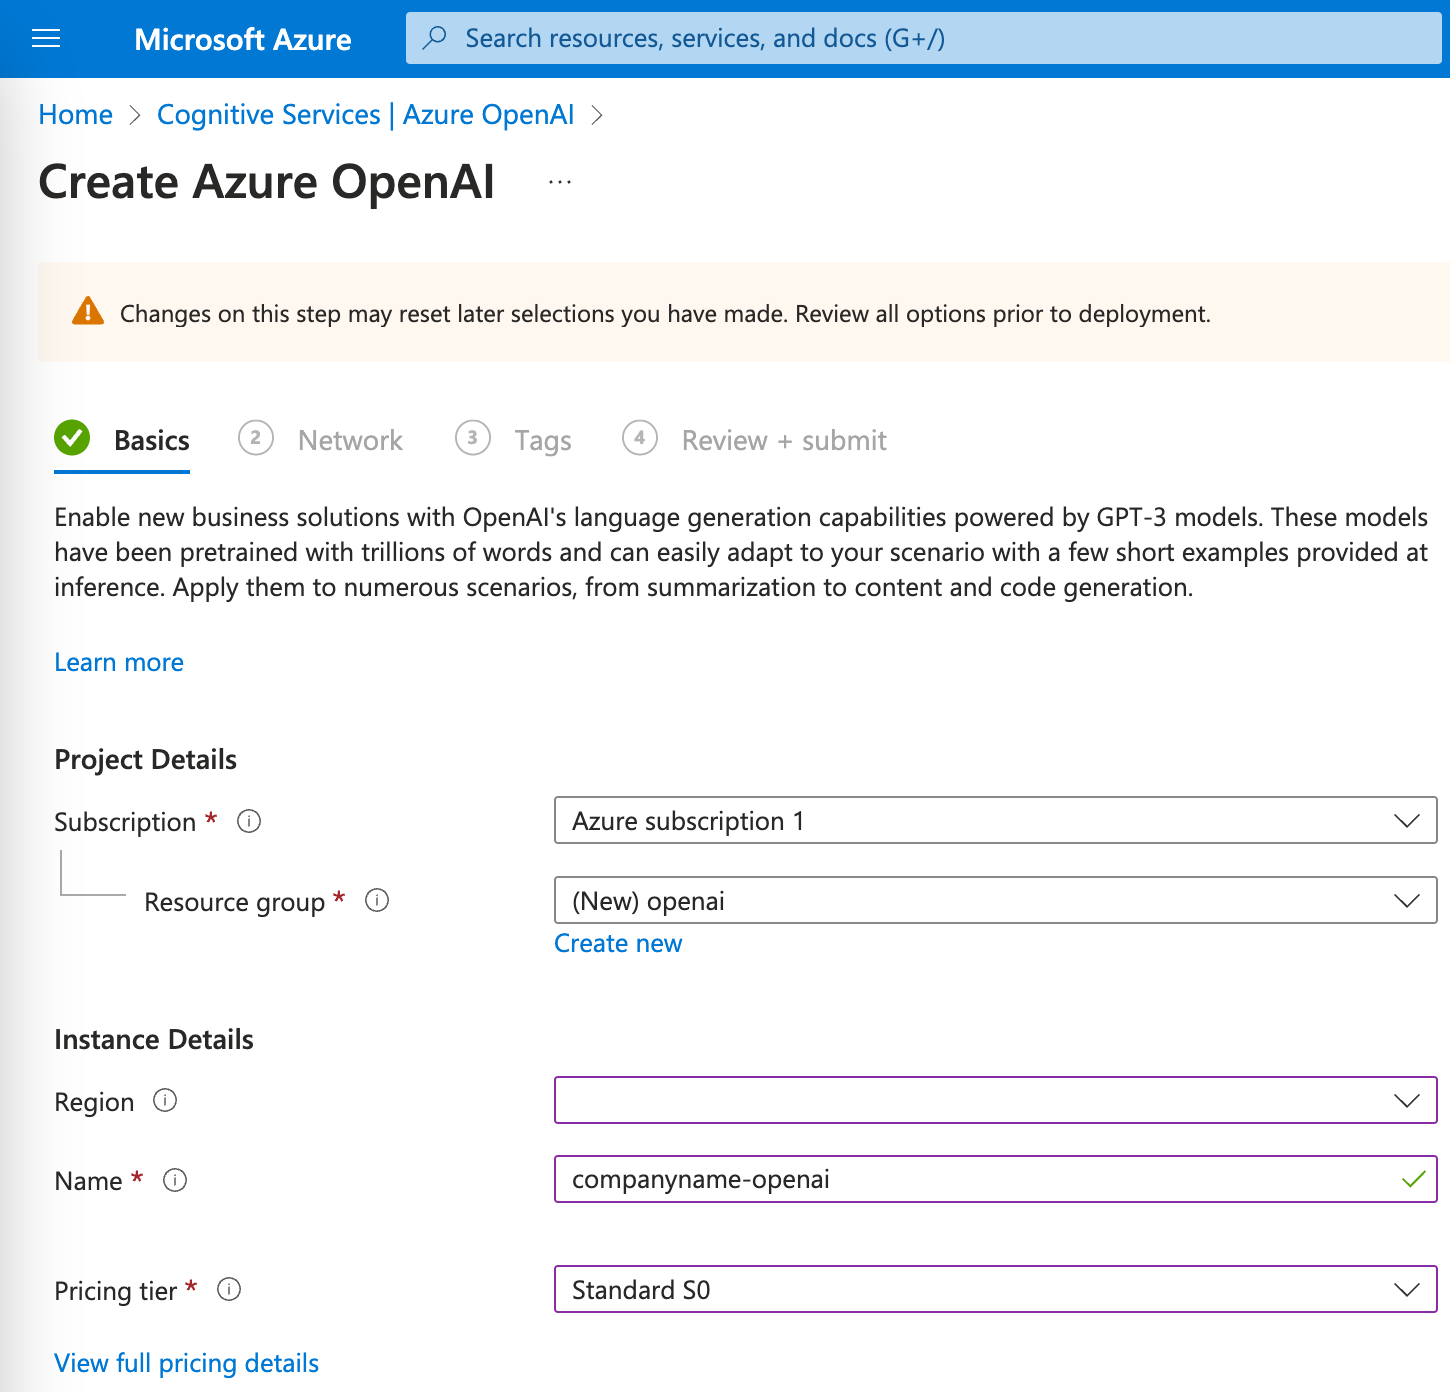
- In Azure OpenAI > Basics
- Select a subscription and if necessary at
Resource groupclickCreate newwith arbitrary name such asopenai - Select a region.
Sweden Centralis recommended for Europe, as it has the newest models. European regions other thanSweden Centrallackgpt-4o-mini, which is required when enabling reranking in GPT Knowledge. You can check the list of available regions for model availability. - In name enter e.g.
companyname-openai. - As pricing select
Standard S0. - Click
Next
- Select a subscription and if necessary at
- In Azure OpenAI > Network keep the preselected value
All networks, including the internet, can access this resource.and clickNext - In Azure OpenAI > Tags click
Next - In Azure OpenAI > Review + submit click
Create
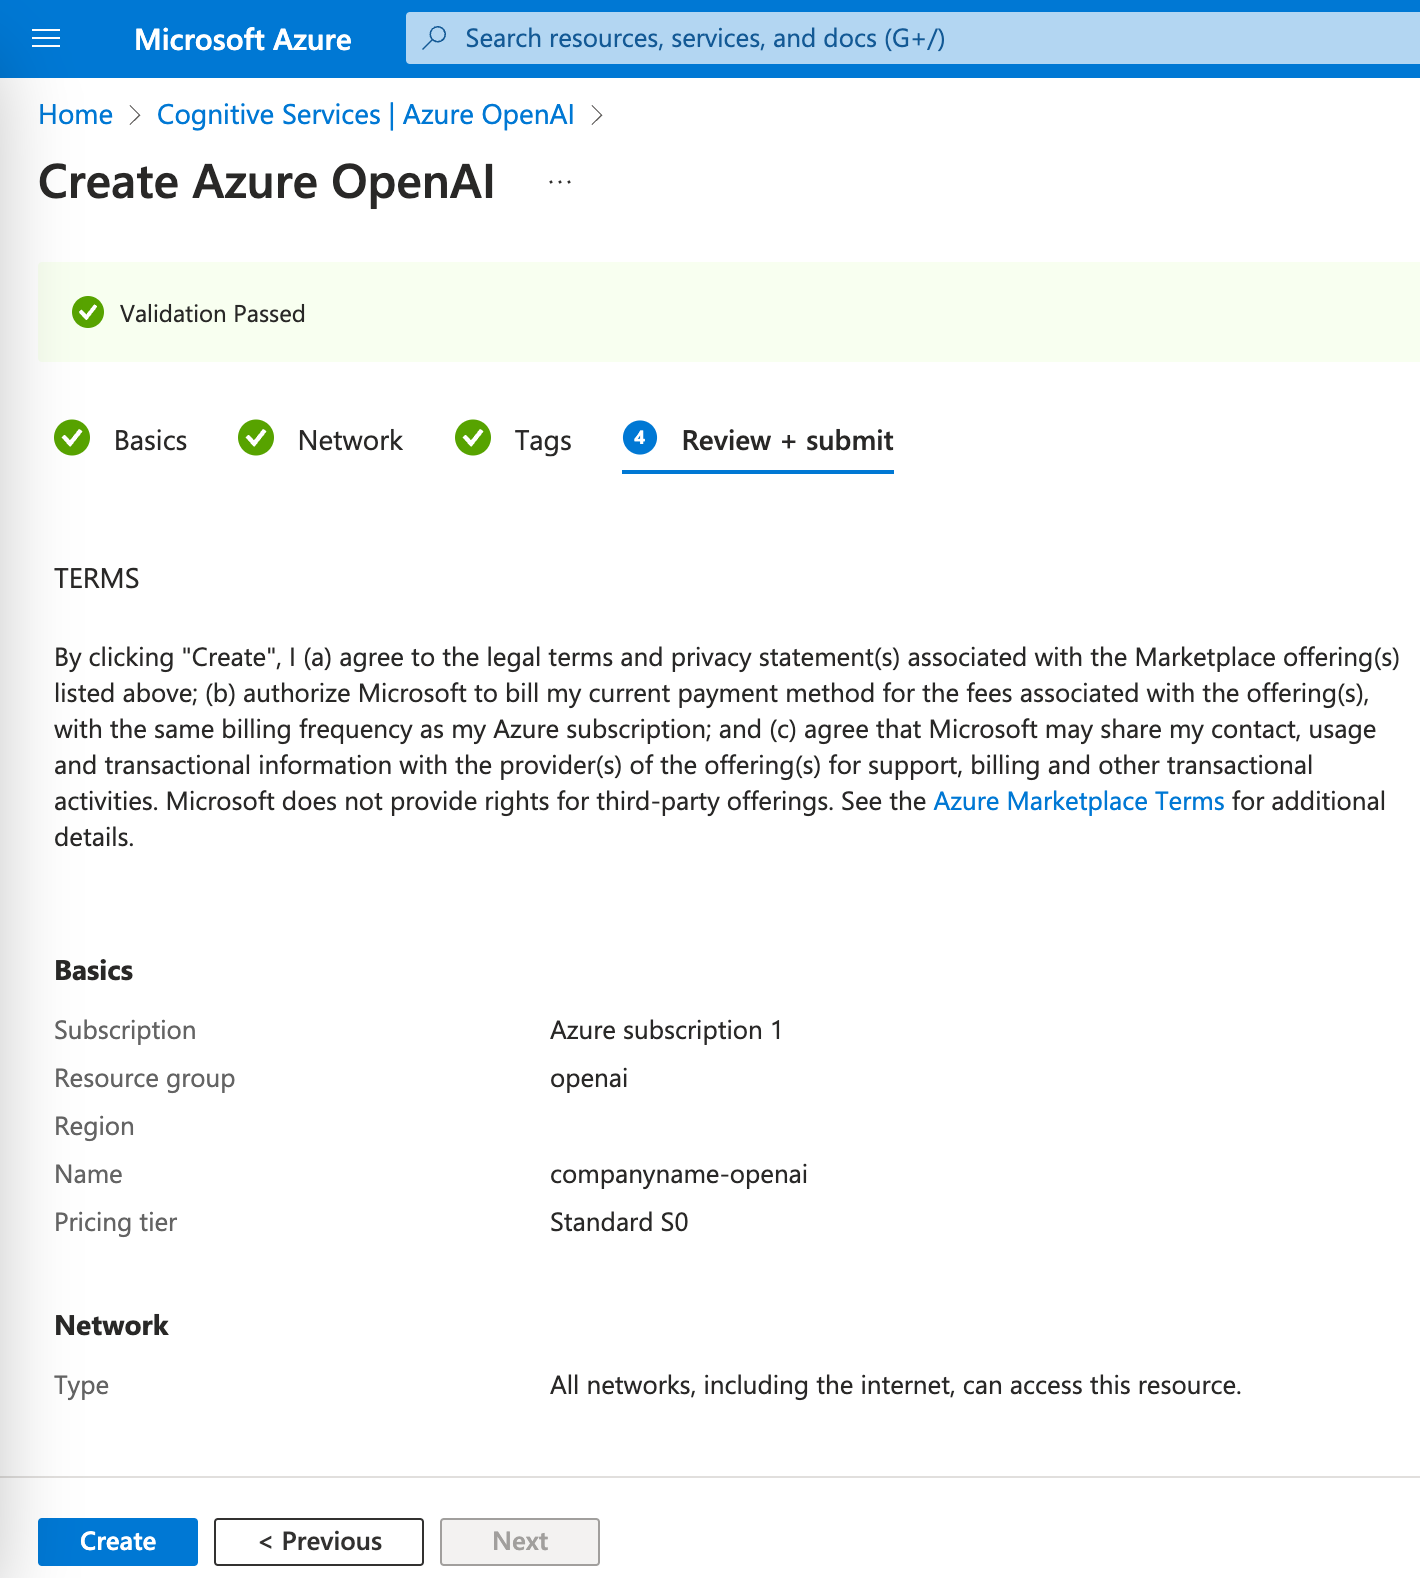
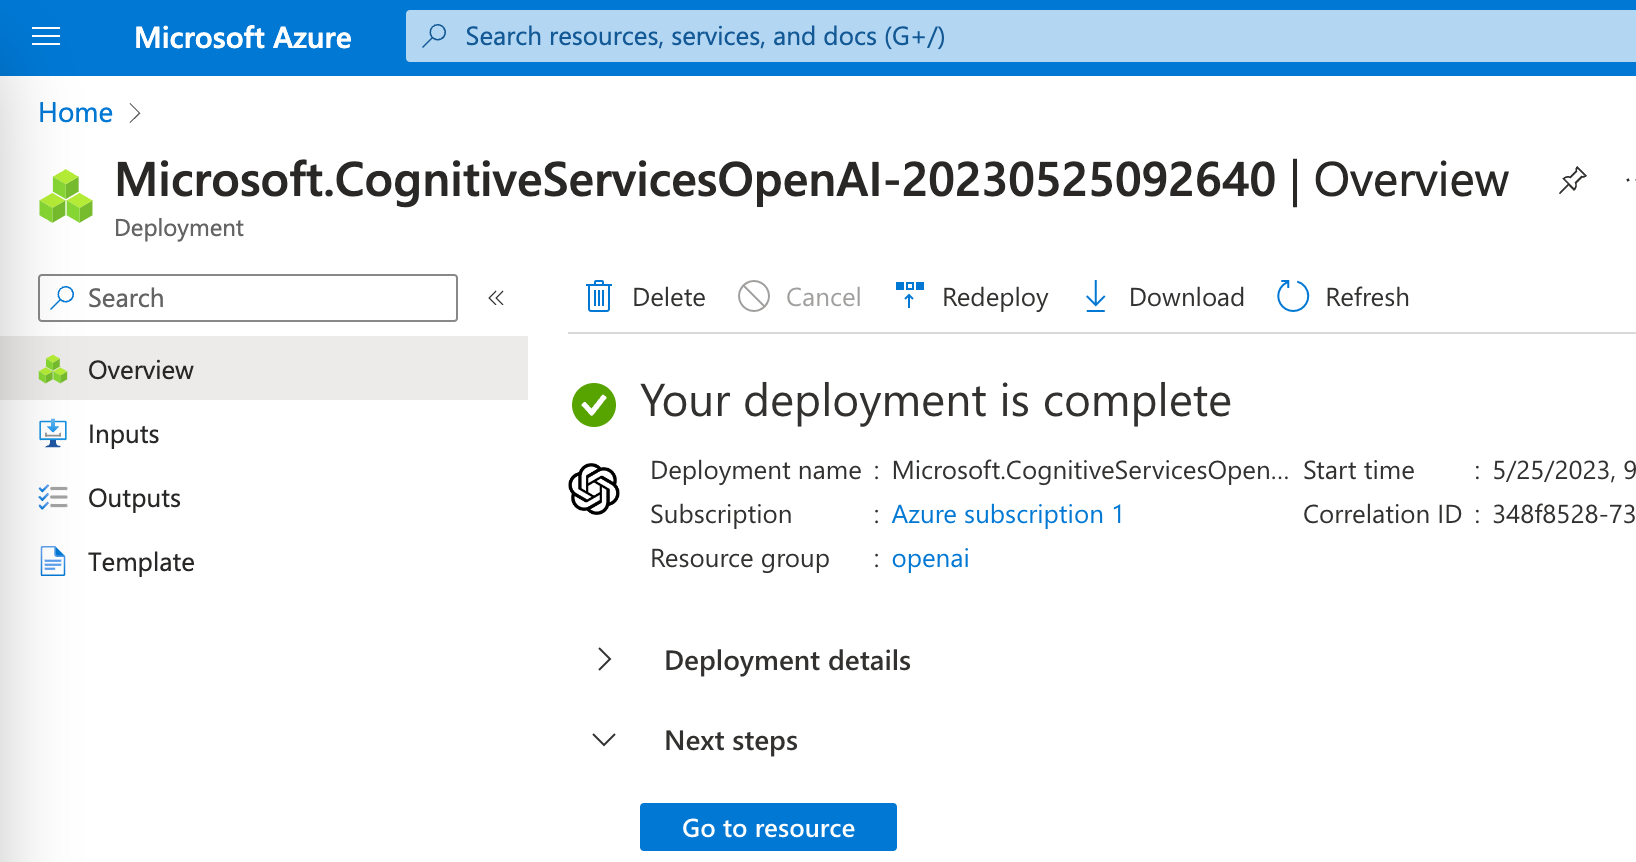
Deployment is in progresswill show up. ThenYour deployment is completewill show up.- Click
Go to resourceto open the deployment.
- Under menu item
Keys and Endpointyou find access keys and an endpoint URL. Copy this data to send it to LoyJoy support team later.
Step 2: Deploy Models
To use Azure OpenAI, now models have to be deployed.
- In
Azure OpenAIclickAzure OpenAI Metrics Dashboardto open Azure AI Foundry | Azure OpenAI Service. - Azure OpenAI Service should open, optionally with a sign in screen. You might need to select your Azure subscription to proceed.
- In Azure OpenAI Service open menu item
Deployments.
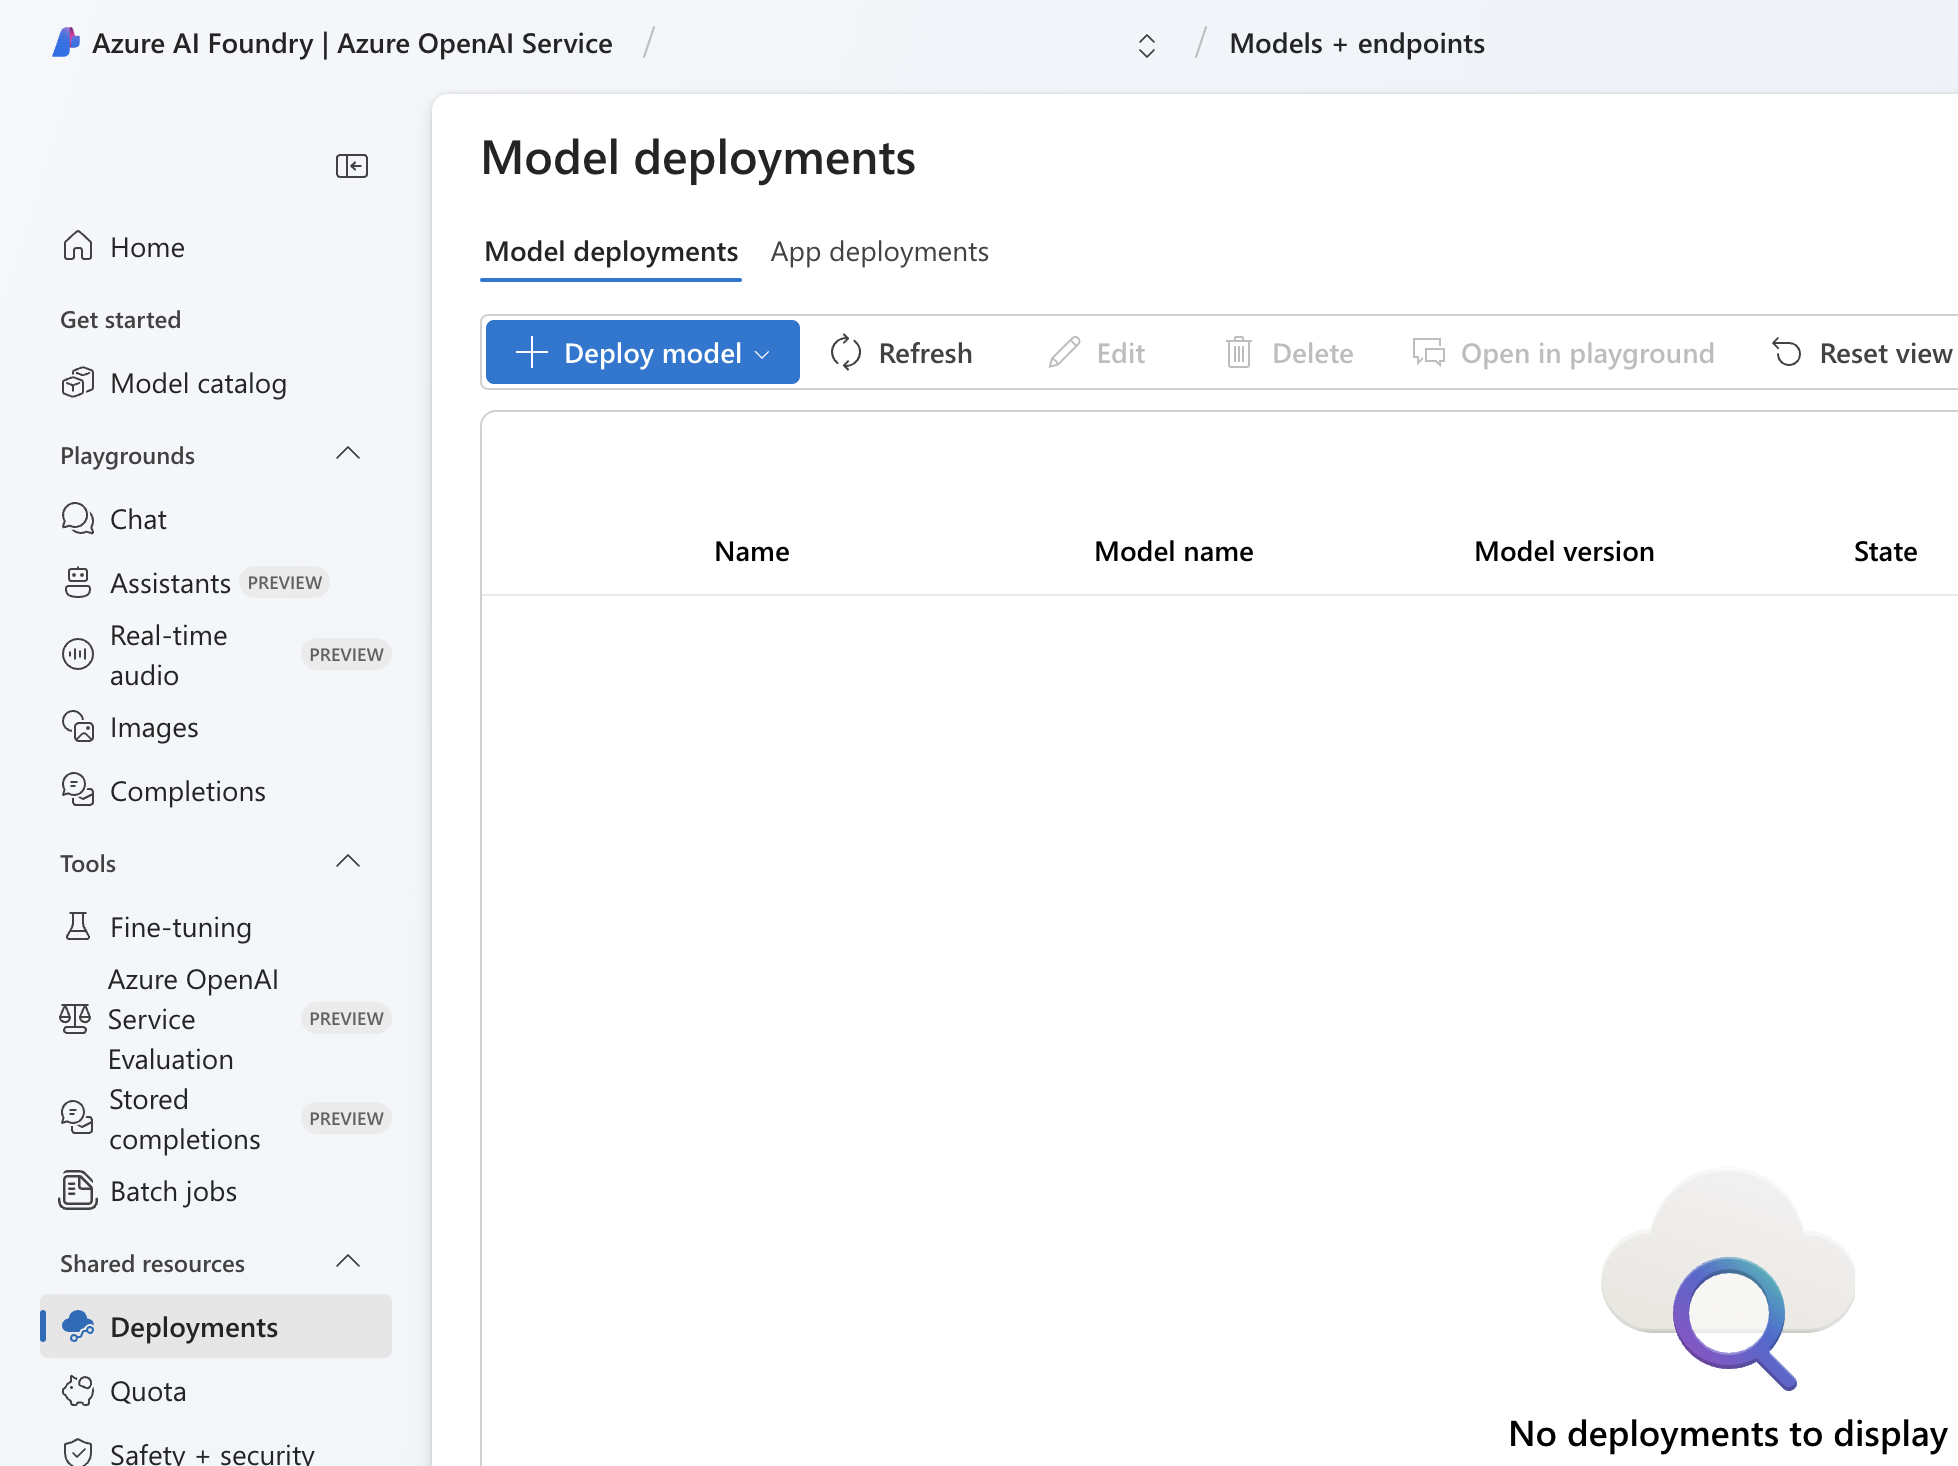
Create following models:
- text-embedding-ada-002:
- Click
Deploy modelandDeploy base model. Selecttext-embedding-ada-002in version2and enter a name such ascompanyname-text-embedding-ada-002.
- Click
- gpt-4o-mini:
- Click
Deploy modelandDeploy base model. Selectgpt-4o-miniin versionStandardand enter a name such ascompanyname-gpt-4o-mini.
- Click
- gpt-4o:
- Click
Deploy modelandDeploy base model. Selectgpt-4oin versionStandardand enter a name such ascompanyname-gpt-4o.
- Click
Step 3: Content Filter
Microsoft Azure filters completion requests for inappropriate content by default. This might lead to error messages in your chatbot such as The response was filtered due to the prompt triggering Azure OpenAI's content management policy. Please modify your prompt and retry..
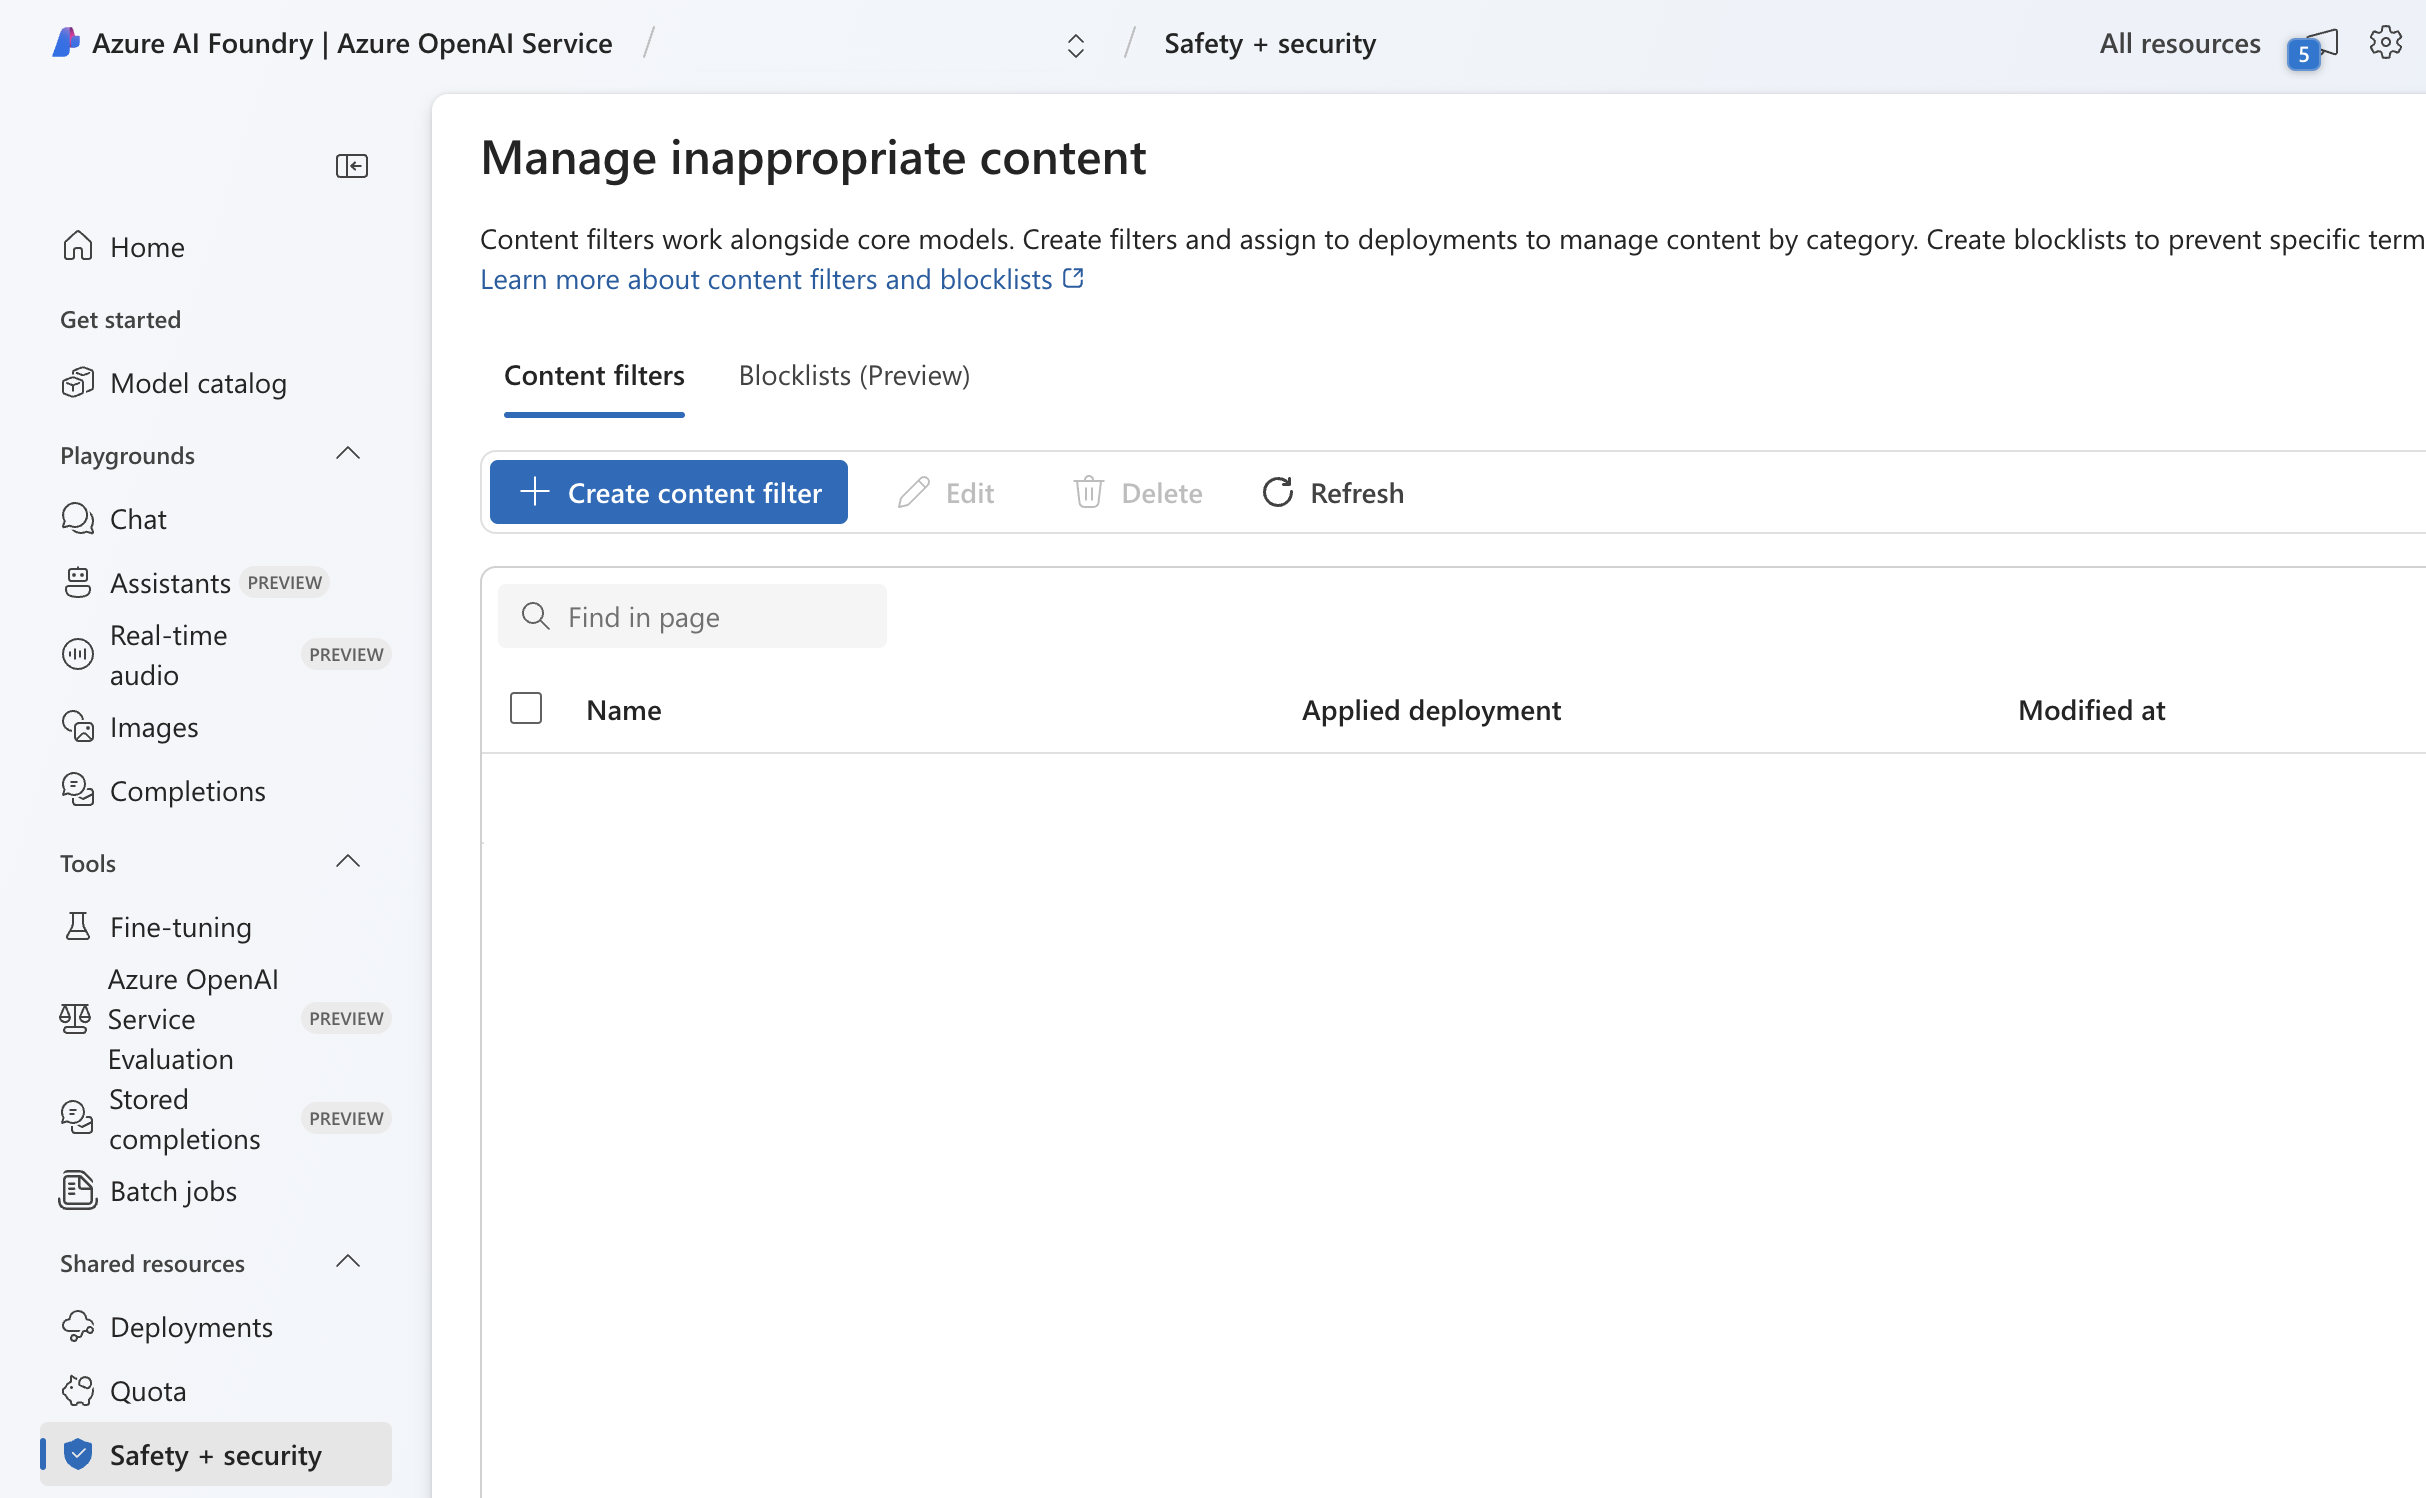
This filter can be lessened by configuring the Content Filter in Azure OpenAI Service. To do this, follow these steps:
- In Azure OpenAI Service click
Safety + securityin the left menu. - Click
Create content filter. - Enter a name such as
CompanyNameContentFilter. - As input filter thresholds select
Highin all categories. A high threshold means that Azure will be less restrictive in filtering out inappropriate questions from customers.
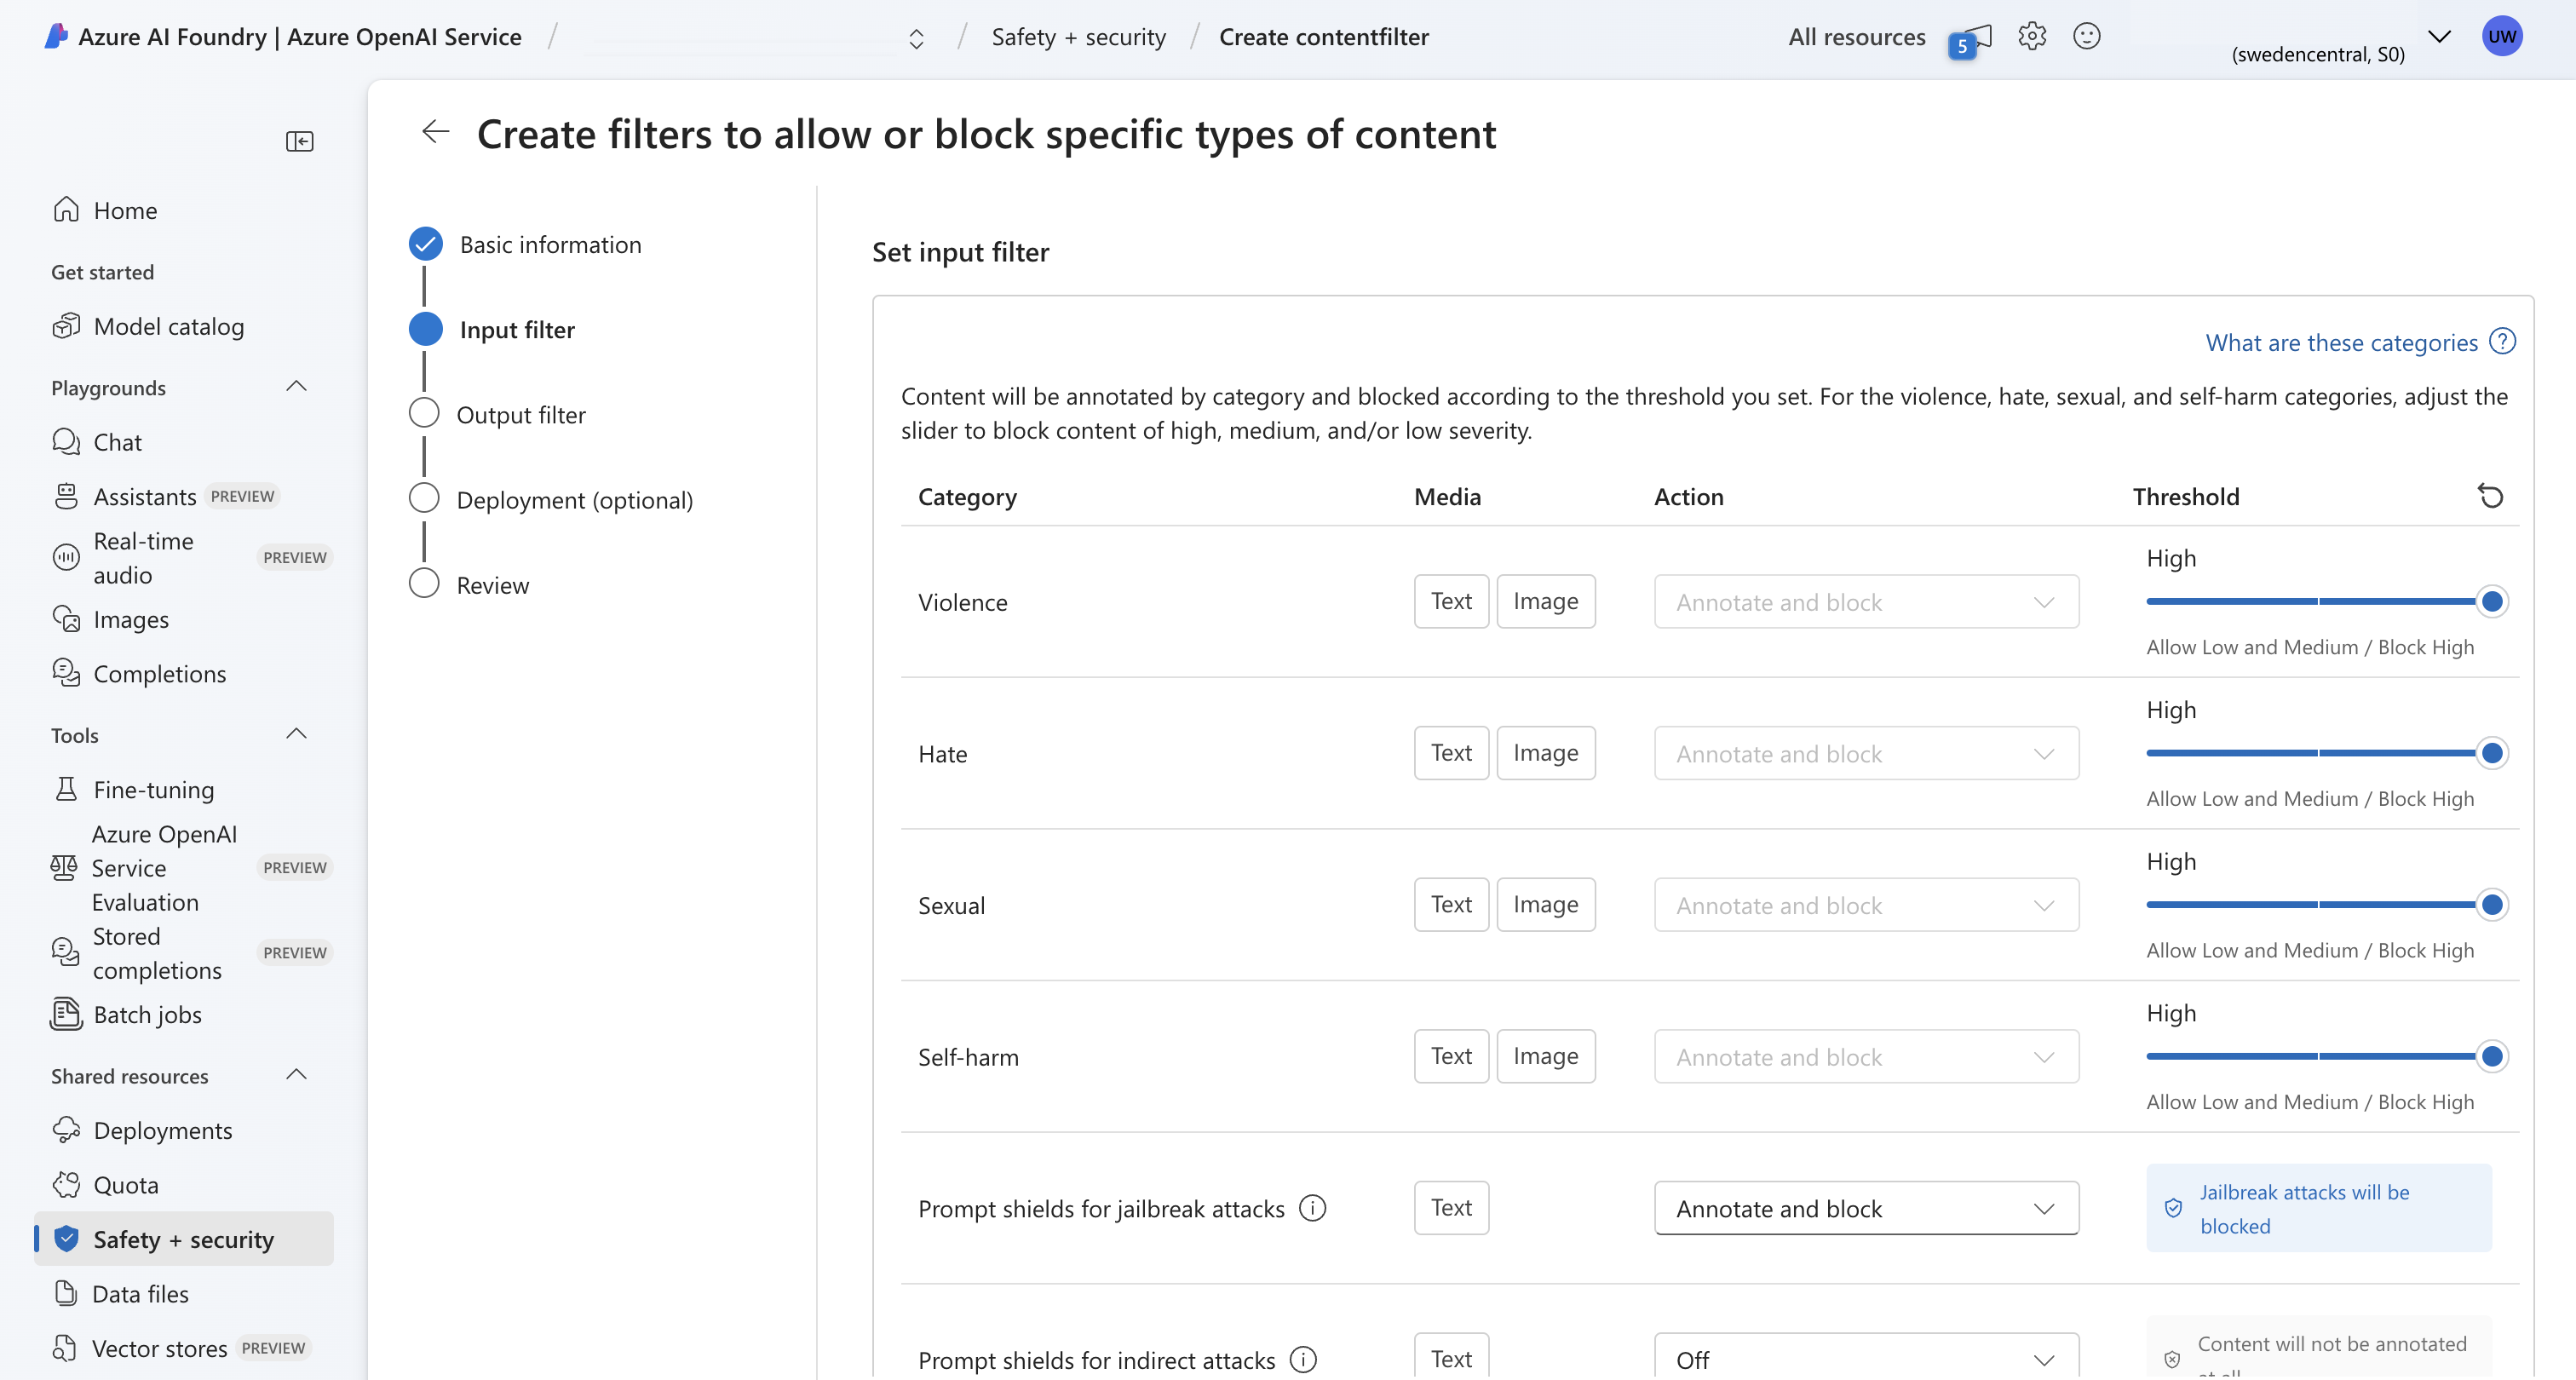
- As output filter thresholds select
Highin all categories. A high threshold means that Azure will be less restrictive in filtering out inappropriate answers generated by the AI.
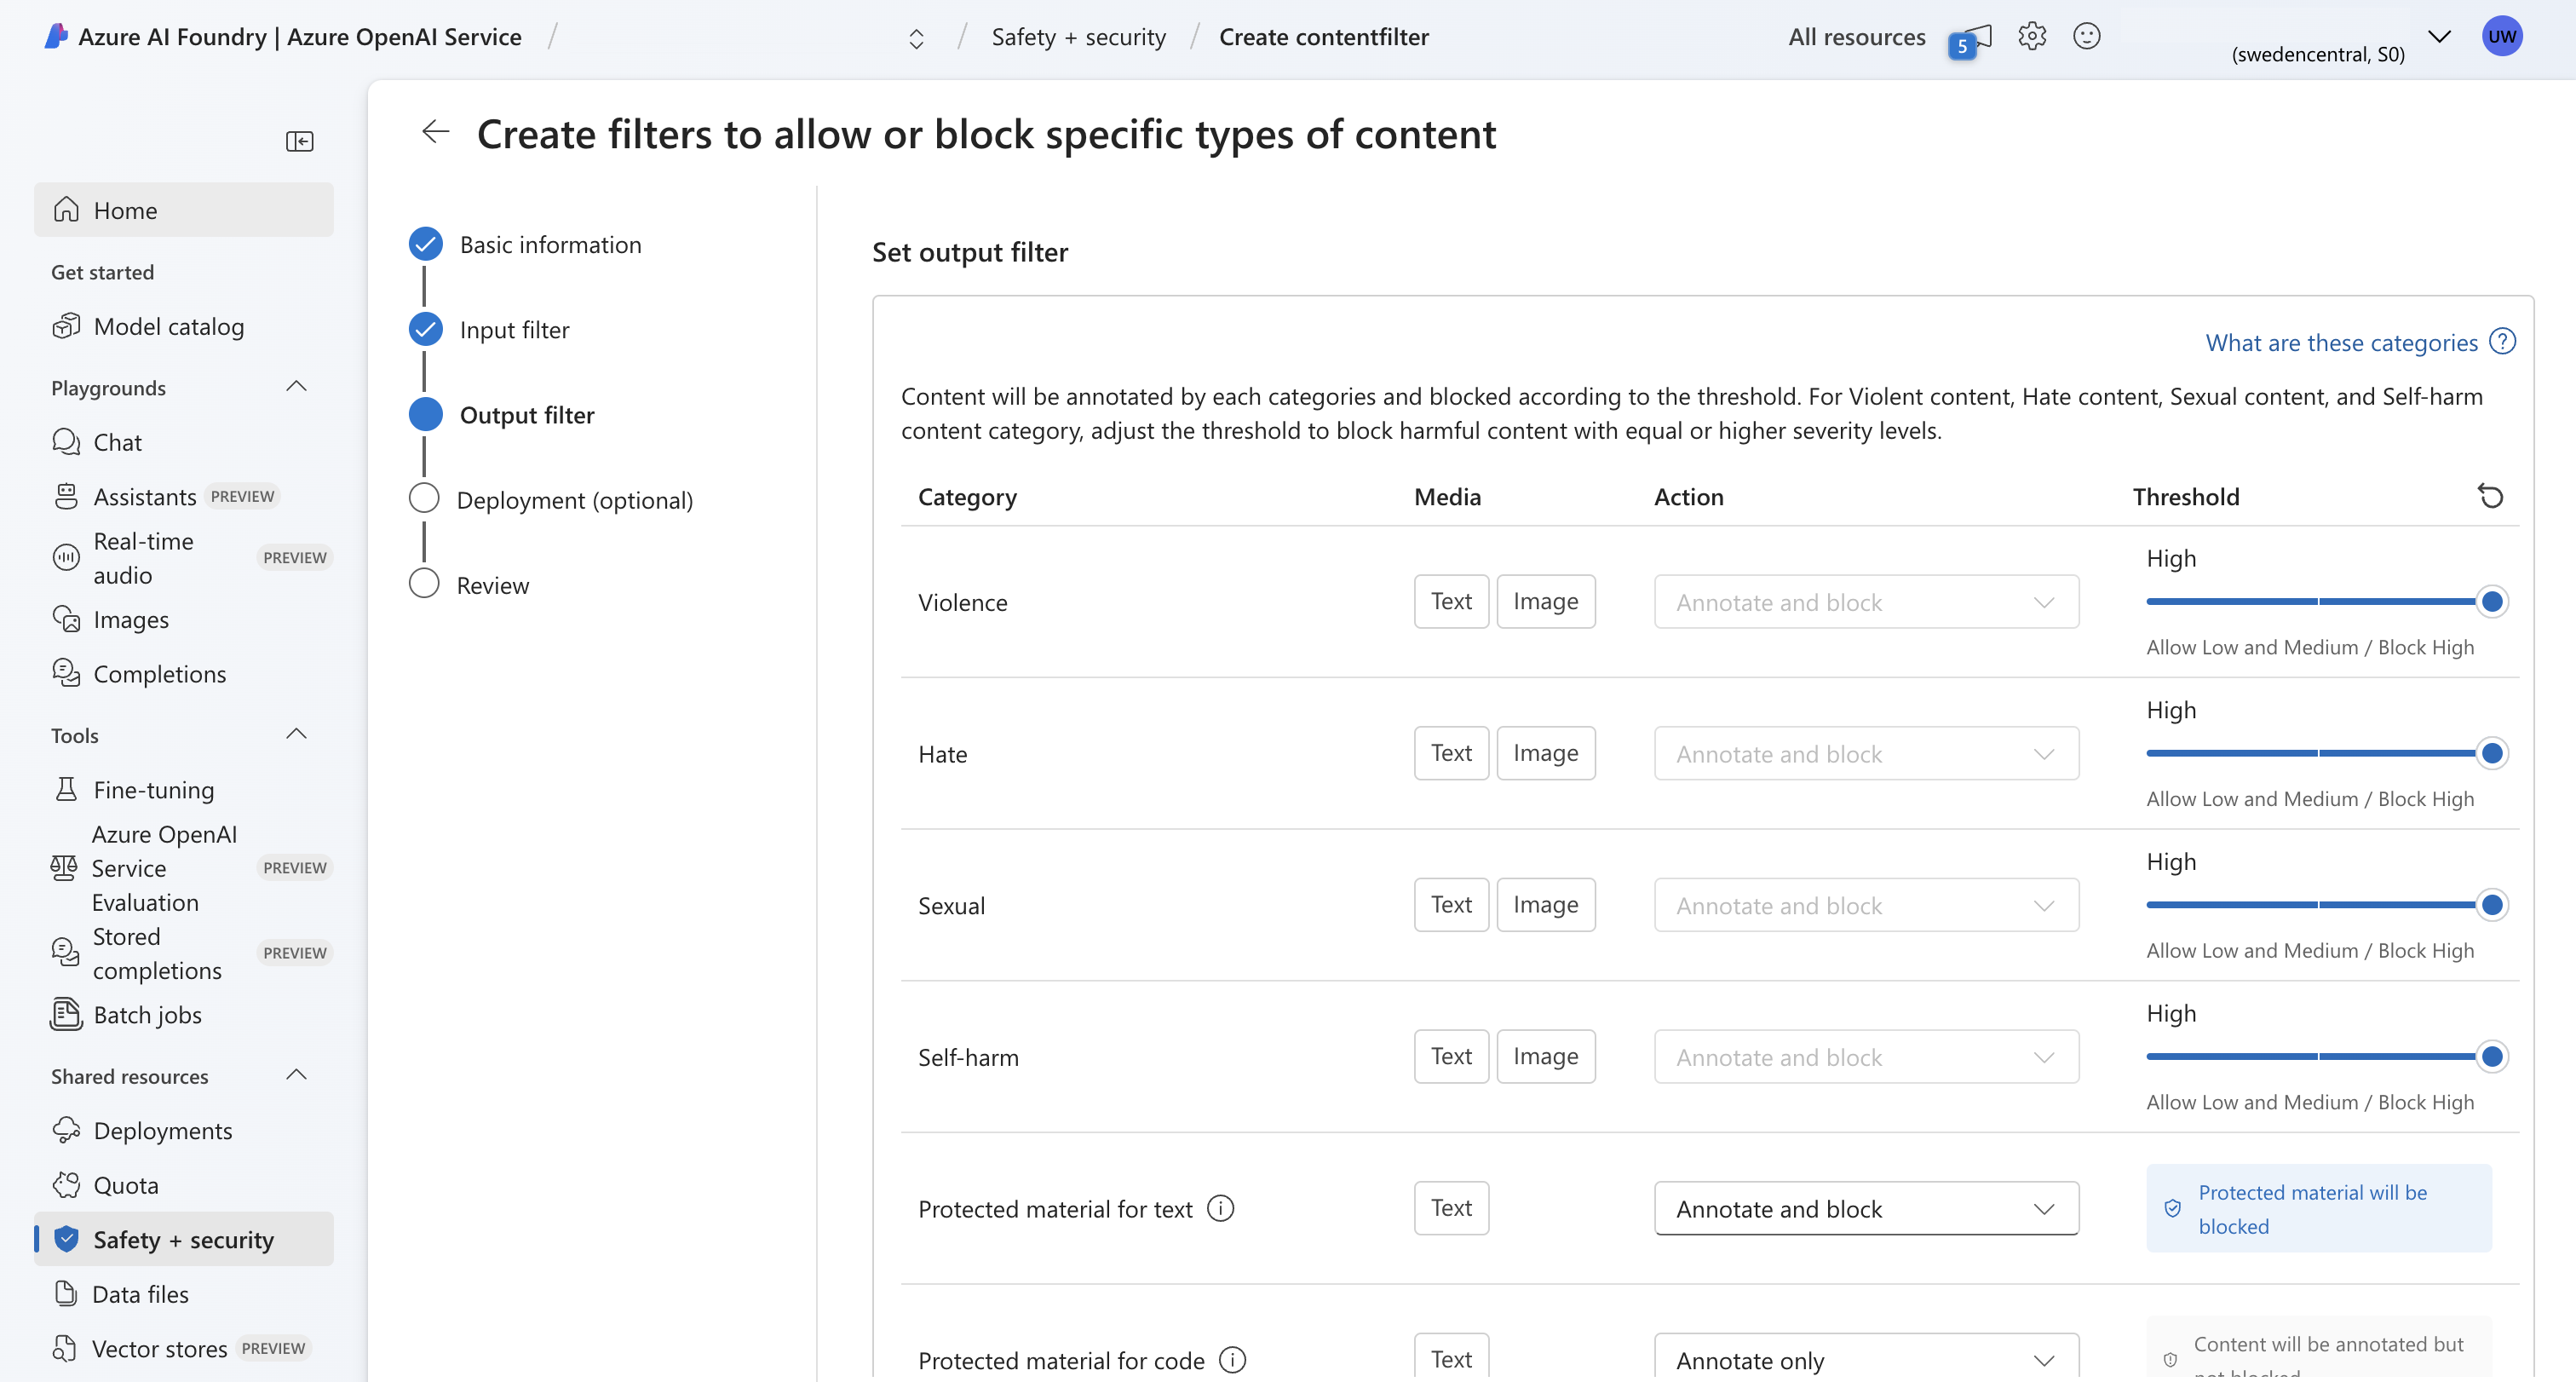
- Apply to all deployments.
- Click
Create filter.
Step 4: Configuration in LoyJoy
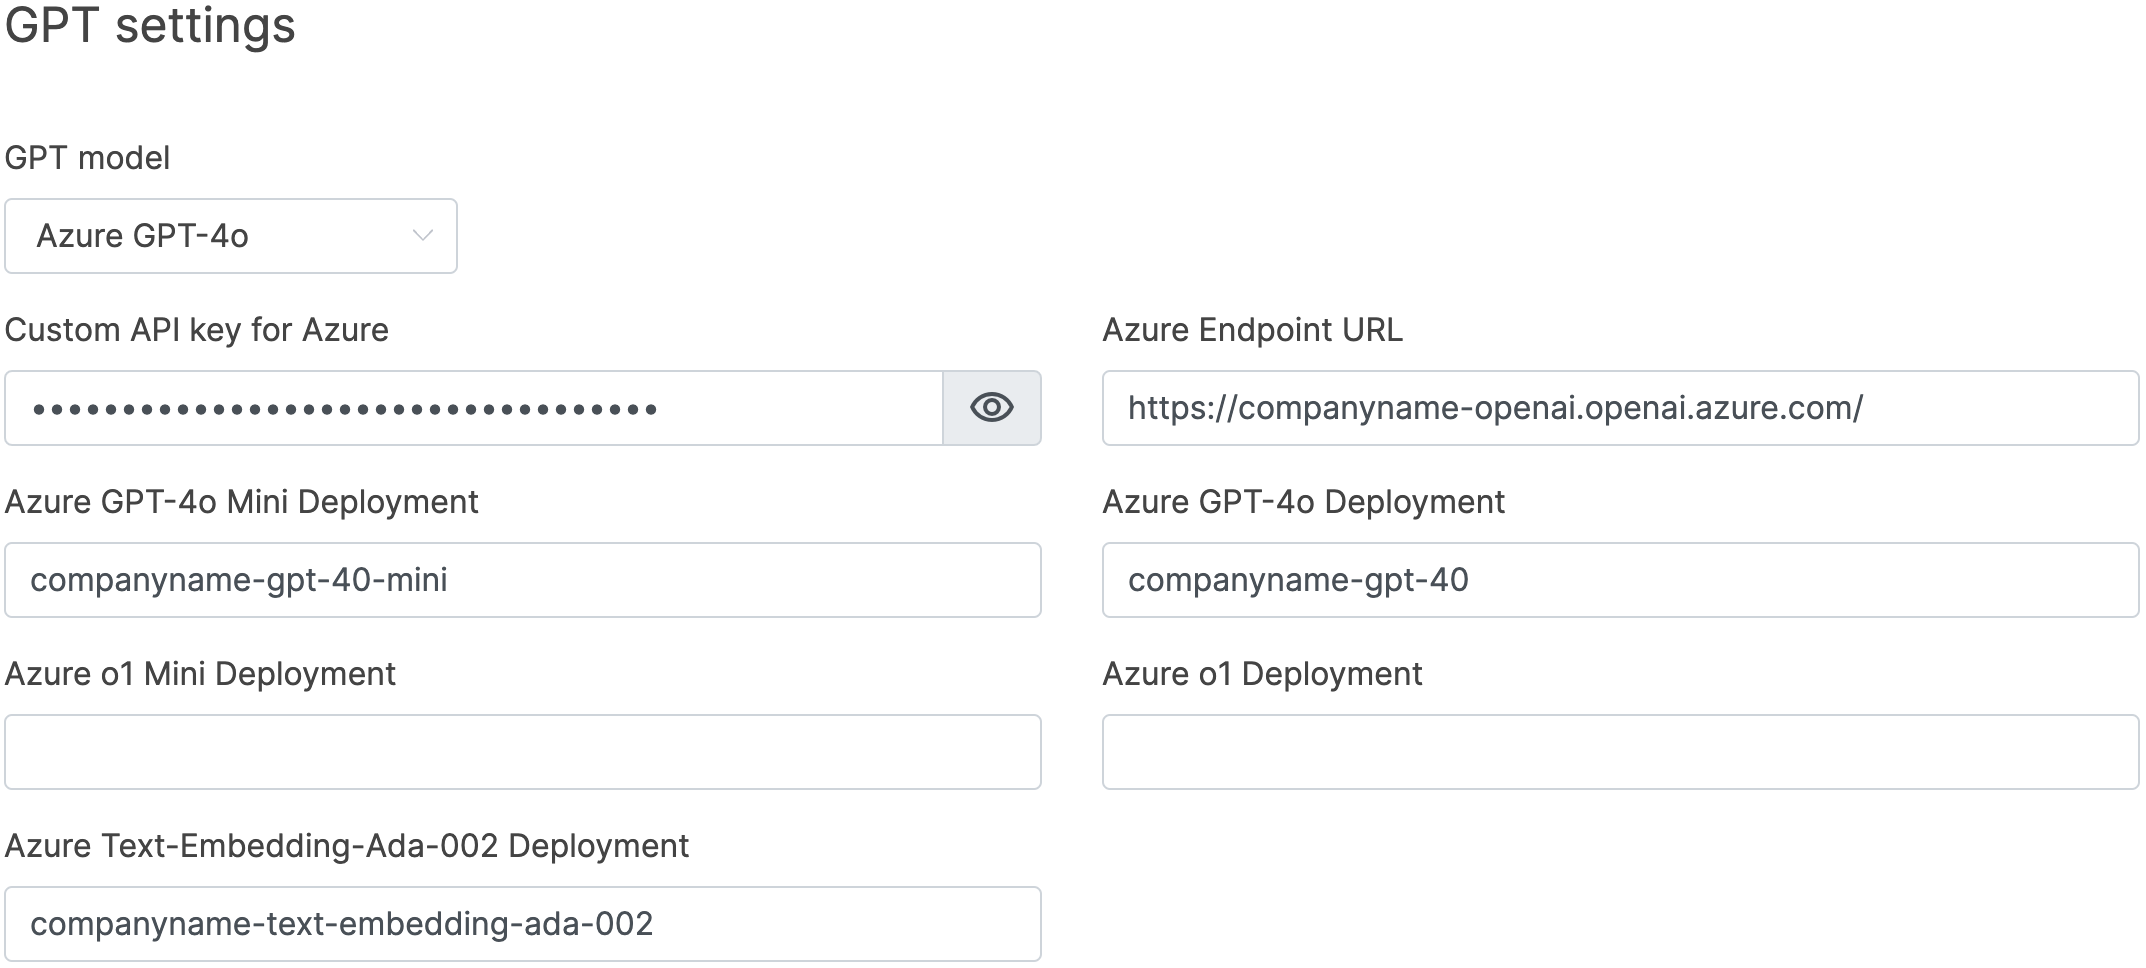
To use the deployment in LoyJoy please select an Azure model and enter the following details:
- From step 3 one of the keys and the endpoint URL
- The model deployment names, in this example
companyname-text-embedding-ada-002andcompanyname-gpt-4oandcompanyname-gpt-4o-mini.
Step 5: Fill out form "Modified Content Filters and Abuse Monitoring"
Optionally, you can request that Microsoft internally should turn off human abuse monitoring based on Microsoft internal staff.
To request this fill out this form.