BigQuery Module
Google BigQuery is a cloud-based big data analytics web service for processing very large read-only data sets. BigQuery was designed for analyzing data on the order of billions of rows, using a SQL-like syntax. With this process module you can save data in Google BigQuery in real-time for further processing and analysis.
This allows you to build arbitrary complex dashboards and data pipelines from your chatbot data.
How to Use the Module
Step 1: Create a dataset in BigQuery
In your Google Cloud project, start by creating a new dataset in BigQuery. Provide a name for the dataset such as loyjoy_dataset and click "Create dataset".
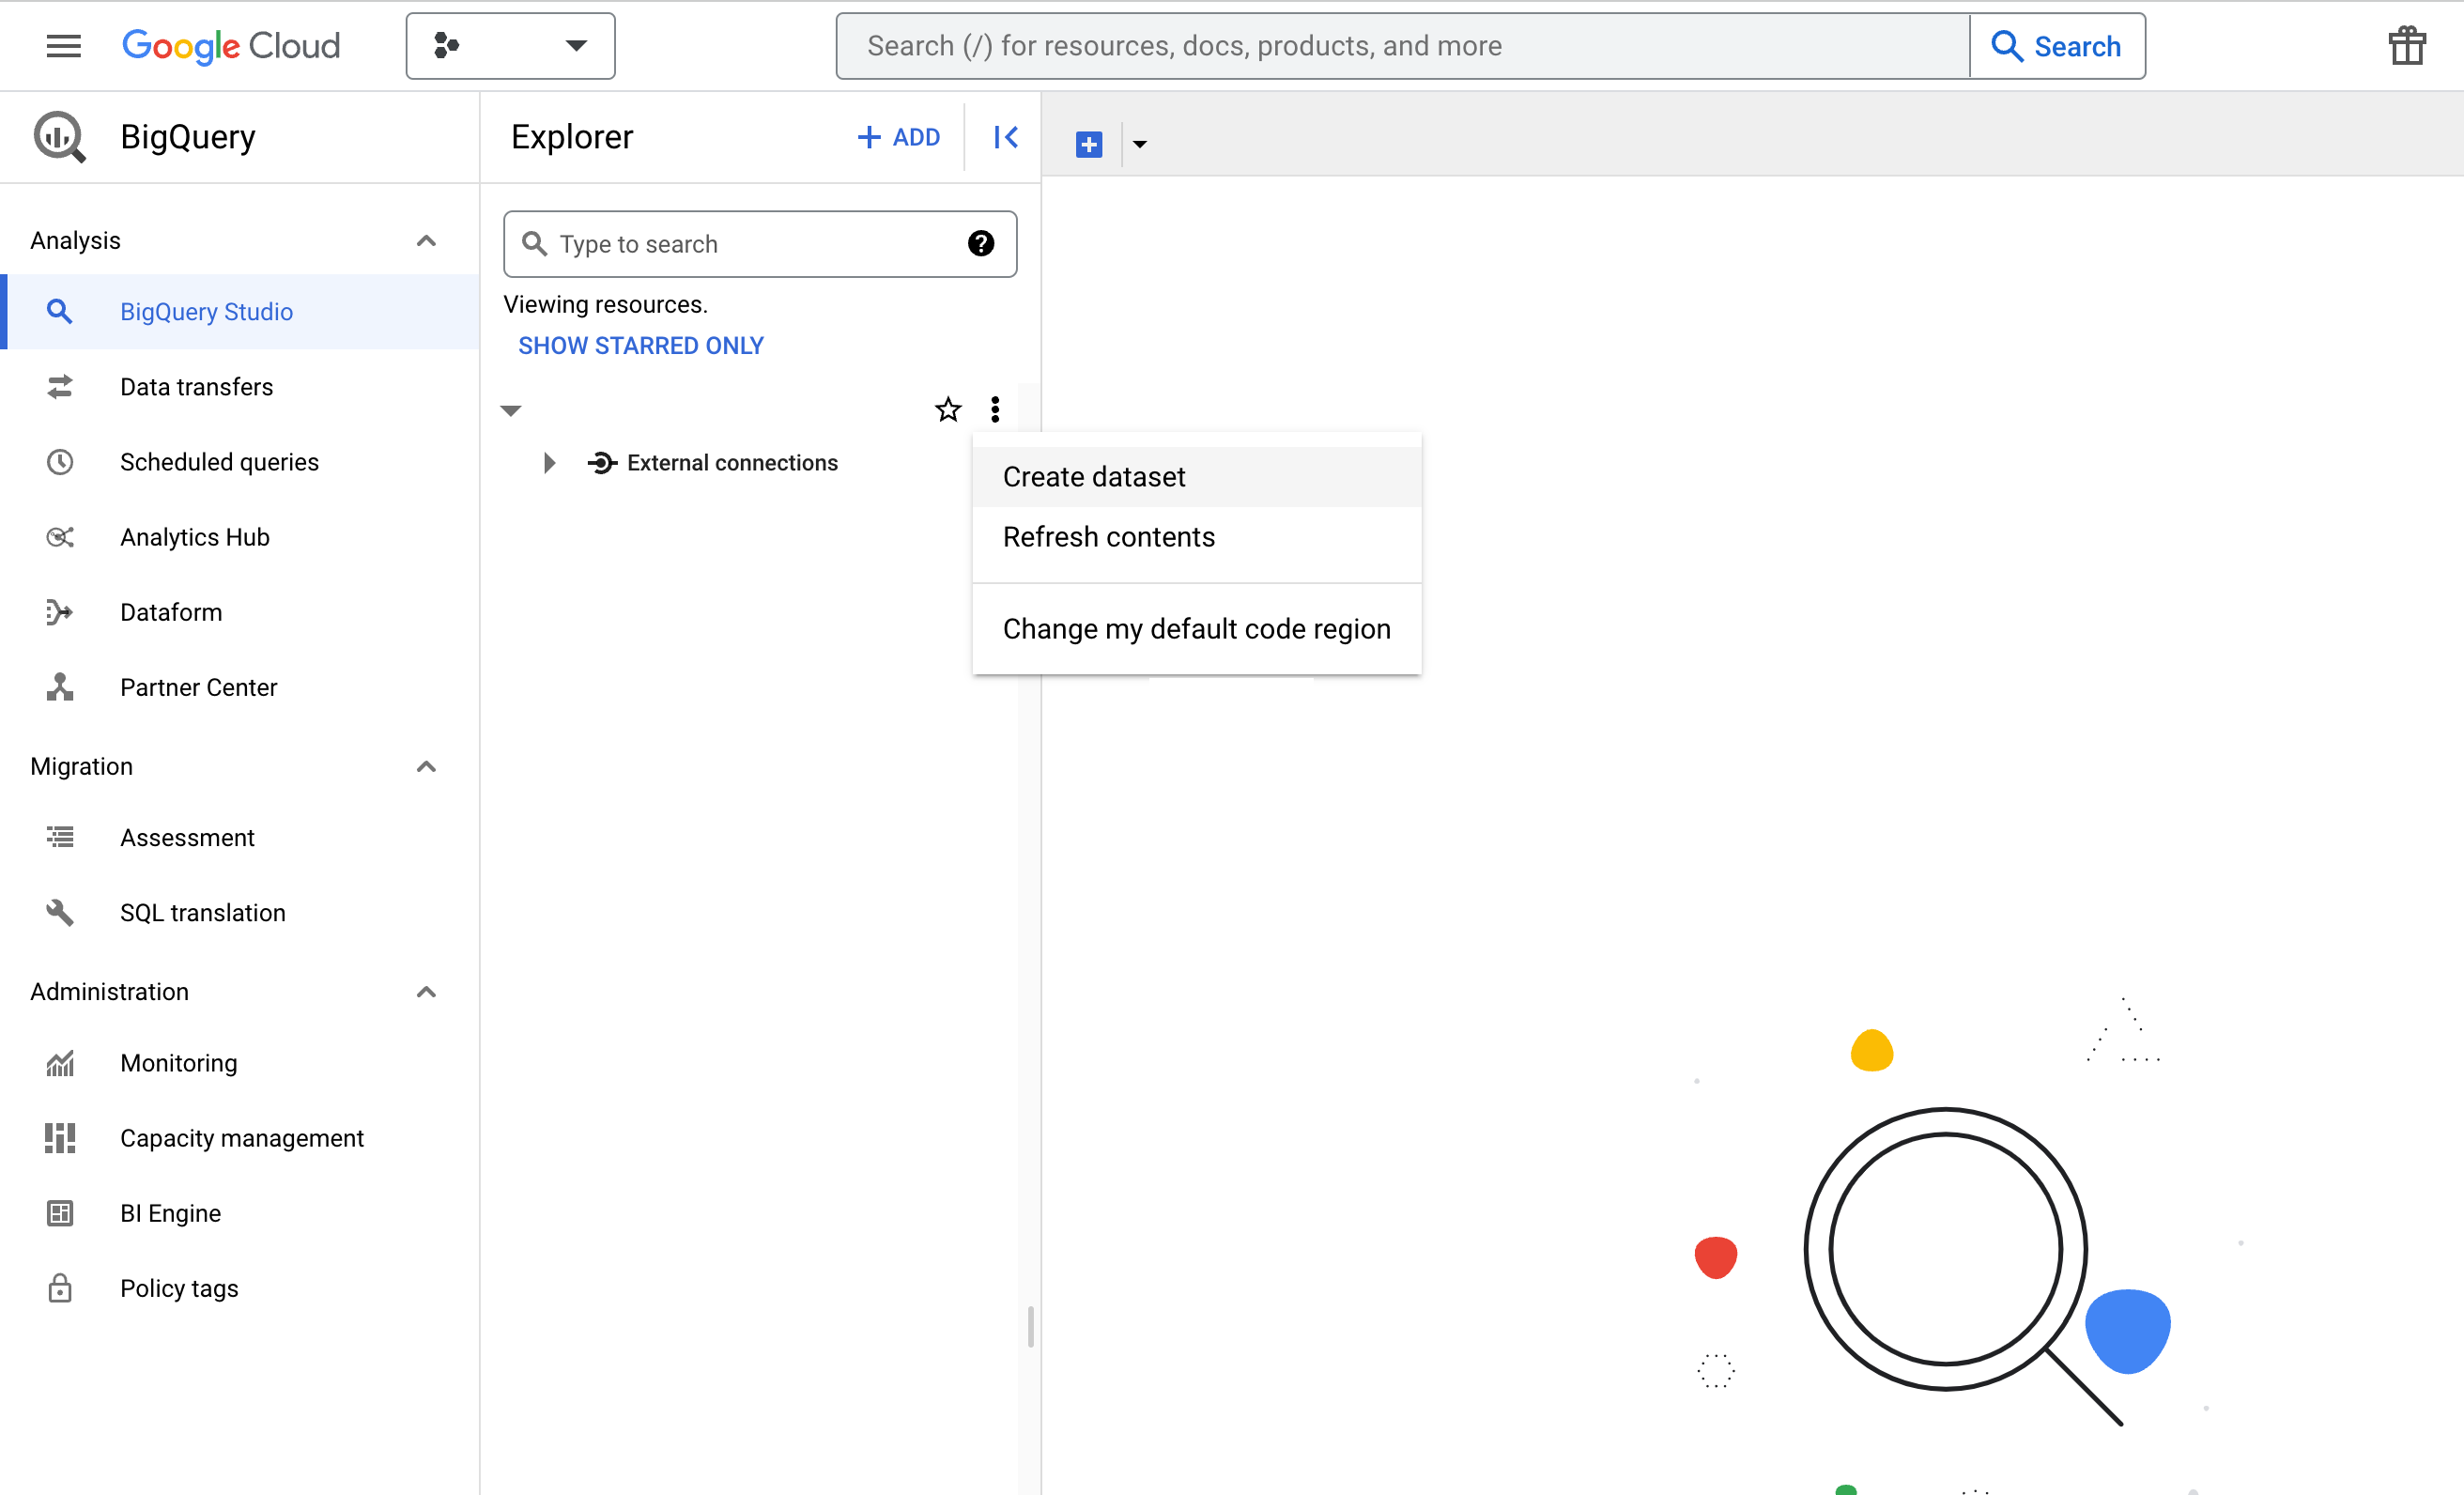
Step 2: Create a table inside your dataset
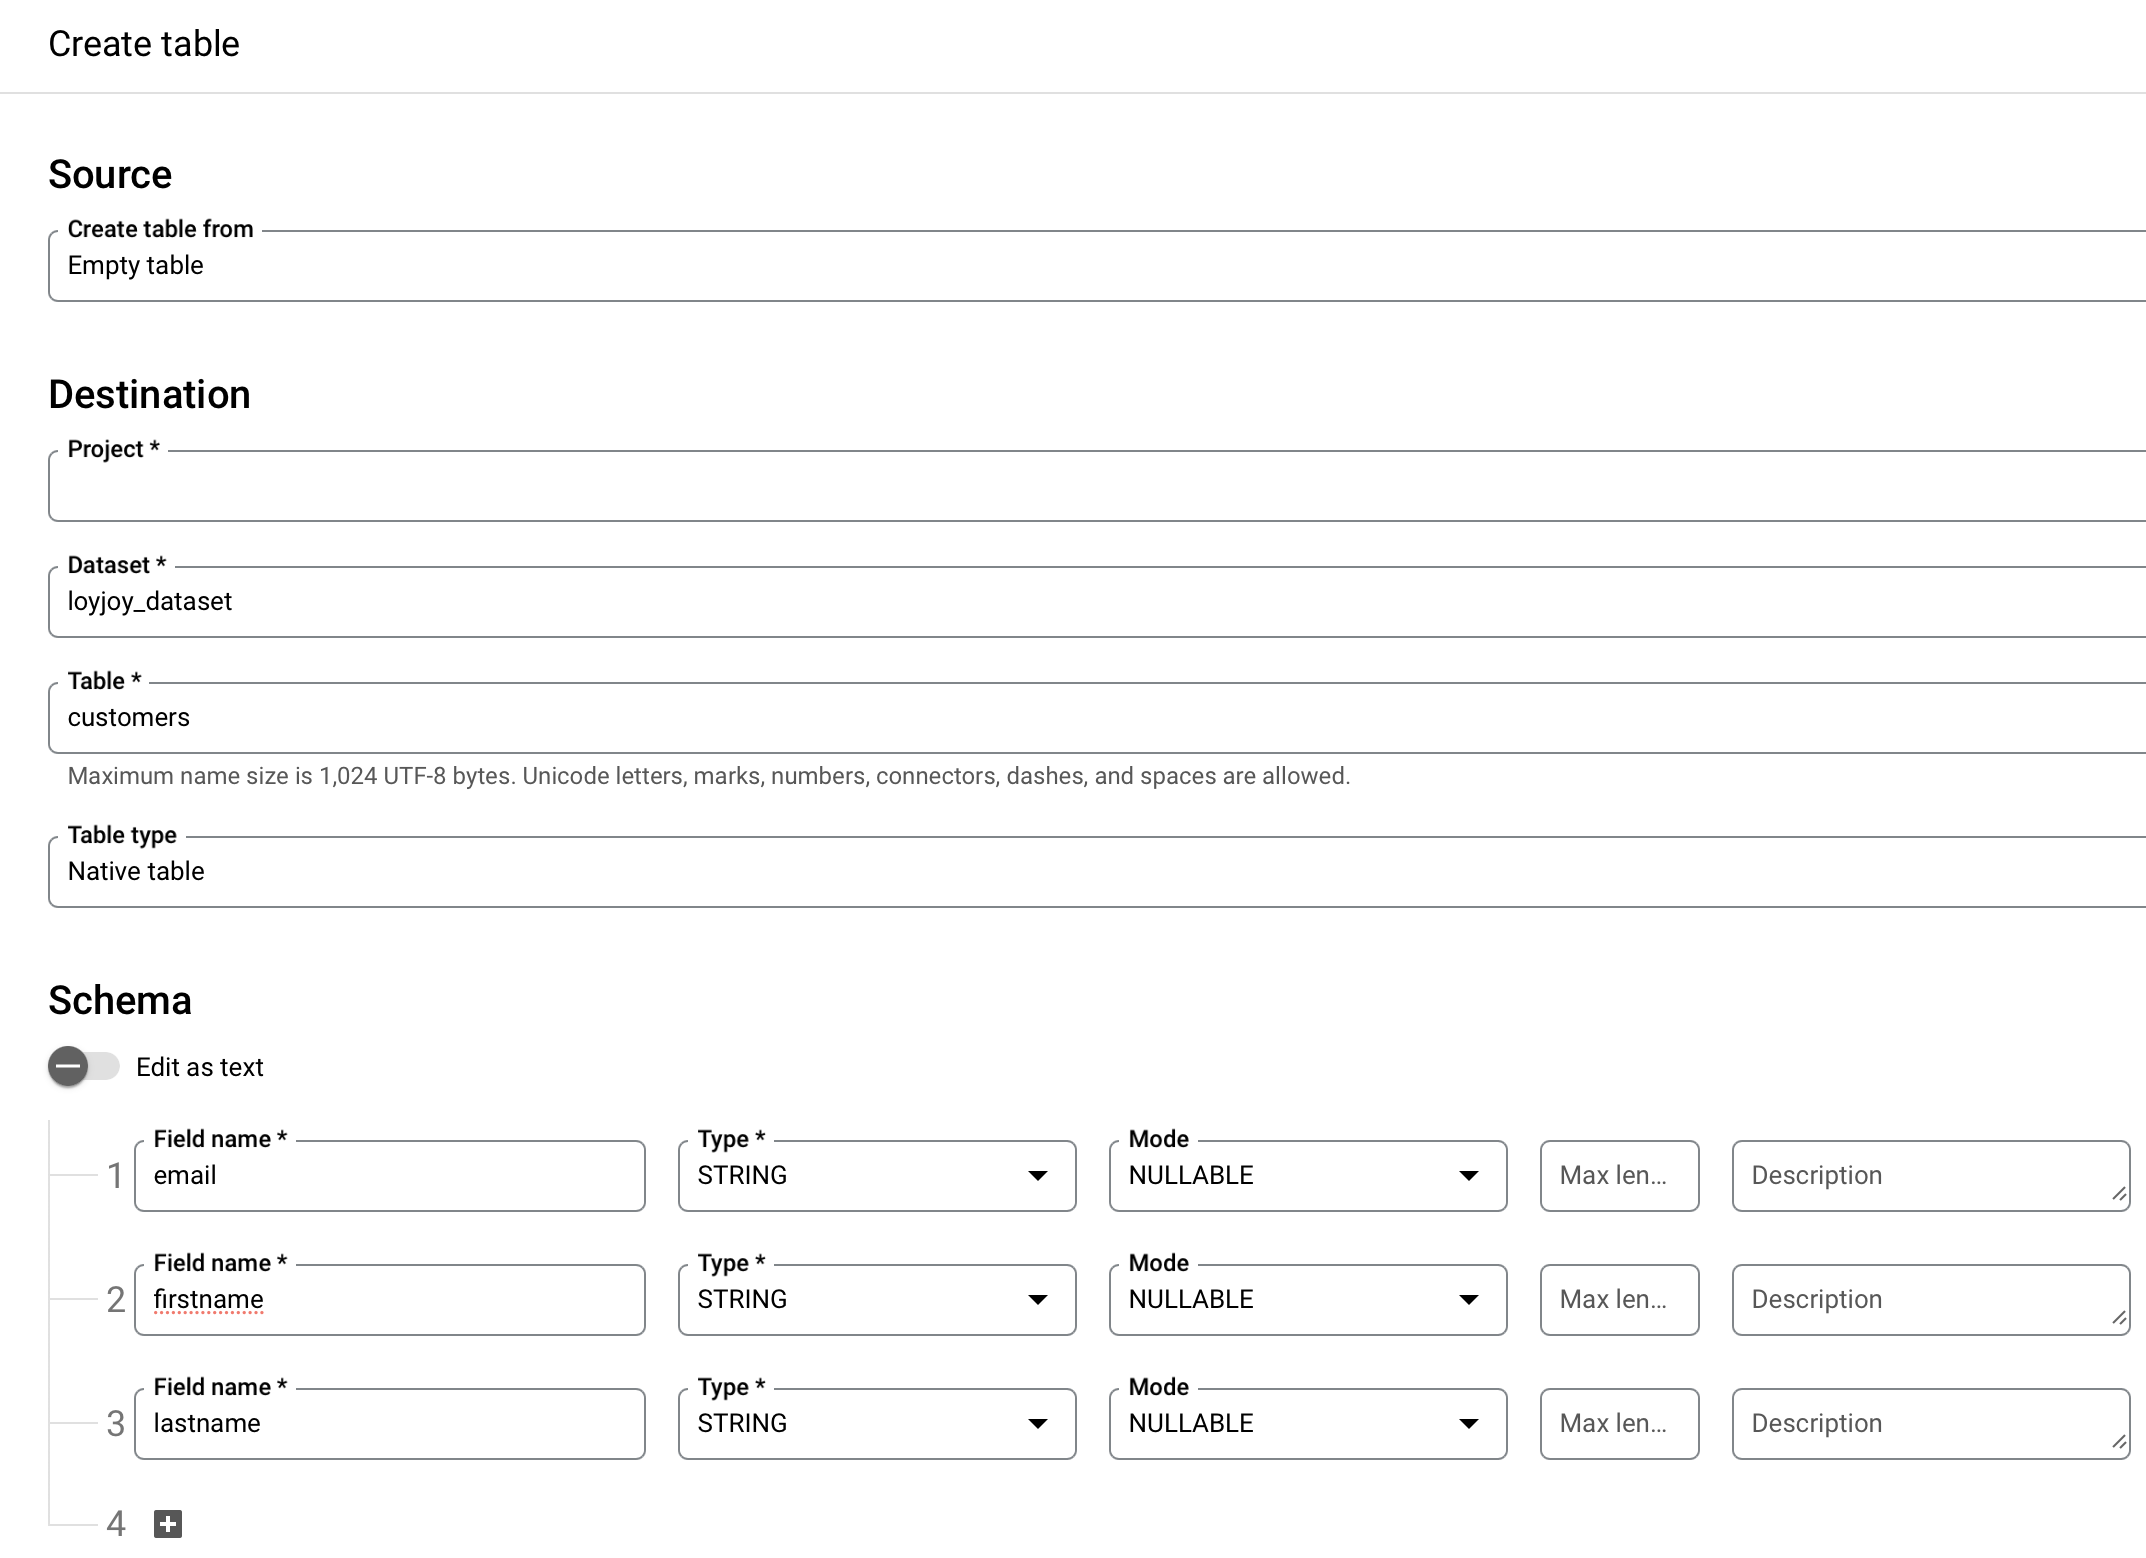
In the list, click on your newly created dataset and create a new table by using the button that says "Create table". Provide a name for the table such as customers or variables.
Next, you have to define a schema for your table. The schema defines the structure of your table, i.e. what kind of data you want to store in your table.
If your want to store customer data, the schema could look like this:
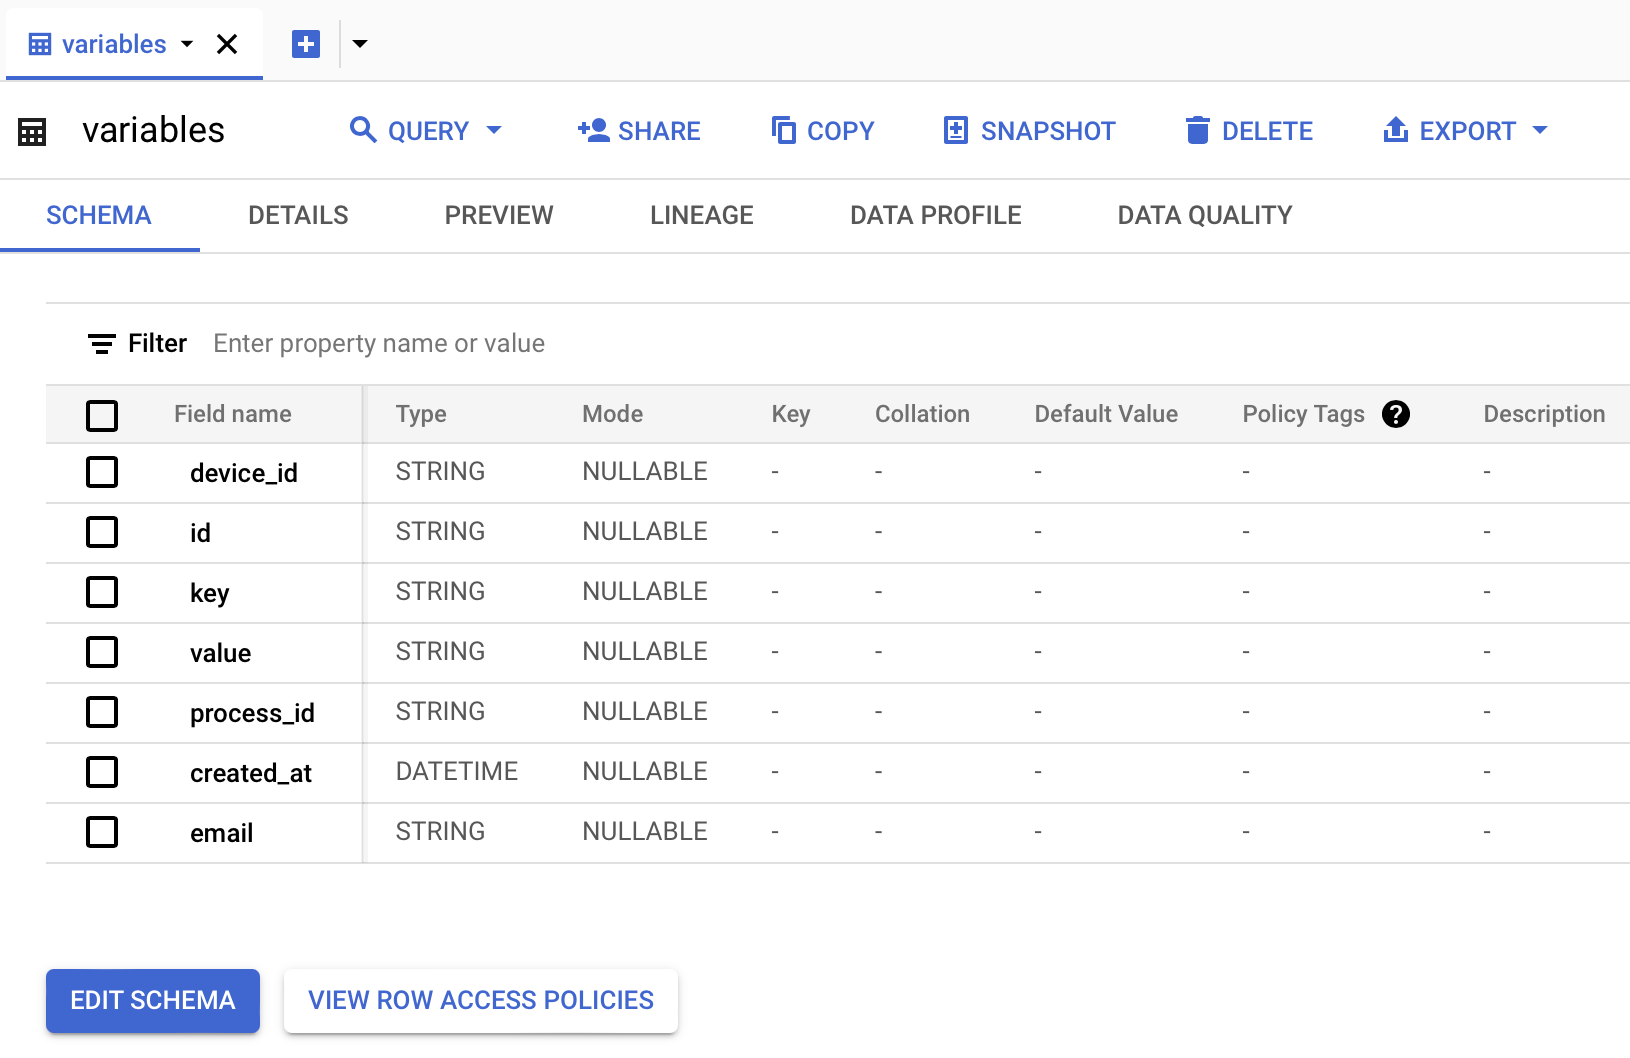
If you want to store arbitrary variables, the schema could look like this:
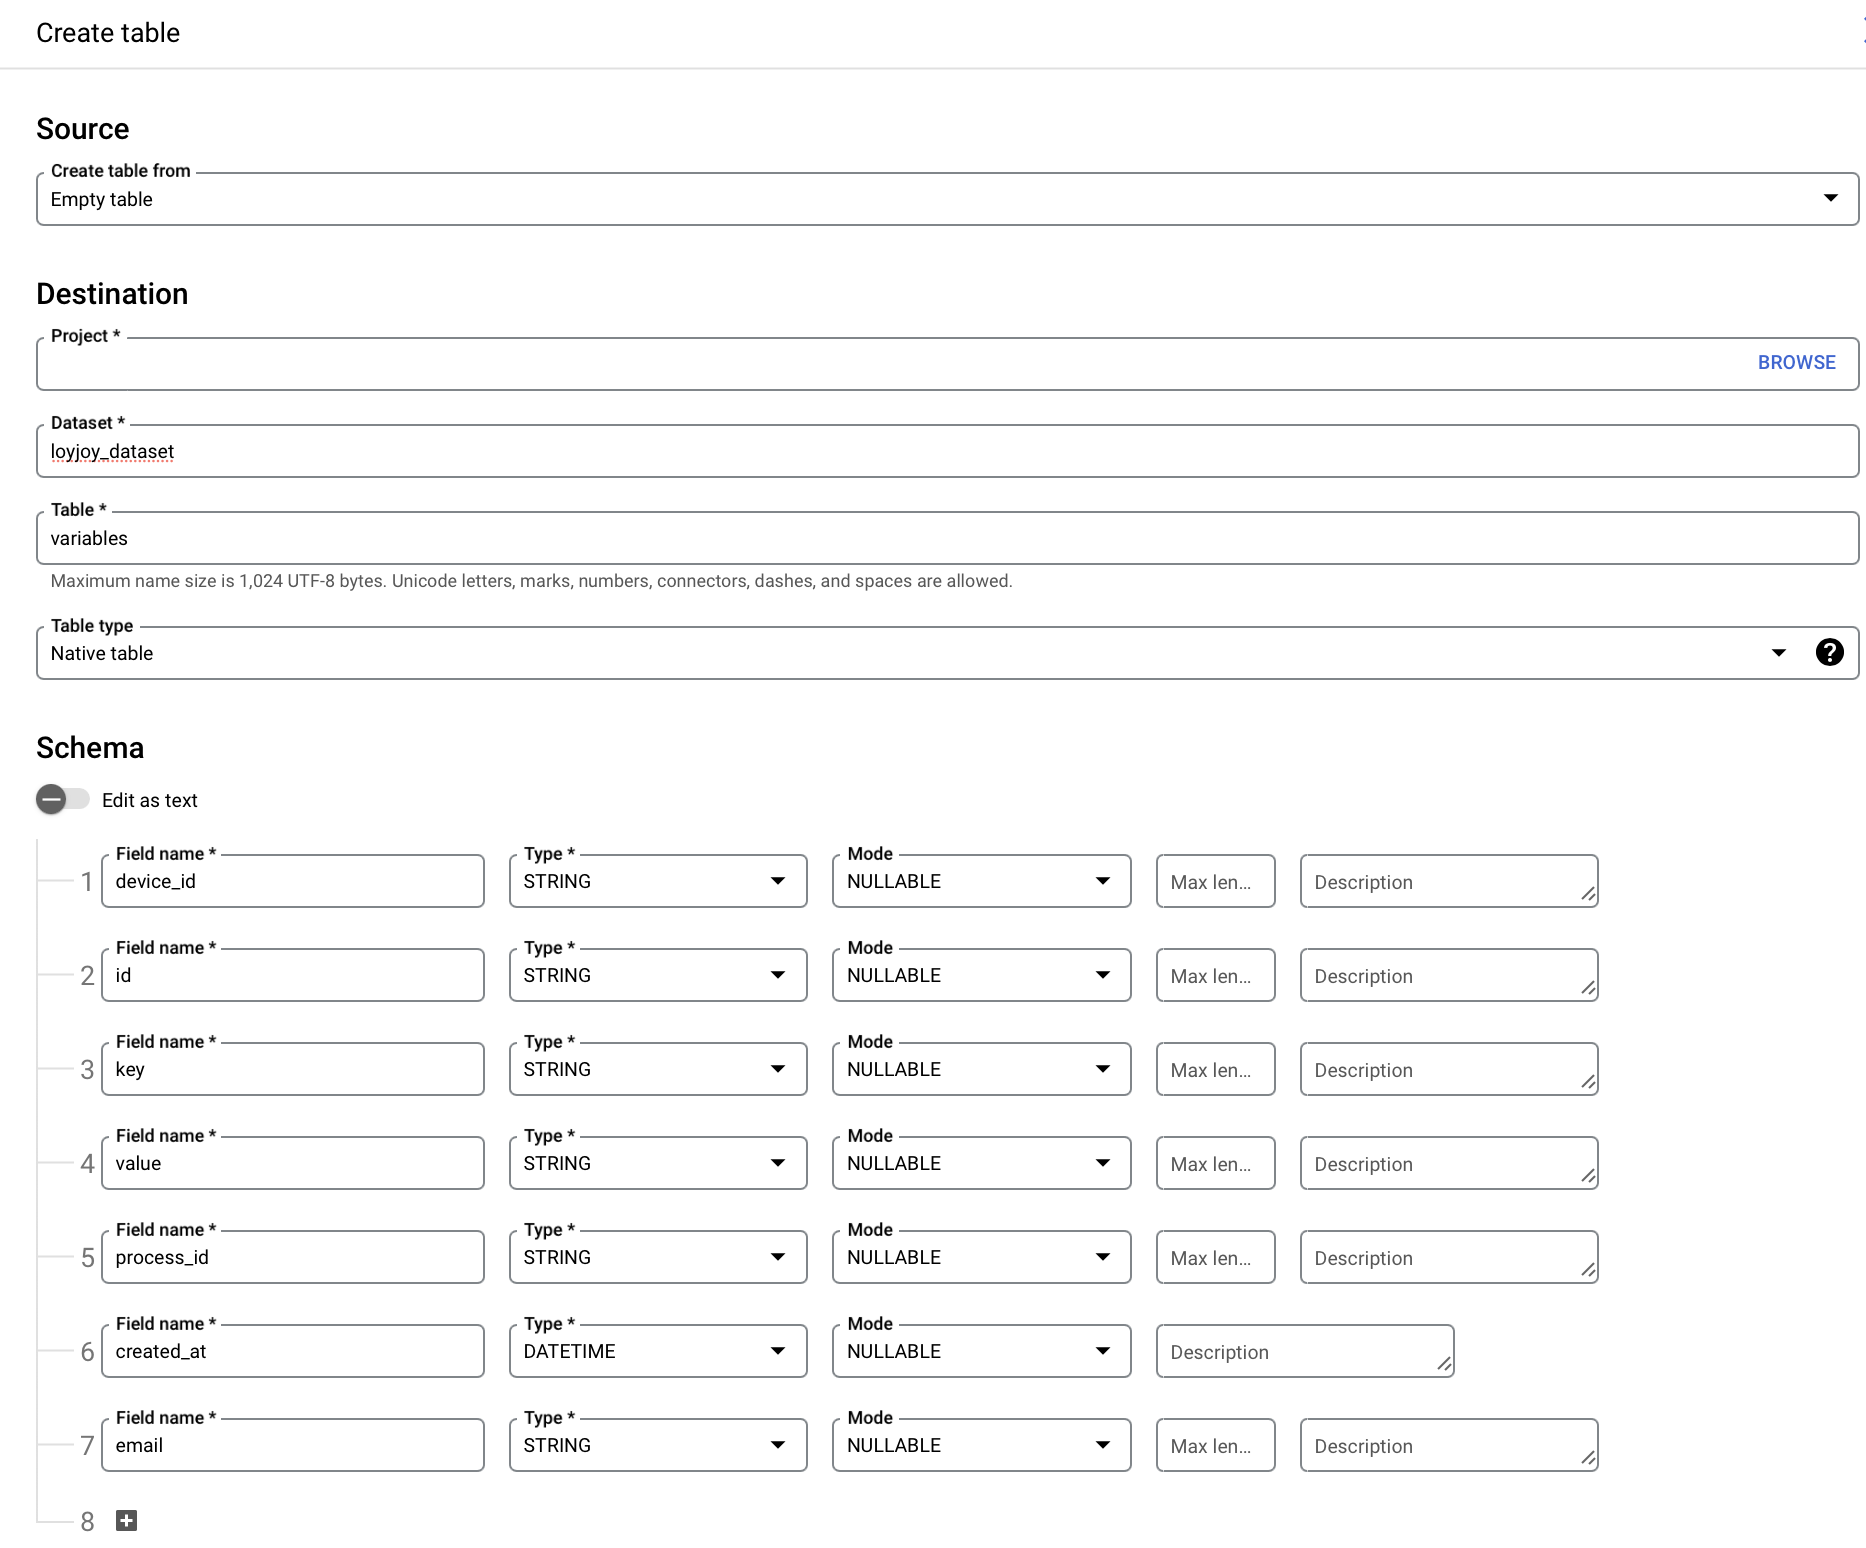
Finally click "Create table".
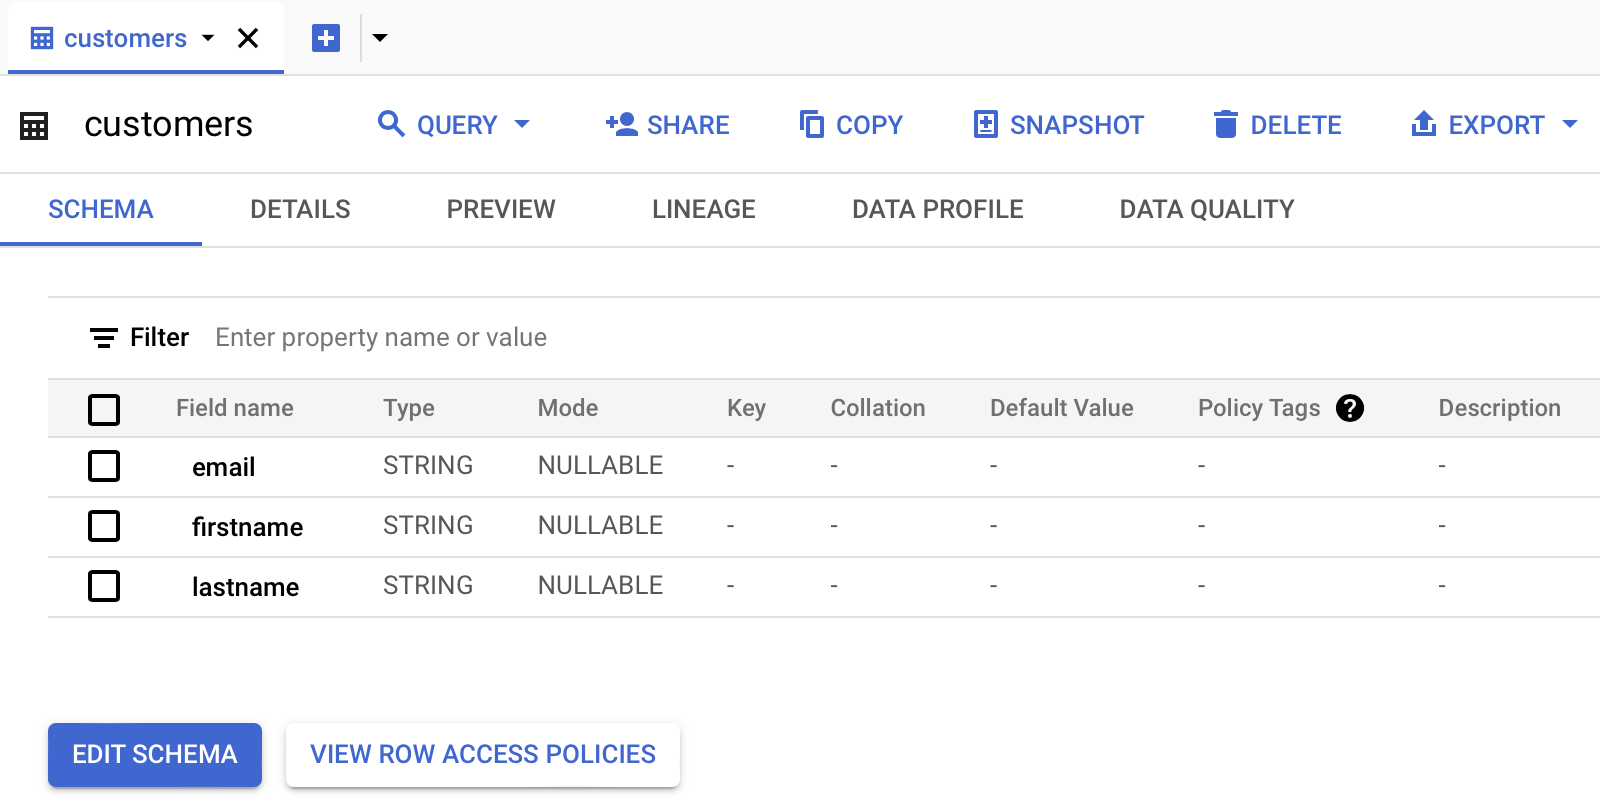
Step 3: Check the schema of your table
In the list, click on your newly created table.
For the customers table, the schema could look like this:
For the variables table, the schema could look like this:
Step 4: Create a service account
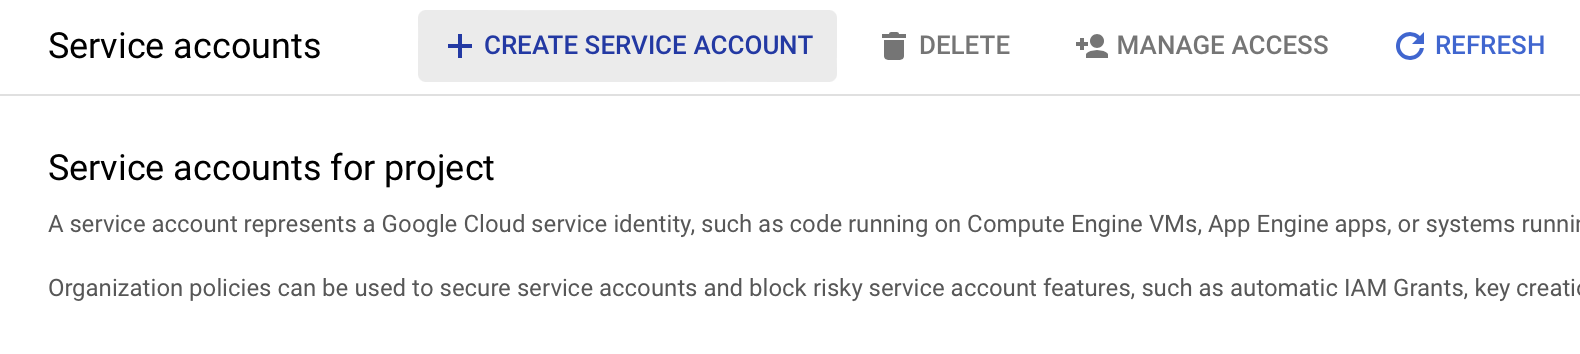
In Google Cloud Platform open the Service Accounts section.
Then click "Create Service Account".
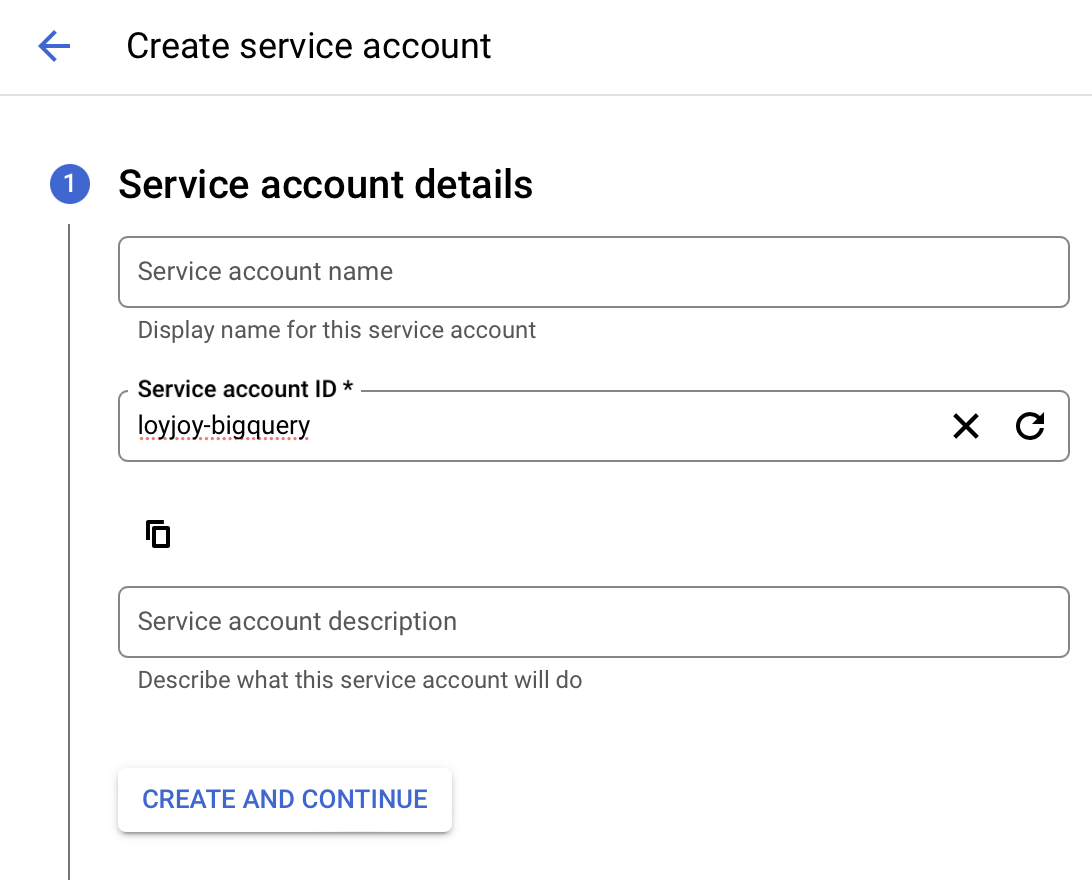
Provide a name for the service account such as loyjoy-bigquery and click "Create and Continue".
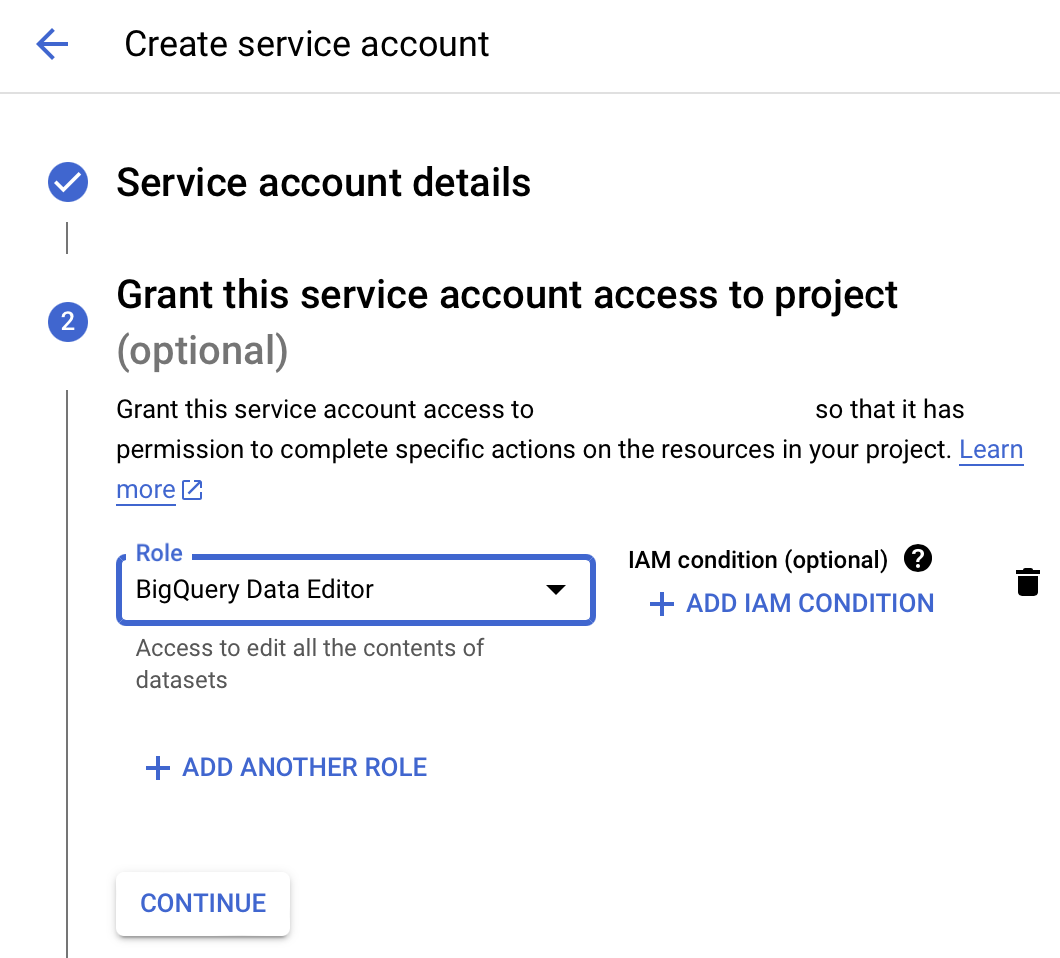
As permissions select "BigQuery Data Editor" and click "Continue".
Click "Done" to create the service account. In the list of service accounts under actions click on the three dots and select "Manage Keys".

Click "Add Key" and select "Create new key".
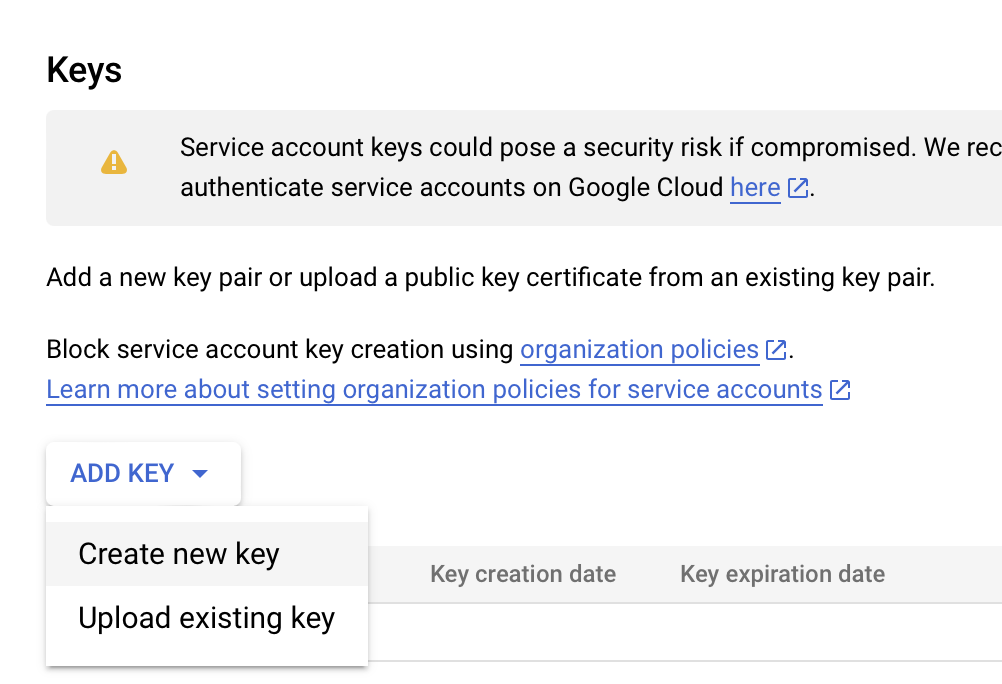
Select "JSON" and click "Create". Your web browser will download a key file.
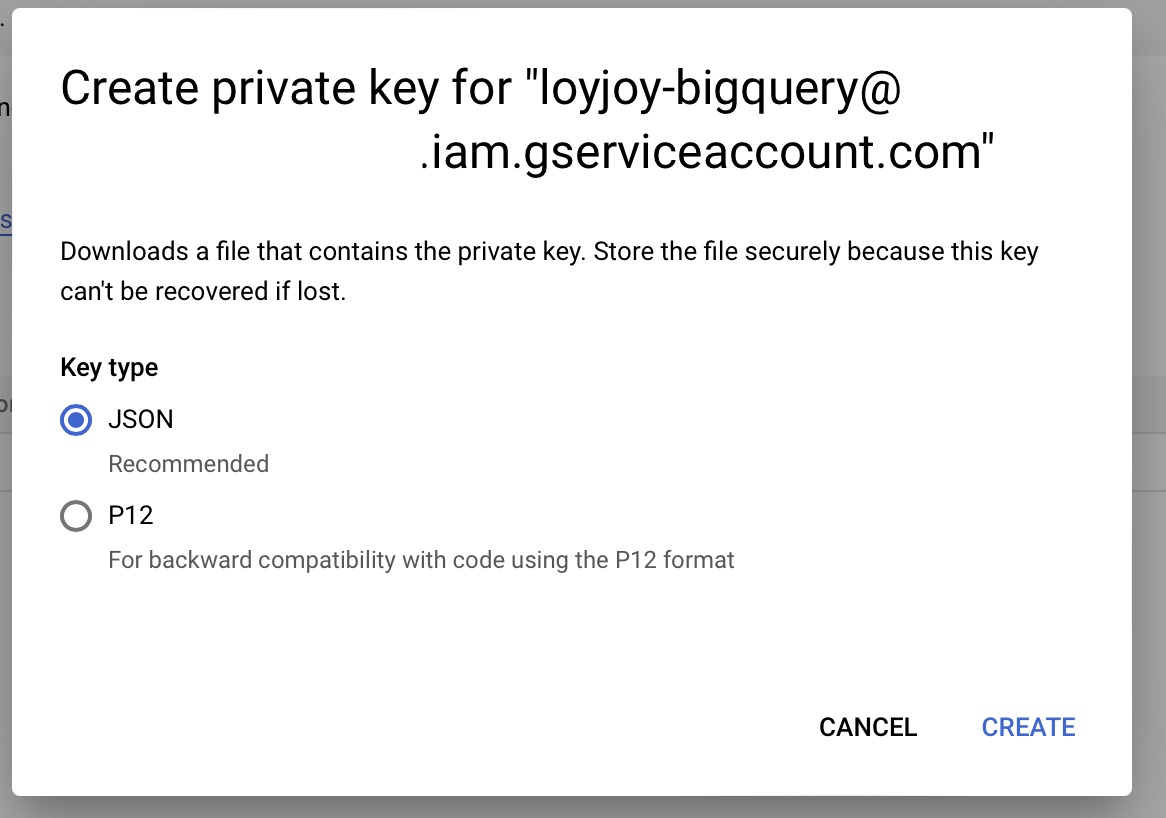
The key file is a simple text file that contains the credentials for your service account and can be opened with any text editor. You will need the contents of this file in the next step.
Step 5: Add the BigQuery Module to your Experience
Either add the BigQuery module to your LoyJoy experience or use one of the templates from the LoyJoy Template Store. In the LoyJoy template store you can find a template for saving customer data into BigQuery and another template for saving arbitrary variables into BigQuery. Simply add one of those templates to your tenant.
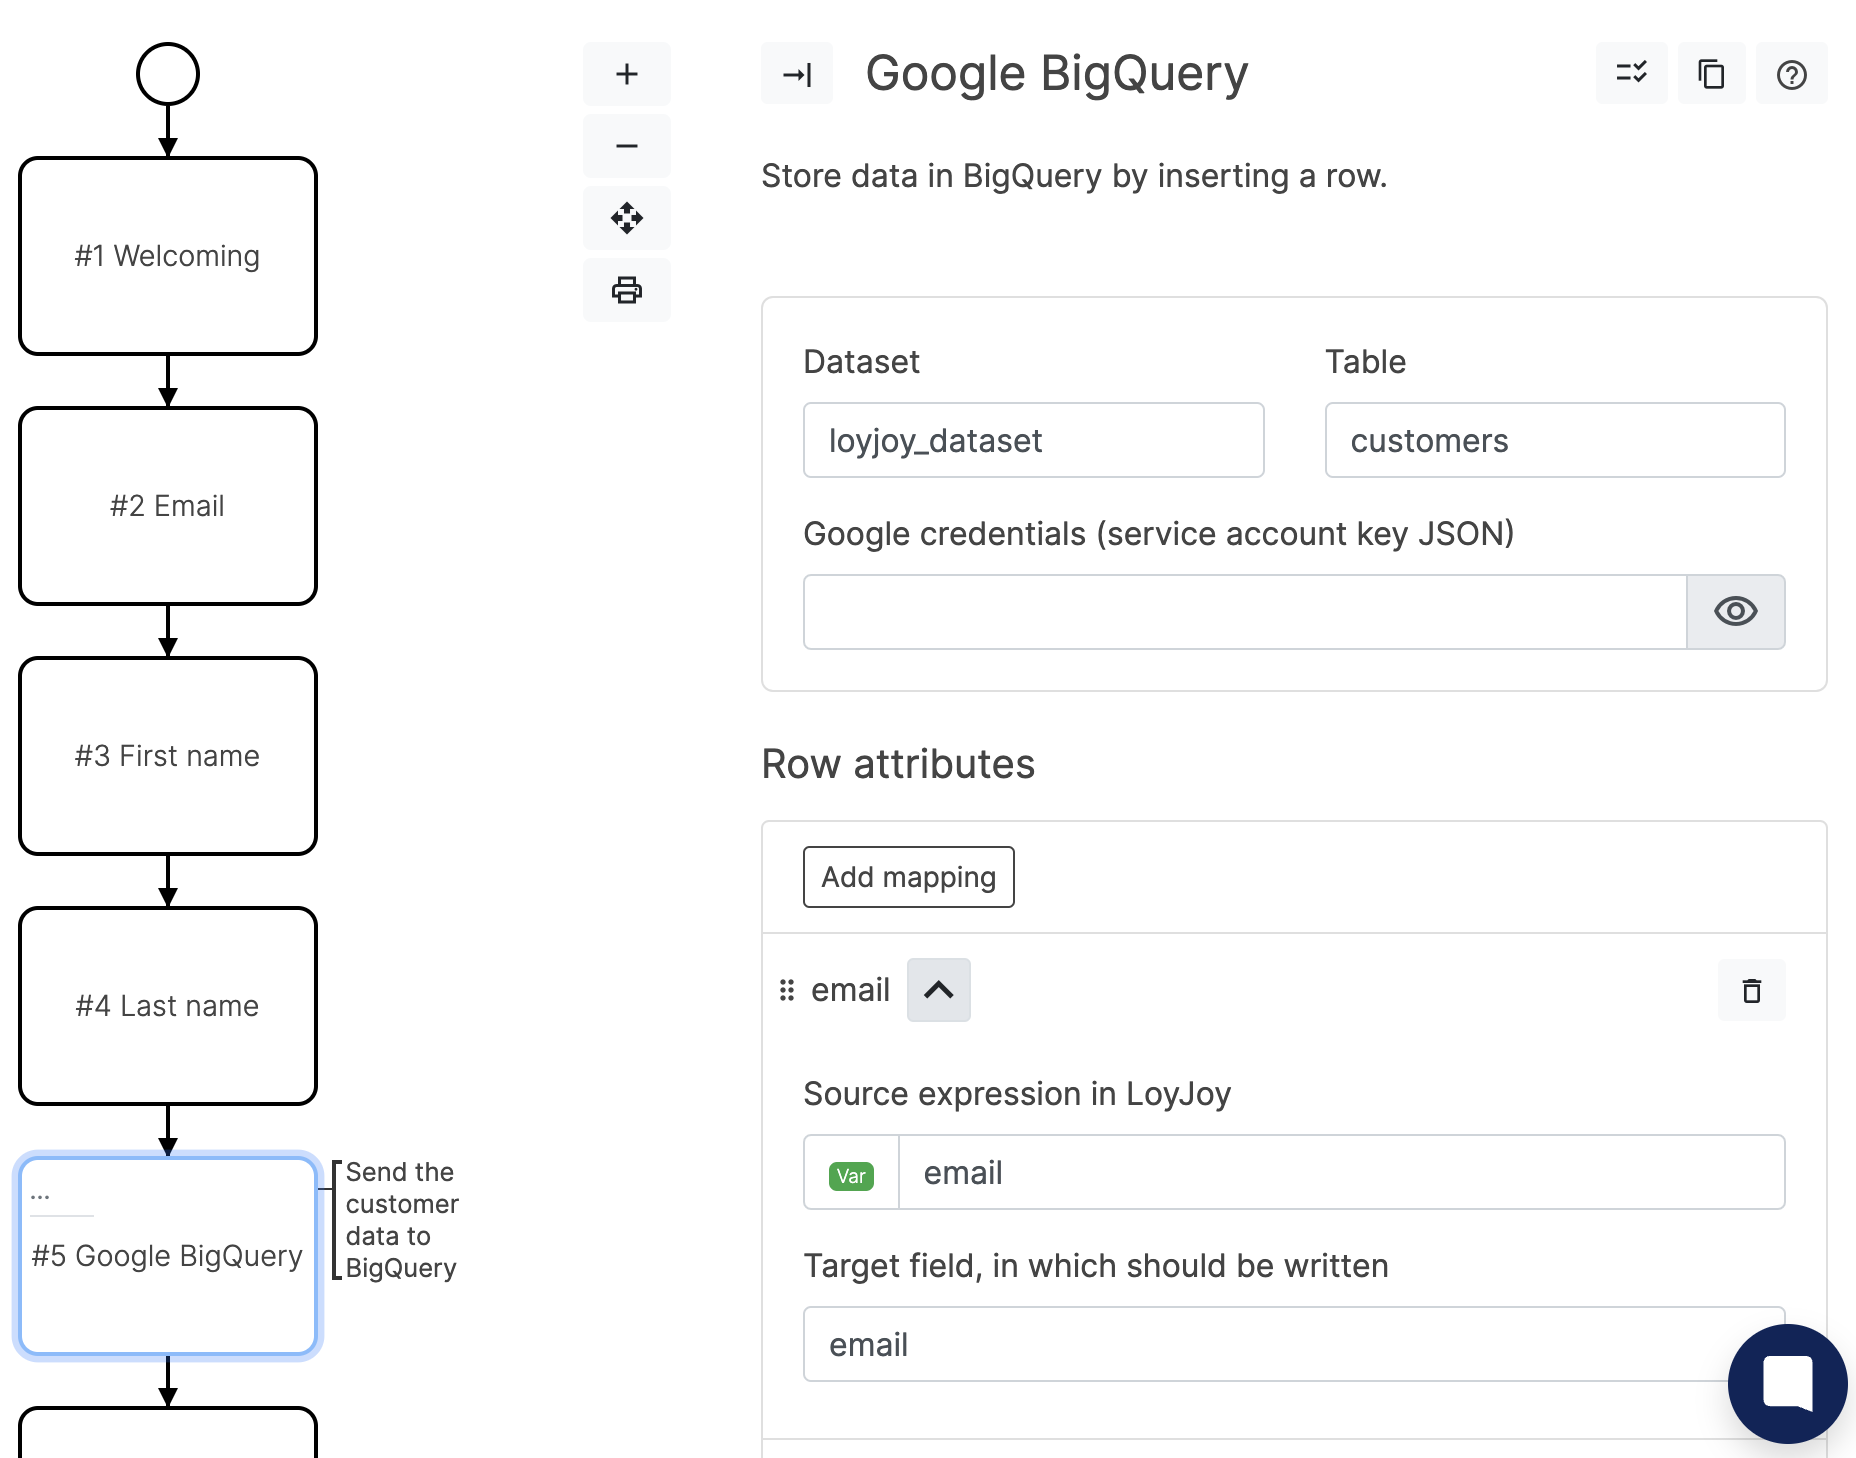
Step 6: Configure the BigQuery Module
The BigQuery module needs to know which data from your chatbot should be saved in BigQuery. This is done by defining field mappings.
In case of the customers table, the field mappings would map the email, first name and last name to the corresponding fields in the BigQuery table:
In case of the variables table, the field mappings would map the variable key, variable value, process ID etc. to the corresponding fields in the BigQuery table:
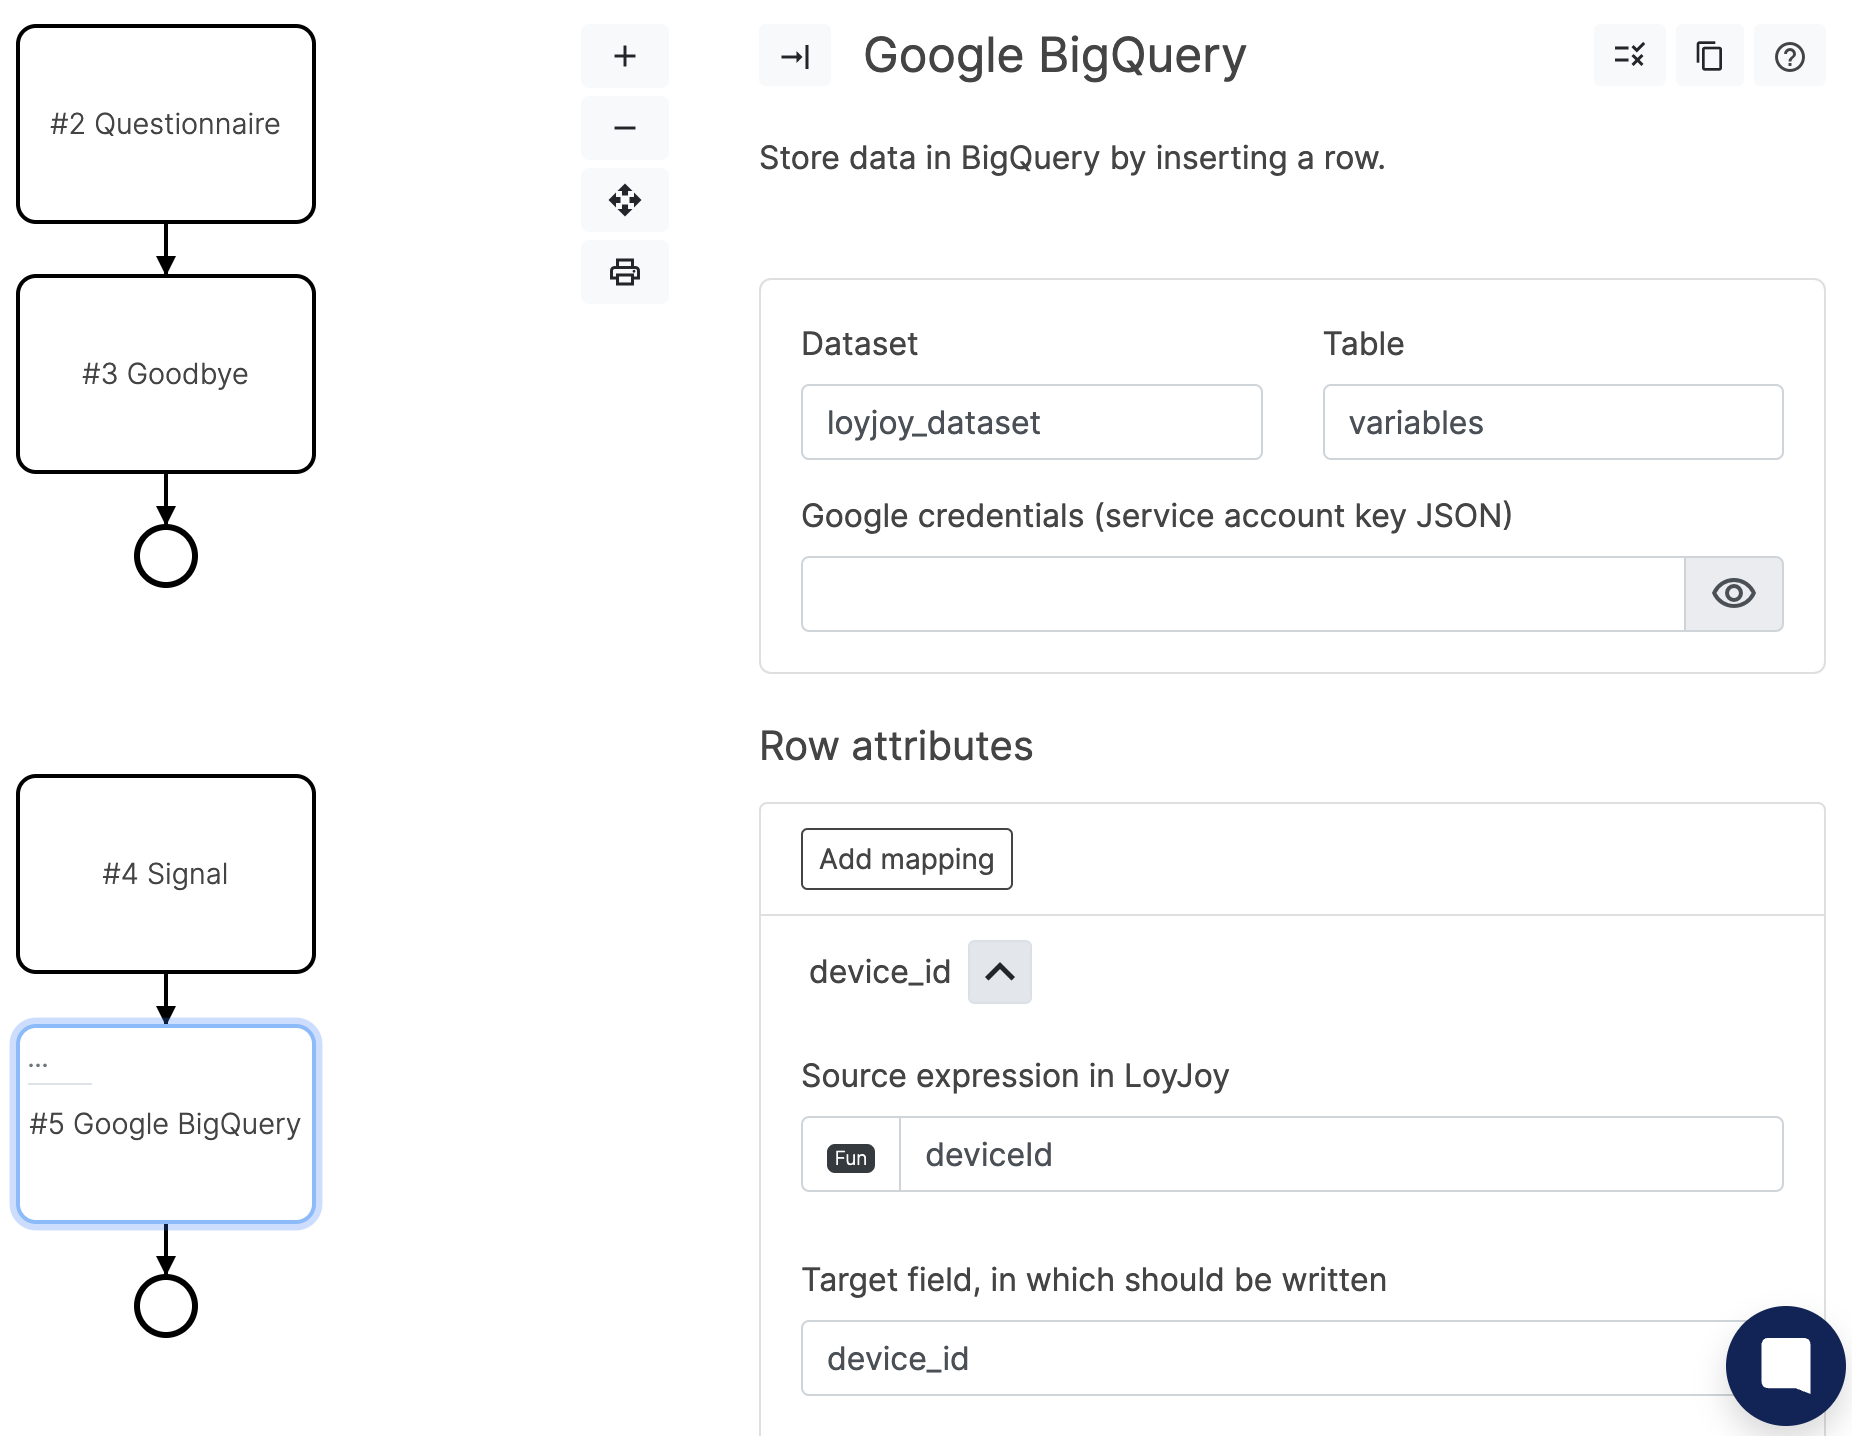
Finally, the Google Service Account credentials need to be added to the module. This is done by pasting the content of your downloaded key file into the credentials field.
Step 7: Test the BigQuery Module
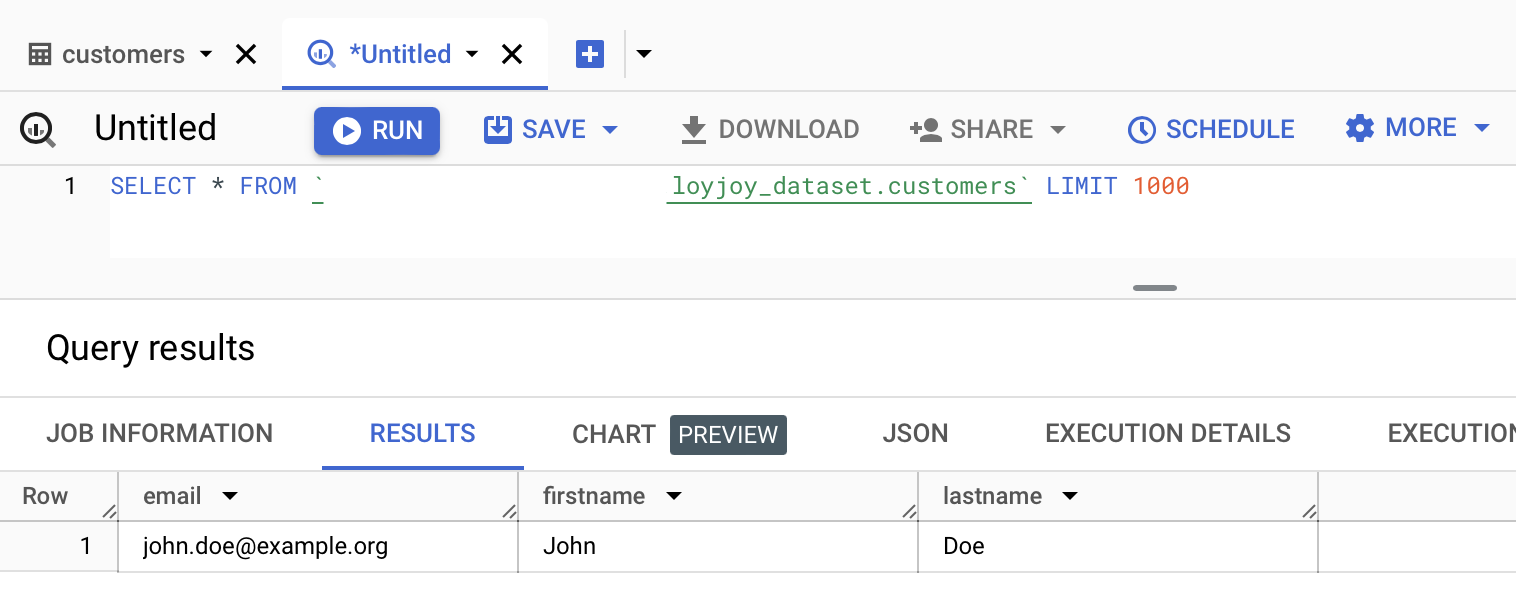
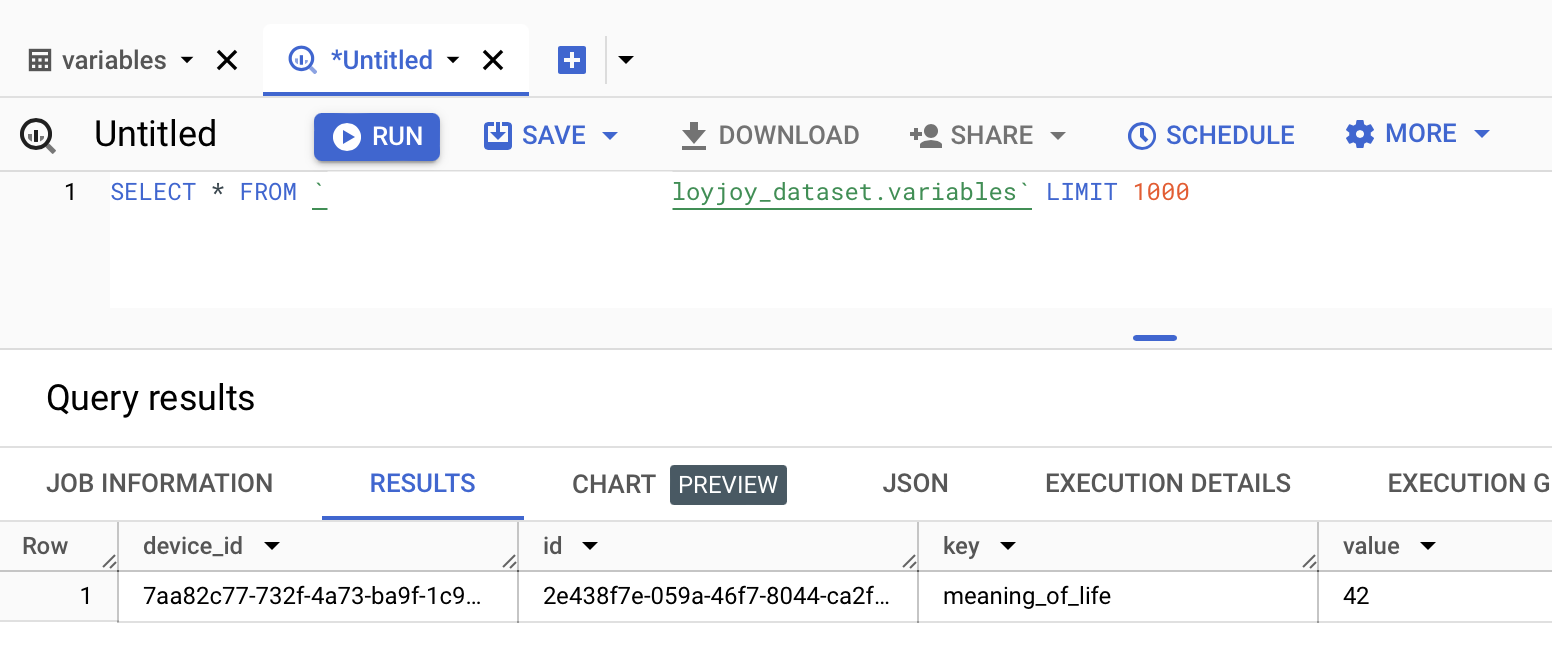
Test the module by sending messages to your chatbot. Then go to your BigQuery table and check if the data has been saved correctly. To do this, open the table and click "Query". A query will be prefilled, which expects you to fill in a * after the SELECT. The * means that you want to select all columns from the table.
For the customers table, the query and data could look like this:
For the variables table, the query and data could look like this:
If no data appears in BigQuery, check the logs of the BigQuery module for errors. Typical errors are that billing or the credit card is not activated in your Google Cloud Platform project or that additional field mappings added by you might be invalid. After adding a credit card in Google Cloud Platform please wait several minutes until billing details have been propagated.