API Client
Introduction
Make use of the API client module whenever you want to send collected data from LoyJoy to your service, pull data from your service to LoyJoy, or you simply want to trigger external services.
Typical Use Cases / Examples
Typical use cases are exporting data from LoyJoy to your web service or reading data from external resources.
Reading data from an external service
As an example, we want to read the current price of a product to be shown in the chat flow.
To do this, we set the method to GET and enter the URL with the ID of the product, for example http://example.org/getPrice?product-id=123abc. We could also use a dynamic product ID, for example stored in the LoyJoy variable product_id. Then the URL would be http://example.org/getPrice?product-id=${product_id}.
Let's assume this request will generate a JSON response body of this form:
{
  "price": {
    "amount": 125,
    "currency": "Euro",
    "validUntil": "2022-12-31"
  },
  "productId": "123abc"
}
We can then map the field price.amount of the response body to a variable of our liking, for example product_price:
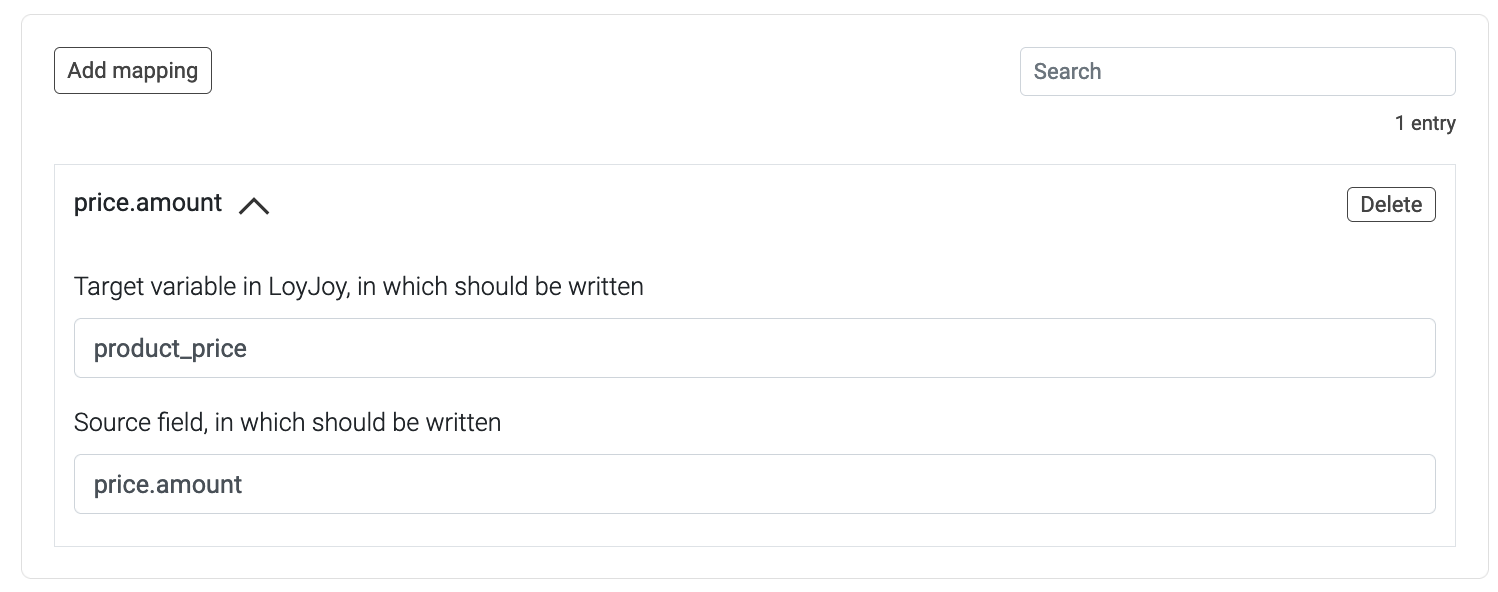
By going through this process module, the GET request will be executed and the product_price variable will be filled with the value from the request. Afterwards, the product_price variable can be used in any text field.
Sending data to an external service
This can be useful to transfer customer data to an existing database, for example to subscribe them to a mailing list or register them. Here we use the POST method and enter a URL such as http://example.org/subscribe.
In this case we are using a JSON post body and simply enter the JSON into the payload text field. In the payload we use the ${} notation to access the variables present in the LoyJoy chat:
{
  "email": ${email},
  "firstName": ${firstname},
  "lastName": ${lastname},
  "birthdate": ${birthdate},
  "marketingOptIn": ${toBoolean(consent_single_opt_in_newsletter)},
  "consumption": ${toInteger(consumption)},
  "key": ${stringConcat(lastname, ", ", birthdate)}
}
Datatypes will be handled automatically based on the data type in LoyJoy. All variables are stored as Strings in LoyJoy. Because of that, we need to use type conversion functions such as toBoolean and toInteger to send these types. See this page for a full list of type conversion functions. Other datatypes exist in LoyJoy e.g. as the output of functions such as randomInt.
You can use expression in the JSON body. These expressions should not be surrounded by quotes:
{
  "key": ${stringConcat(lastname, ", ", birthdate)}
}
The variables in this example are all standard LoyJoy variables. You can look up the standard LoyJoy variable here and here. Additionally, you can also use custom variables defined questionnaires or other modules.
Again, we can interpret the response body as JSON. For example we get a response body such as:
{
  "status": "success",
  "subscriberId": "9cc2d7a1-888f-49bd-a169-5d196c900ced"
}
We can create a mapping that will read the status field of the response and map it to a variable of our liking:
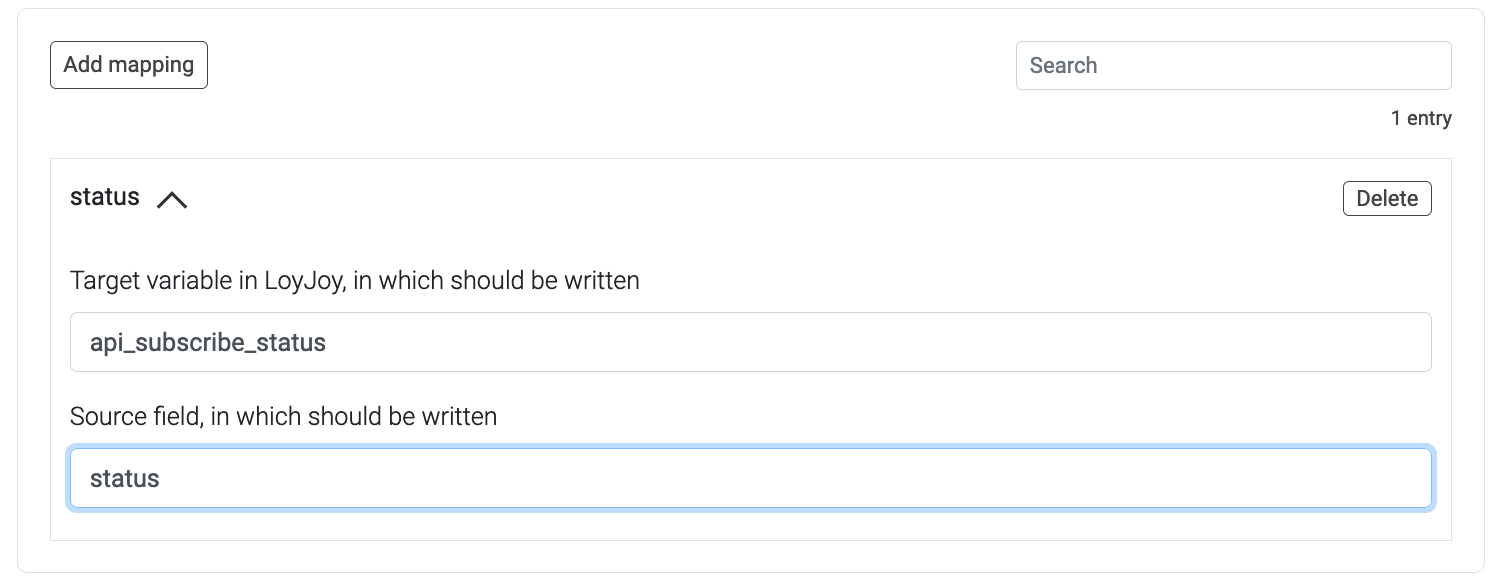
Depending on the status, we can then, for example, tell the customer that they were successfully subscribed or that there was an error.
How to Use the Module
Send a GET or POST request to any URL. You can add a custom payload to your post requests and use variables in this payload using the ${variable} syntax. If the URL returns a JSON response, you can use mappings to map a JSON field to a LoyJoy variable.
See the following video for a short overview:

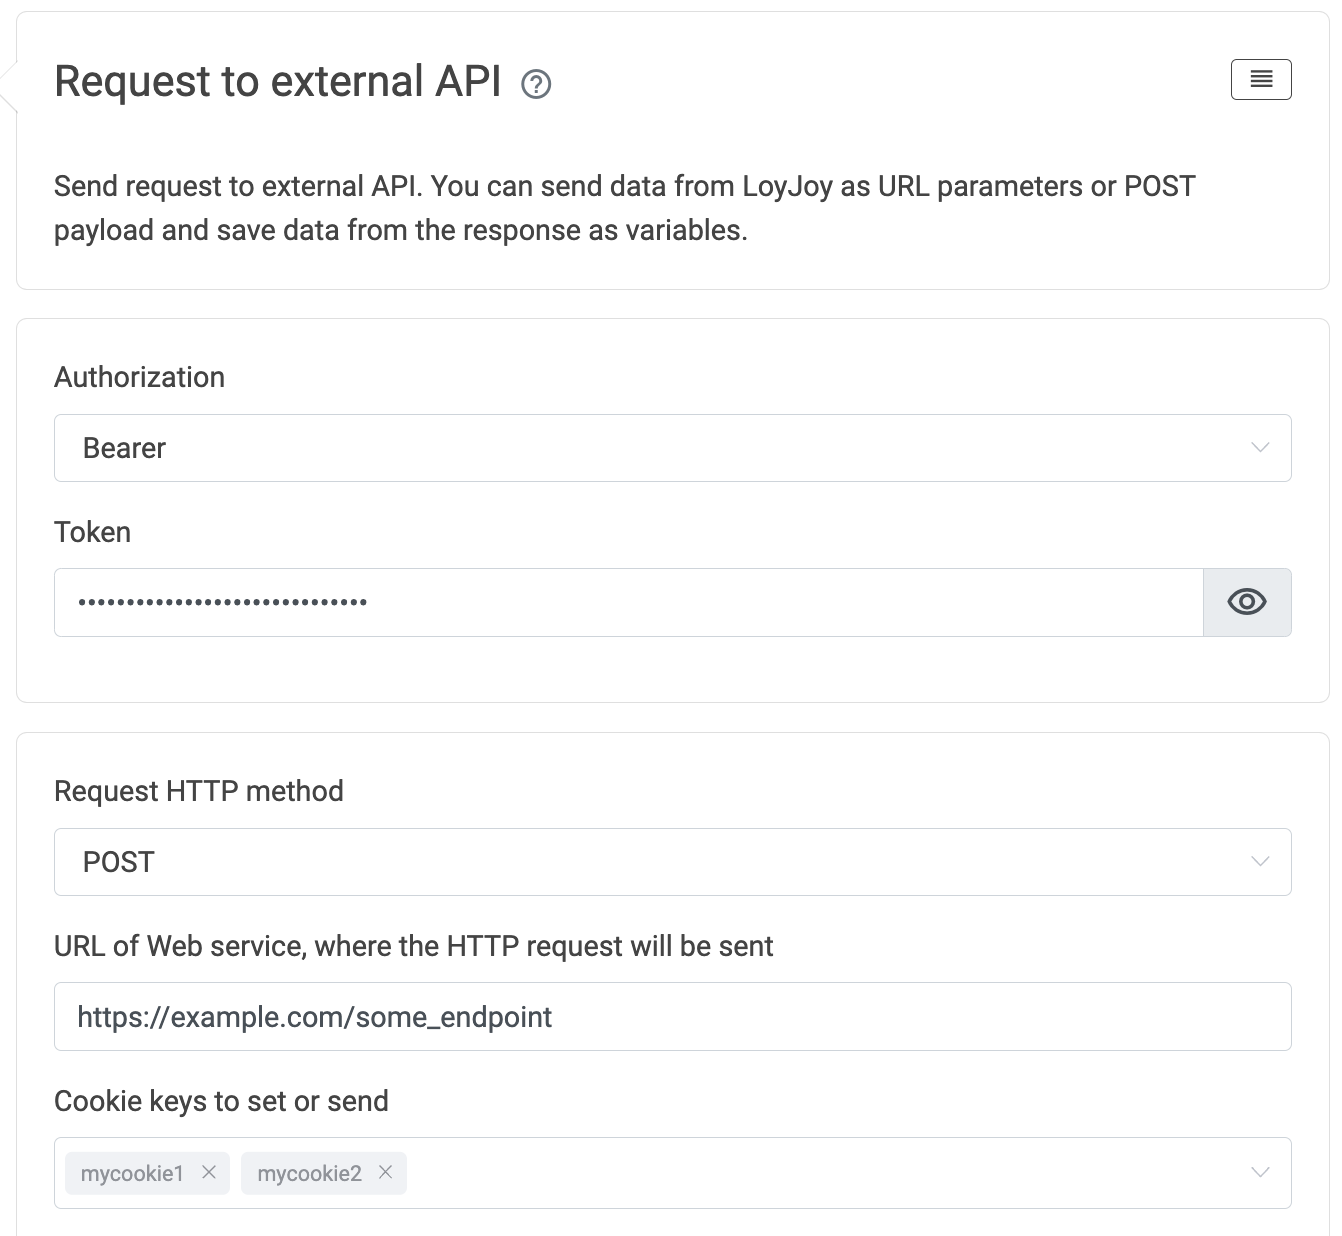
Request
Start by entering necessary information from your service. If you are not sure what information is involved here, check with the appropriate developer.
Authorization
LoyJoy supports three different kinds of HTTP authorization methods which are send as the Authorization header: Basic, Bearer and OAuth2.
Basic
The Basic HTTP authorization method involves sending the username and password as part of the Authorization header, separated by a colon and Base64 encoded. You simply enter the username and password in LoyJoy.
Bearer
The Bearer HTTP authorization method uses token-based authentication, where a token (usually a JWT) is sent in the Authorization header with the "Bearer" prefix. Here you enter the token in LoyJoy (without the Bearer prefix).
OAuth2
OAuth2 is an industry-standard authorization framework used for delegated authentication and authorization. It enables users to grant limited access to their resources on one service to another service without sharing their credentials.
To use OAuth2 authentication, you need to enter the following information:
- Header prefix: Prefix for the
Authorizationheader. Usually and by defaultBearer - Token URL: URL where the token can be retrieved from
- Grant type: The grant type of the OAuth2 flow.
client_credentialsorpassword - Client ID: ID of the OAuth2 client
- Client Secret: Secret to verify the client
- Password: For
passwordgrant type - Scope: Scope of the OAuth2 token
- Authentication:
bodyorheader. If you choosebody, the token will be sent in the body of the request to the token URL. If you chooseheader, the token will be sent in theAuthorizationheader.
HTTP Request Method
LoyJoy is able to either send the HTTP request via GET, POST, or PUT.
POST / PUT Body Types
Three different POST and PUT body types are supported
- JSON
- File (Base64 encoded)
- File (Mulipart)
- File (Octet-Stream)
- x-www-form-urlencoded (key-value pairs)
API URL
Enter the URL of the endpoint of the service in which you can use LoyJoy variables e.g. https://example.org/some_endpoint?param1=${variable1}.
Payload
To send an HTTP body alongside your request, please use either the methods POST or PUT. Structure your payload according to the scheme defined by your endpoint. Again, if your not sure, please consult the appropriate developer. Note that you can make use of LoyJoy's variables. For example you can send a JSON as follows.
{
  "source": "loyjoy",
  "firstname": ${firstname},
  "lastname": ${lastname},
  "variable1": ${variable1}
}
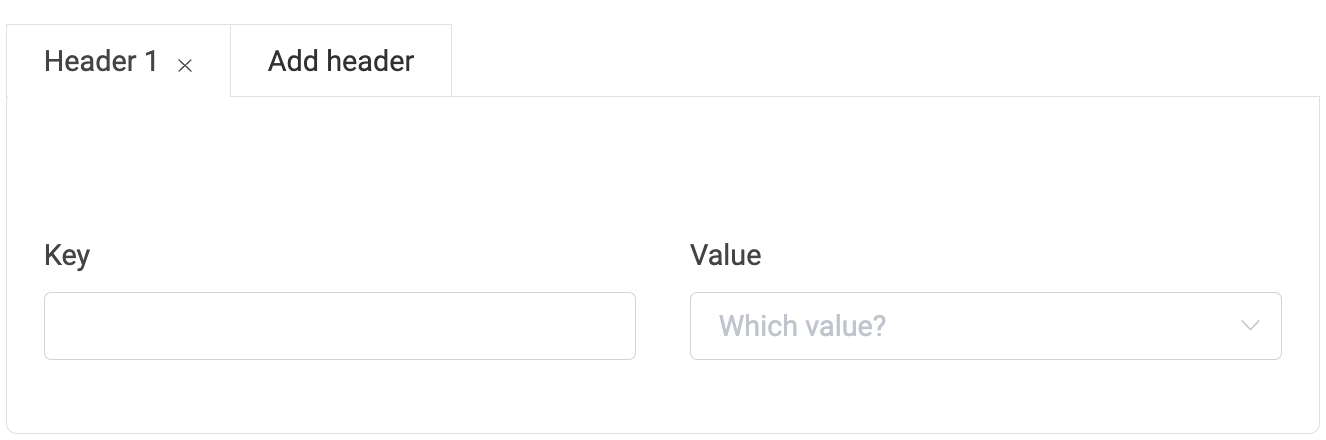
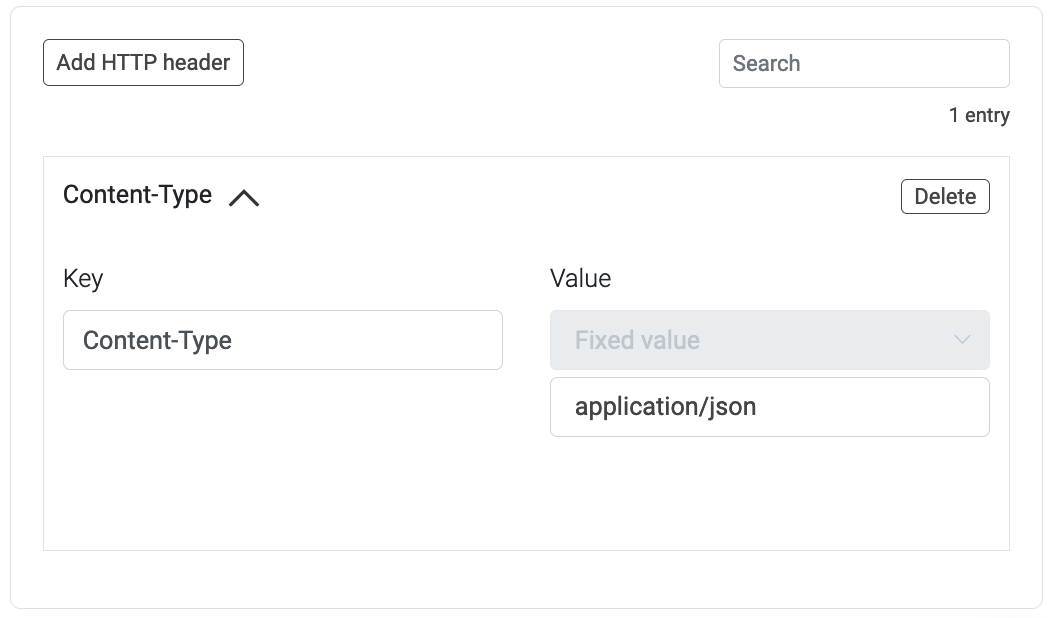
Headers
You can setup any custom header necessary for request by adding header key value pairs.
Response
The response HTTP status code is always saved in the variable api_client_status_code. The response body is saved in the variable api_client_response_body.
You can process the response in LoyJoy and map a JSON to variables by adding mappings in the module. This allows external information of your service to be used in the chat. To declare variables in LoyJoy use the field Target variable in LoyJoyand to extract information from the JSON in the response use the field Source field in external system. Consider the following example.
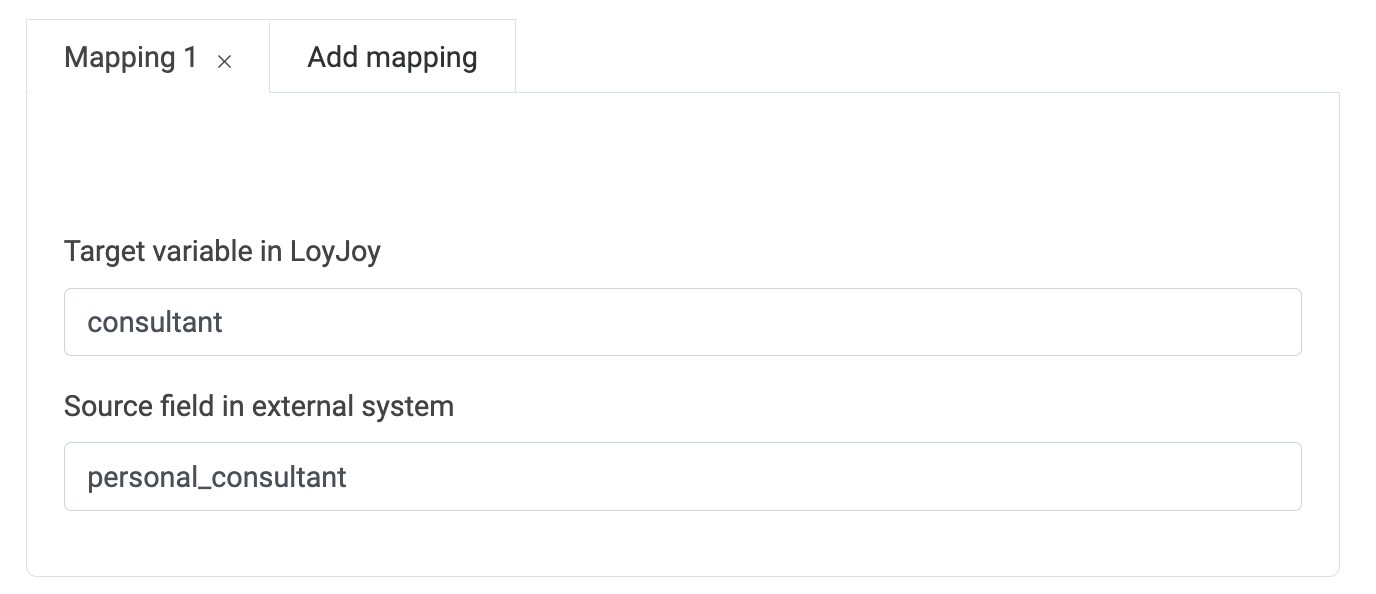
This mapping requires the JSON payload to have the key personal_consultant. For example, consider the following response.
{
   "personal_consultant": "John Doe",
   "store_address": {
      "street": "Main Street 20",
      "city": "Münster",
      "zipcode": "48147"
   }
}
You can then use the variable ${consultant} in the chat.
To extract nested information of a JSON payload, chain the fields with a dot i.e. to extract the city as the variable city use store_address.city.

Testing and Debugging
To test the API client configuration, you can use the chat preview and go through the steps required to activate the API client module. To see which data was transferred, you can activate debug logging in the module:
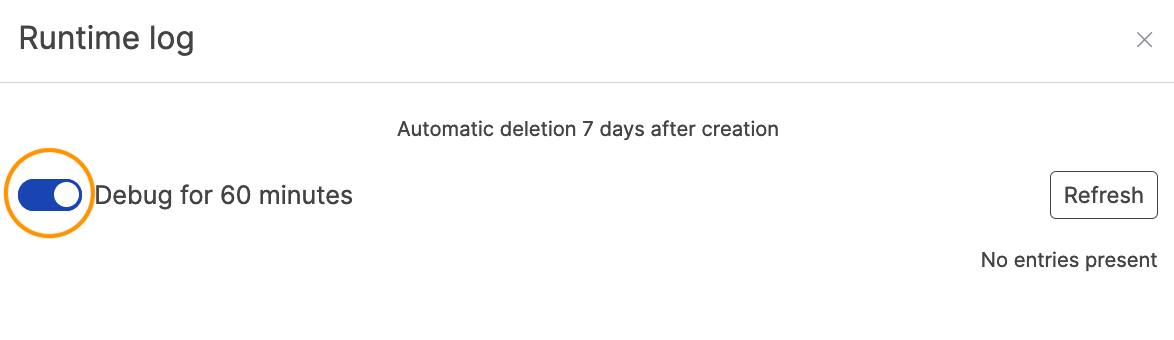

This log will then show you what requests were made, as well as the payload sent and the response received. Payloads and responses will only be saved when debugging is active. Otherwise, only the HTTP status code of unsuccessful requests are logged. In general, HTTP status codes starting with 4 indicate an error was made in the request and status codes starting with 5 indicate an internal error in the service. See here for a list of HTTP status codes.
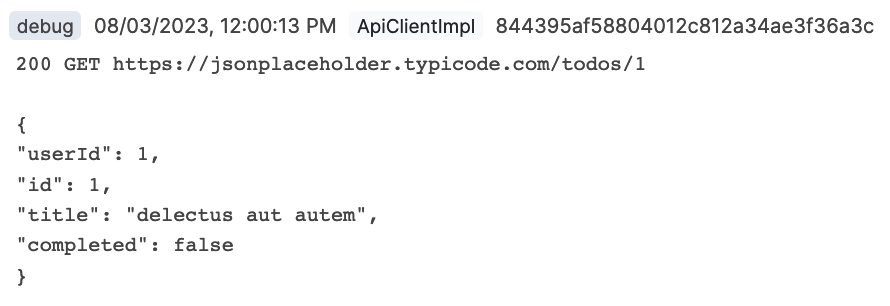
Example for a log of a successful request:
Example for a log of an unsuccessful request:

Here we see that the response status was 404 which stands for "Not Found".
Please note the underlined typo in the URL. The URL should have been /todos/1
instead of /todoes/1. Because of this, the server could not find the resource
responded with a 404 status code.
Another example for an unsuccessful request:
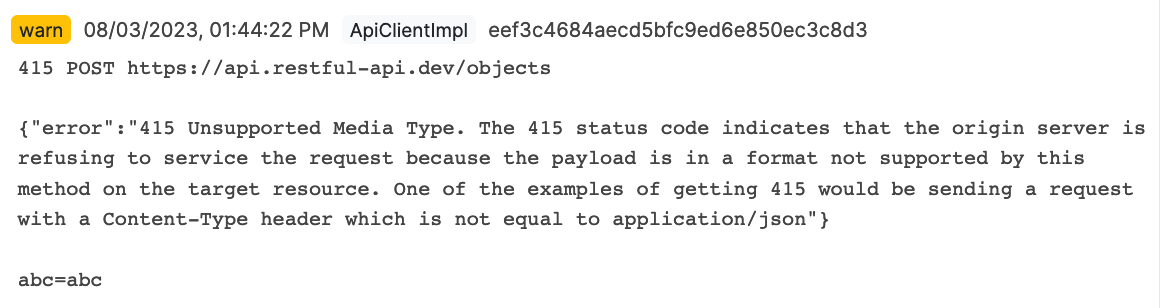
Here we see that the resource responded with a 415 status code which stands
for "Unsupported Media Type". This means that the server does not support the
media type of the request. In this case, the server only supports
application/json but the request was sent with
application/x-www-form-urlencoded as the media type. This can be fixed by
changing the Request body type in the module configuration.
We also see that often the response body contains more information about the error and can help you to debug the issue.
Cookies
These field allows you to enter names of cookies you want to send or receive. If the server replies with a cookie of the given name, it will be saved in the LoyJoy session. If a cookie with the given name is saved in the LoyJoy session, it will be sent with the request.
Headers
Headers can be used in both directions. To add a request header, you can simply enter a valid expression and a header name.
Timeouts
The process module waits for a response from the server for around 20 seconds. If the server does not respond within this time, the process module will classify this as a timeout. There are multiple solutions to this problem.
Replay unsuccessful requests
The replay feature allows you to replay failed requests. The request will be saved and can be replayed. This is useful if you want to replay requests that failed due to a timeout or other reasons.