Decision Table Module
Introduction
Define a decision table based on decision rules to read and write BPMN process variables at once.
Typical Use Cases
Example
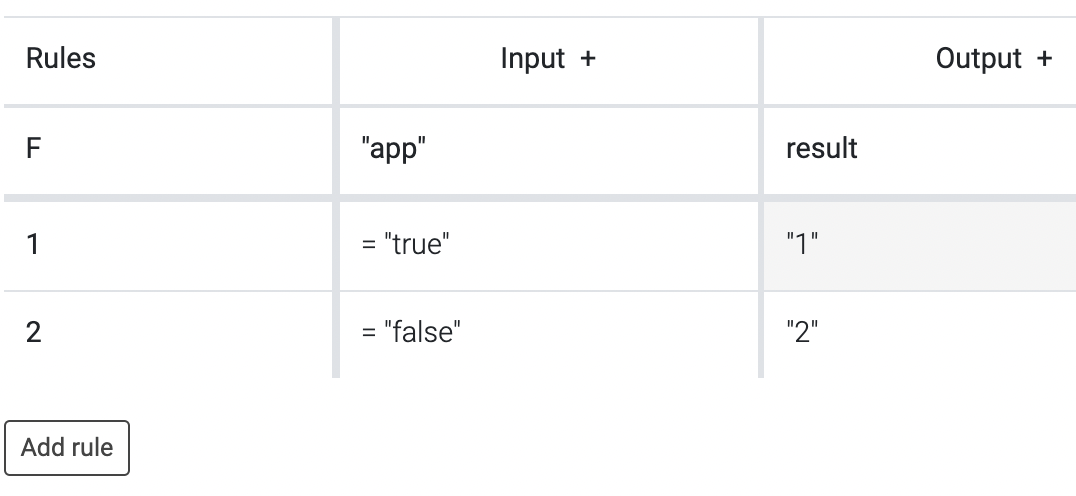
In this example, the value of the "app" variable is checked. If it is equal to the string "true", the decision table sets the value "1" in the variable "result". If it is equal to the string "false", the decision table sets the value "2" in the variable "result".
Further example
In the next example, we consider the result of a questionnaire with three questions. From these we want to generate a process variable with the value green, yellow or red. If at least one question was answered with red, the value should also be red. If all questions were answered with green, the value should become green and in the remaining cases the value should become yellow.
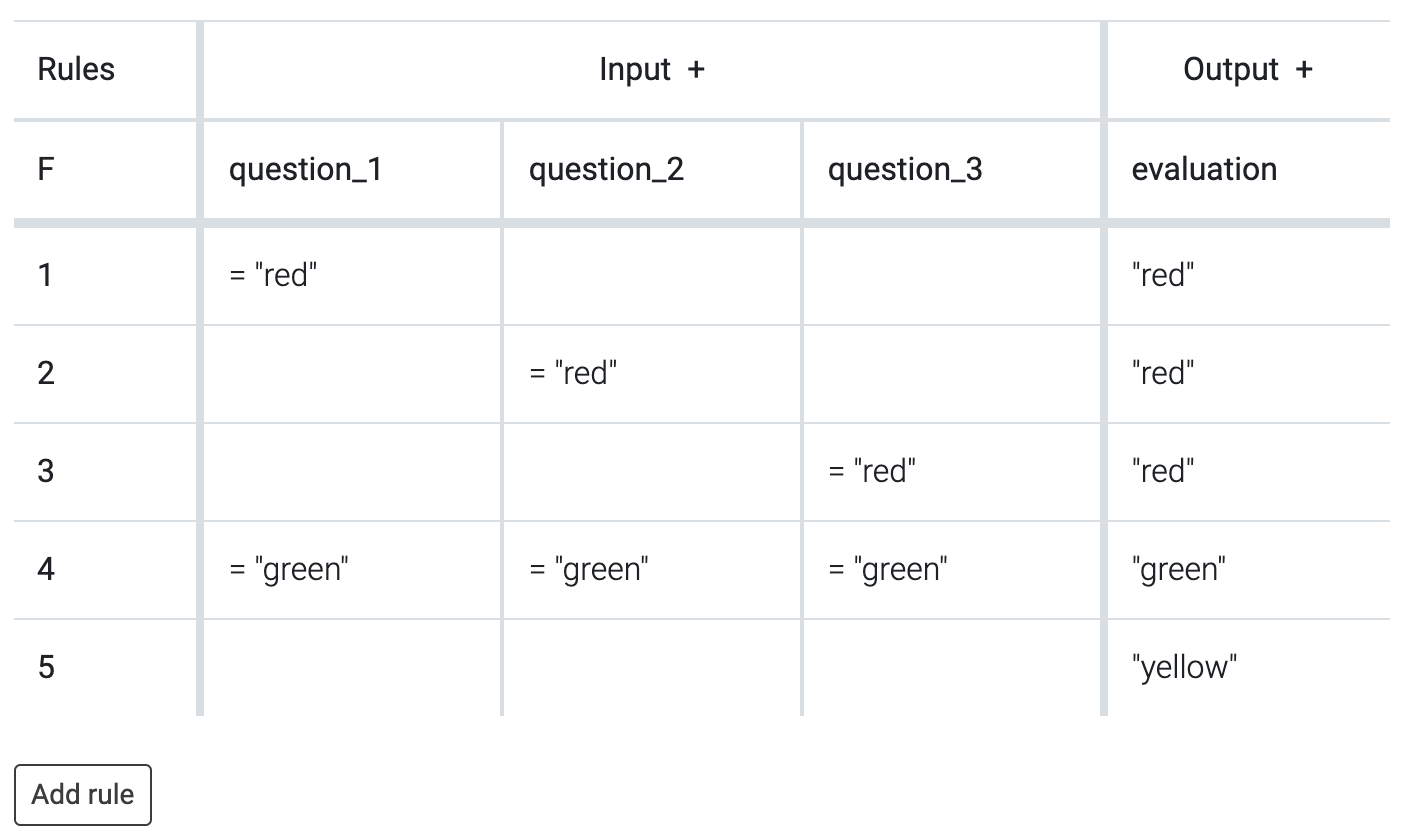
Since we cannot realize an OR in one line, we create three lines for the case that the output value should become red. We see that the condition in empty cells is automatically considered to be fulfilled. Next, we consider the case where the output value should become green. Since the columns of a row are linked with an AND, it is sufficient if we check the value for green in each cell. After that, it is important that "first" was selected in the rule's settings. This makes it possible that we can map all remaining combinations to the output value yellow. Again, we use that the condition in empty cells is automatically considered to be fulfilled.
How to Use the Module
Input
By clicking on "Input +" you add another input. The input can be a fixed value, a function, or variable. The value this returns is compared to the rules from top to bottom. If one rule applies the output in the same row is generated.
Output
By clicking on "Output +" you add another output. The output is stored in a variable/key whose name you can choose yourself.
Rules
By clicking on the rule number you can add an annotation, delete it or move the rule up or down. To edit the rule itself you need to click the box and choose an operator and value.
Rules settings
You can choose between "First" and "Rule order" by clicking on "F" / "R". Select "first" if the first matching rule should be applied and "rule order" if every rule should be applied. The default is "first".
Useful Tips
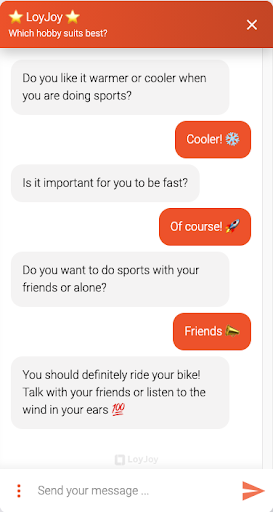
Building a product finder, a skin type test, or something similar has never been easier than with our decision table! You do not have to add every condition to each module. It is much simpler! For this article, you should know how variables work. If you need help with that, read this article first. To use a decision table you need a questionnaire, a decision table, and some outputs. Outputs can be every module you want. The outputs are what the customer will see as a result. In this example, we will build a test on which hobby is best suited for the customer. As a result (outputs) we have swimming, cycling, and jogging.

Add a Questionnaire
First, you add the questions you want to ask. Add at least two questions. For fewer questions, it does not make sense to use a decision table.
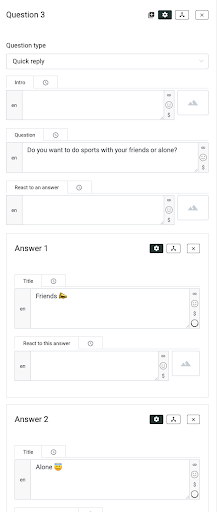
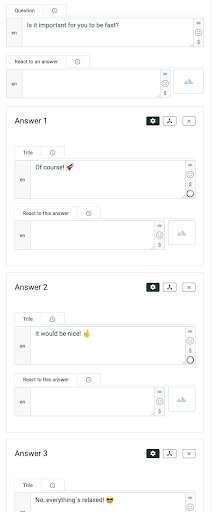
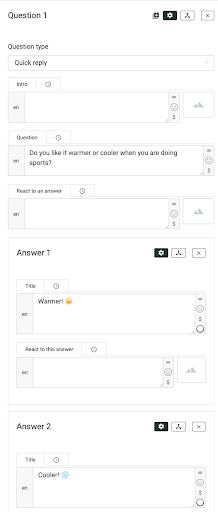
Then choose the process variables and values for each question and each answer. Pay attention to the correct spelling!
Working With the Decision Table
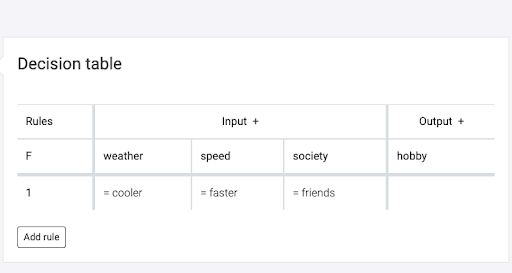
Now you open the decision table. We need to add as many inputs as you have added questions. Therefore click on “Input +”.
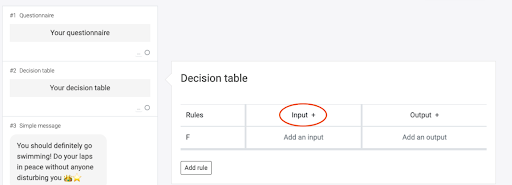
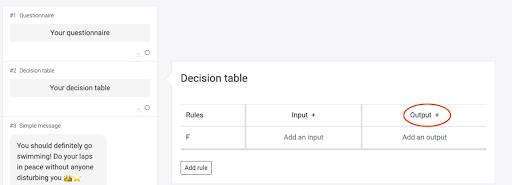
Afterwards, add an output by clicking on “Output +”.
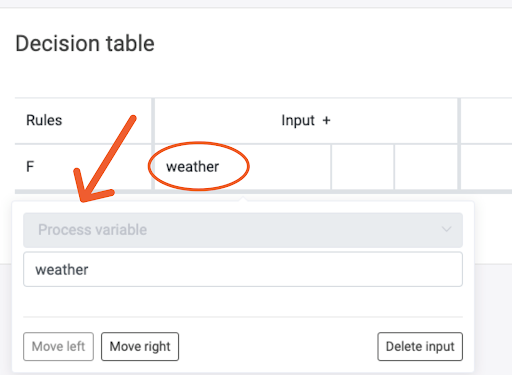
Next, click on the first field under “Input” and select “process variable”. Fill in the name of the process variable of your first question. In the other field under input, you do the same with the other process variables.
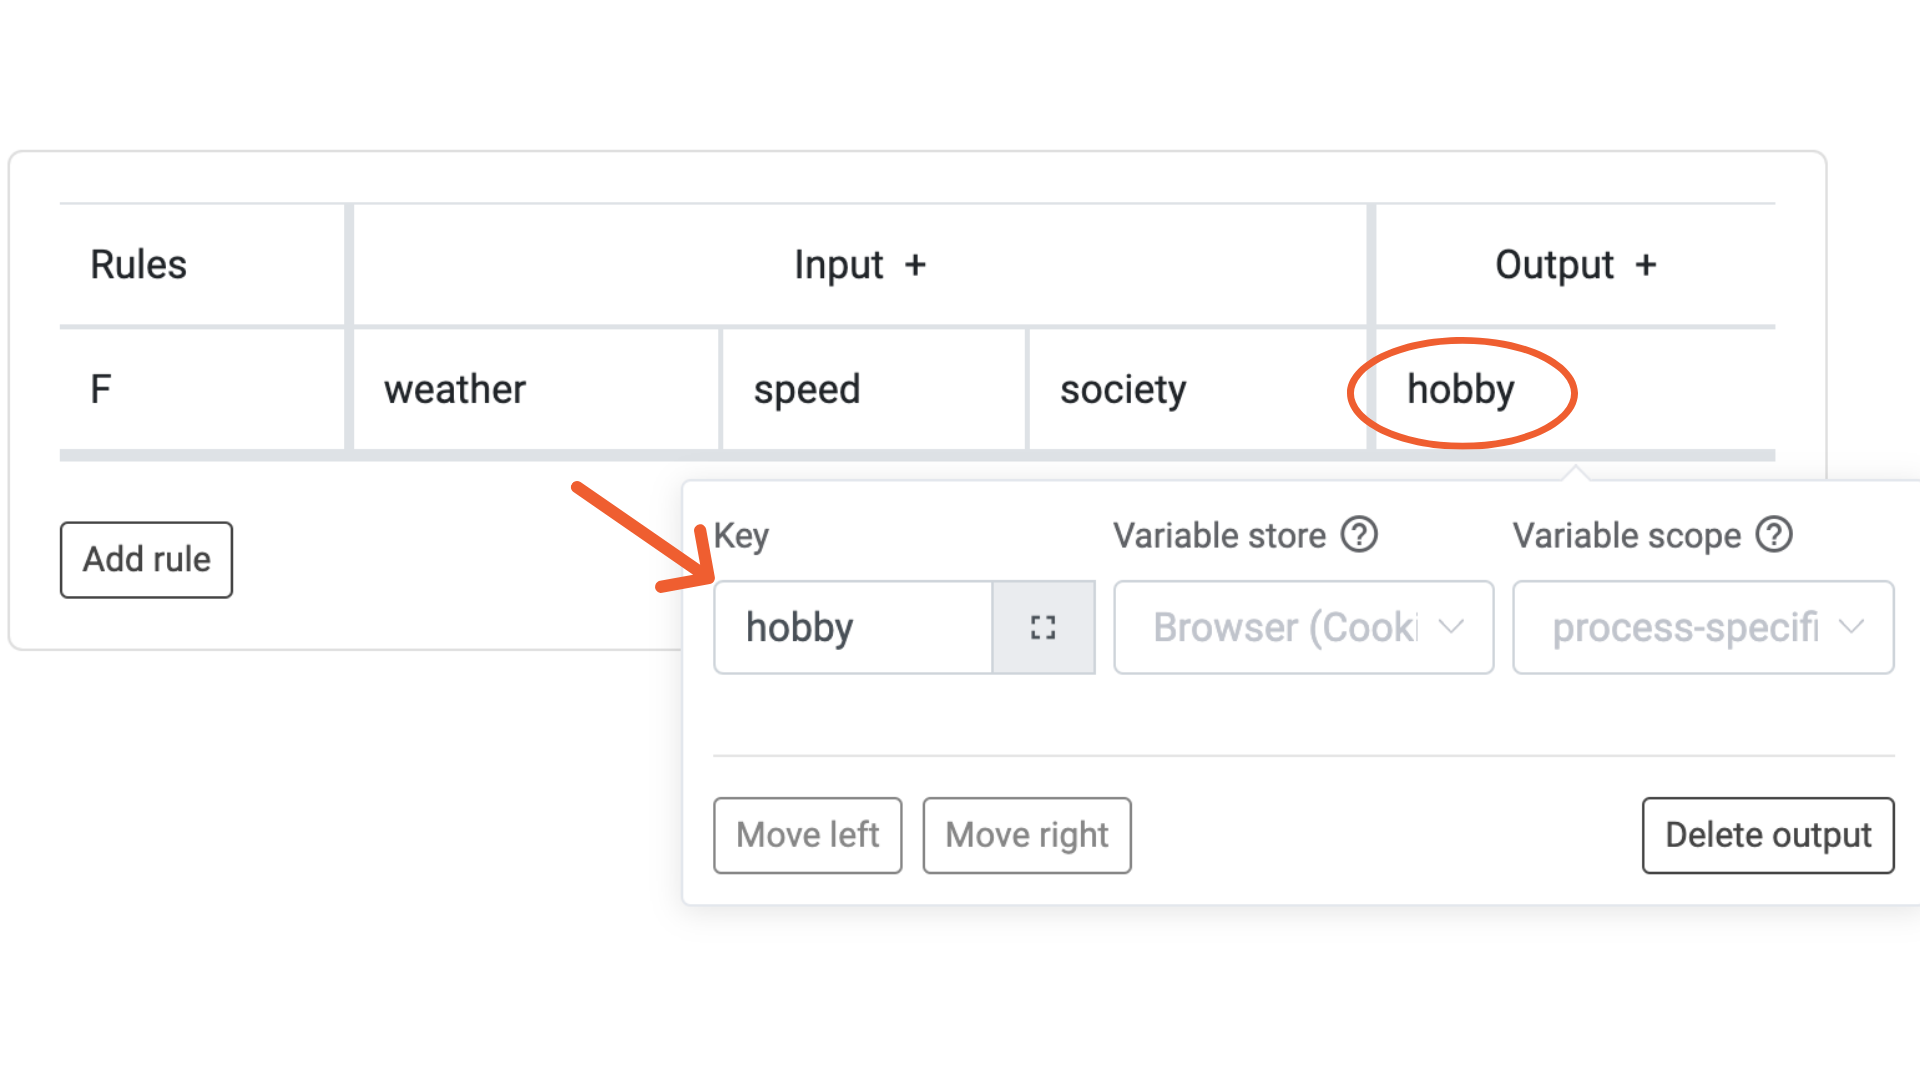
Then, click on the field under “Output”, choose “process variable” again, and add a new name. Do not use a name that you have already used. For example, use “skin type” if you are doing a skin type test or use “product” if you are building a product finder. Select 'process specific' for 'Variable scope' if you want the variable to be used only in this experience and 'process independent' if you want the variable to be usable in other experiences as well.
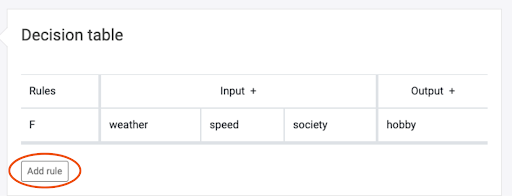
As a next step, add a new rule.
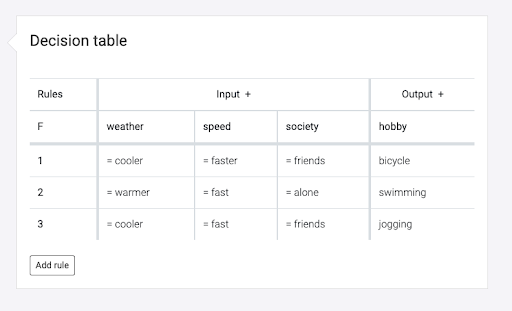
With this, you determine the combinations of your questionnaire. For example, if you have three outputs: jogging, cycling, and swimming, add a rule for every combination after which jogging comes as an output. Because of length, we are showing you how to do it with three combinations. After that, the system will be clear and you can choose more combinations! If the first combination is clicked by the customer the hobby will be cycling. So we add in the fields of the first rule values that fit. The system is similar to the variables at modules. Click on the field under the first input. Choose an operator and add the fitting value. This has to be the value that was set in the first question.
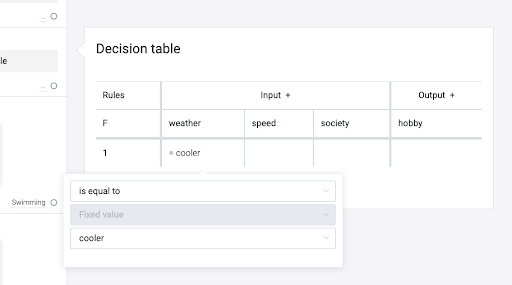
Then you add the values in the other fields of your inputs too.
Next, you fill in the “Output”. For this, click on the field under hobby. Choose a fixed value and add a name that is fitting. In our case, we will use swimming, jogging, and bicycle.
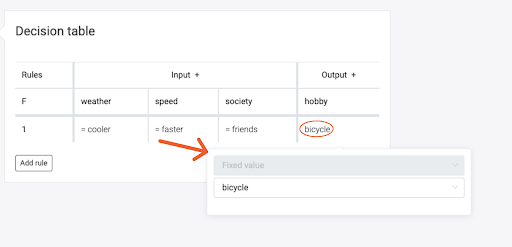
Now the first rule is ready. If this combination is clicked, the customer will get “bicycle” as a result. You need to rule every possibility because otherwise the chatbot does not know what to send. In that case, there would be no output.
Choose Your Modules
As the last step, you need to condition your modules. To condition them, click on the small circle of the module.
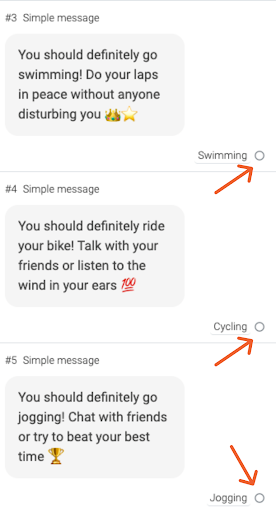
Then choose “hobby” as a process variable in the first field and your output (swimming, jogging, or cycling) as a fixed value in the third field.

That's it! Now your chat is customized to the responses of the customer.