Server for Web Service Module
Use serverless functions such as a Google Cloud Function to process data from your experience and feed the results back into it.
Why should I use a Google Cloud Function?
A Google Cloud Function provides a safe execution environment to run arbitrary code. It also gives you access to APIs of the Google Cloud environment such as the Google Vision API or the Google Cloud Datastore.
You could also use another cloud provider such as AWS or Azure to achieve the same result.
Deploying the Cloud Function
First, you create a new Cloud Function in the Google Cloud Console. Choose a name describing your function.
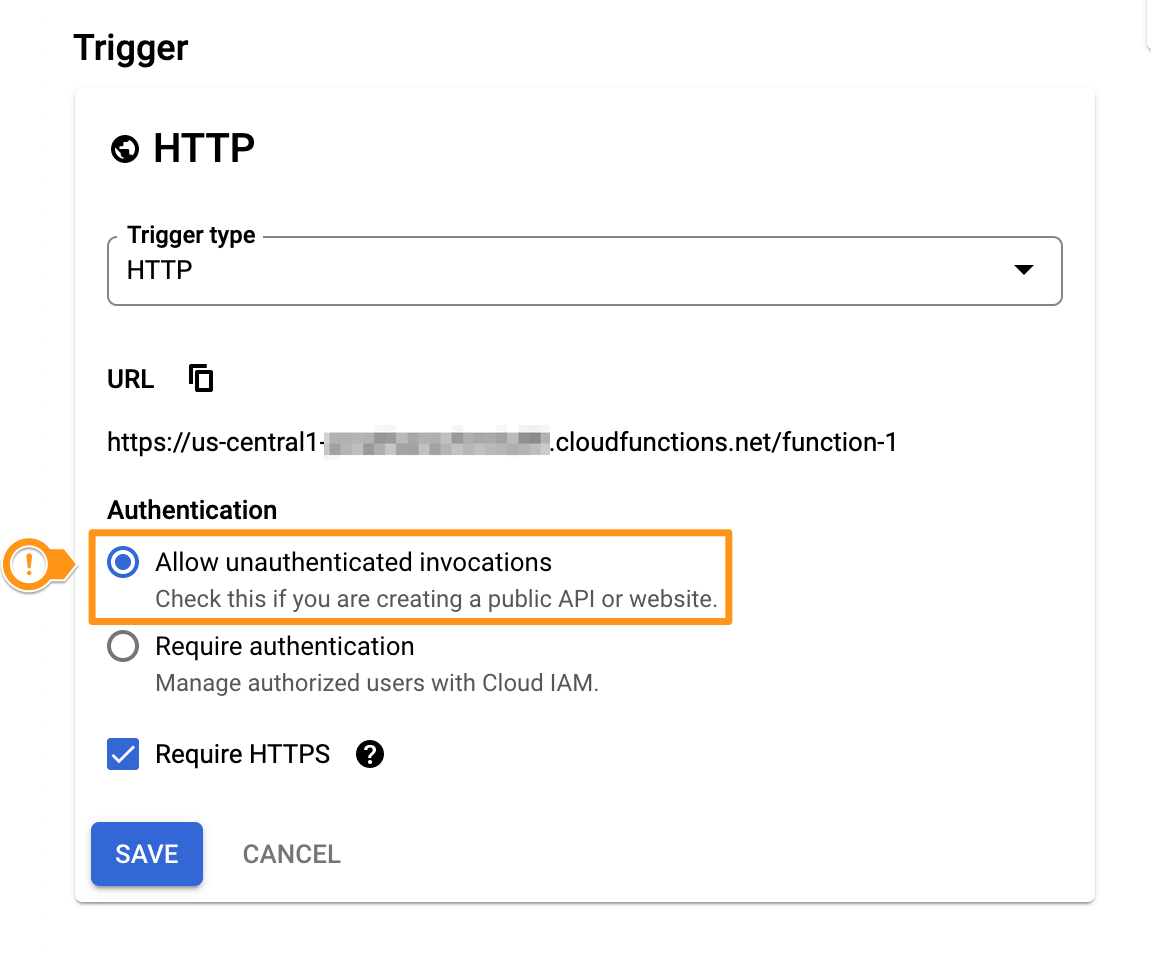
You have to allow unauthenticated invocations of the function. We will handle authentication inside the function code itself. The function URL will not be published by using it in LoyJoy.

Next, you can enter the code of your function. In this example we have chosen the Node.js 16 Runtime.
This is the example code for the index.js file:
const functions = require('@google-cloud/functions-framework');

// you can test your function using curl:
// curl -d '{"params":{"paramkey": "paramvalue"},"variables":{"length": "12", "width": "1.5"}, "process_definition_id": "6b3431a0-b0ee-4fcd-bfdd-c769239e835c"}' http://localhost:8091/ -H "Authorization: Bearer TTYz6n6q7tu8MhBV7TCp"  -H "Content-type: application/json"
functions.http('exampleFunction', (req, res) => {
    const {
        authorization
    } = req.headers;

    // set this authorization header in the module
    if (authorization !== 'Bearer TTYz6n6q7tu8MhBV7TCp') {
        res.sendStatus(403);
    } else {
        // req.body contains:
        // req.body.params - params set in the web service module config
        // req.body.variables - variables of the process instance / customer
        // req.body.process_definition_id - ID of the experience / BPMN process the request comes from
        // req.body.process_instance_id

        const vars = req && req.body ? req.body.variables : null;

        if (!vars || !vars.length || !vars.width) {
            res.sendStatus(400);
        } else {
            const length = parseFloat(vars.length);
            const width = parseFloat(vars.width);

            const area = length * width;

            const response = {
                'data': {
                    'variables': {
                        // following variables will be set in the process
                        'area': area
                    }
                }
            };

            res.setHeader('Content-type', 'application/json');
            res.send(response);
        }
    }
});
The example code checks for the experience variables length and width and multiplies their values. It returns the result as the variable area to be used in the further execution of the experience.
You also have to put this code into the package.json file:
{
  "name": "<NAME>",
  "version": "1.0.0",
  "description": "",
  "private": true,
  "main": "index.js",
  "scripts": {
    "start": "npx functions-framework --target=exampleFunction --signature-type=http --port 8091"
  },
  "author": "<YOUR NAME>",
  "dependencies": {
    "@google-cloud/functions-framework": "^3.0.0"
  }
}
The entry point has to be set to the name of the function in the index.js file. In the example it is exampleFunction.

If there is a JavaScript syntax error in your code, you will get a warning that the entry point could not be found.
Authentication
The authentication in the function is done via this line:
if (authorization !== 'Bearer TTYz6n6q7tu8MhBV7TCp') {
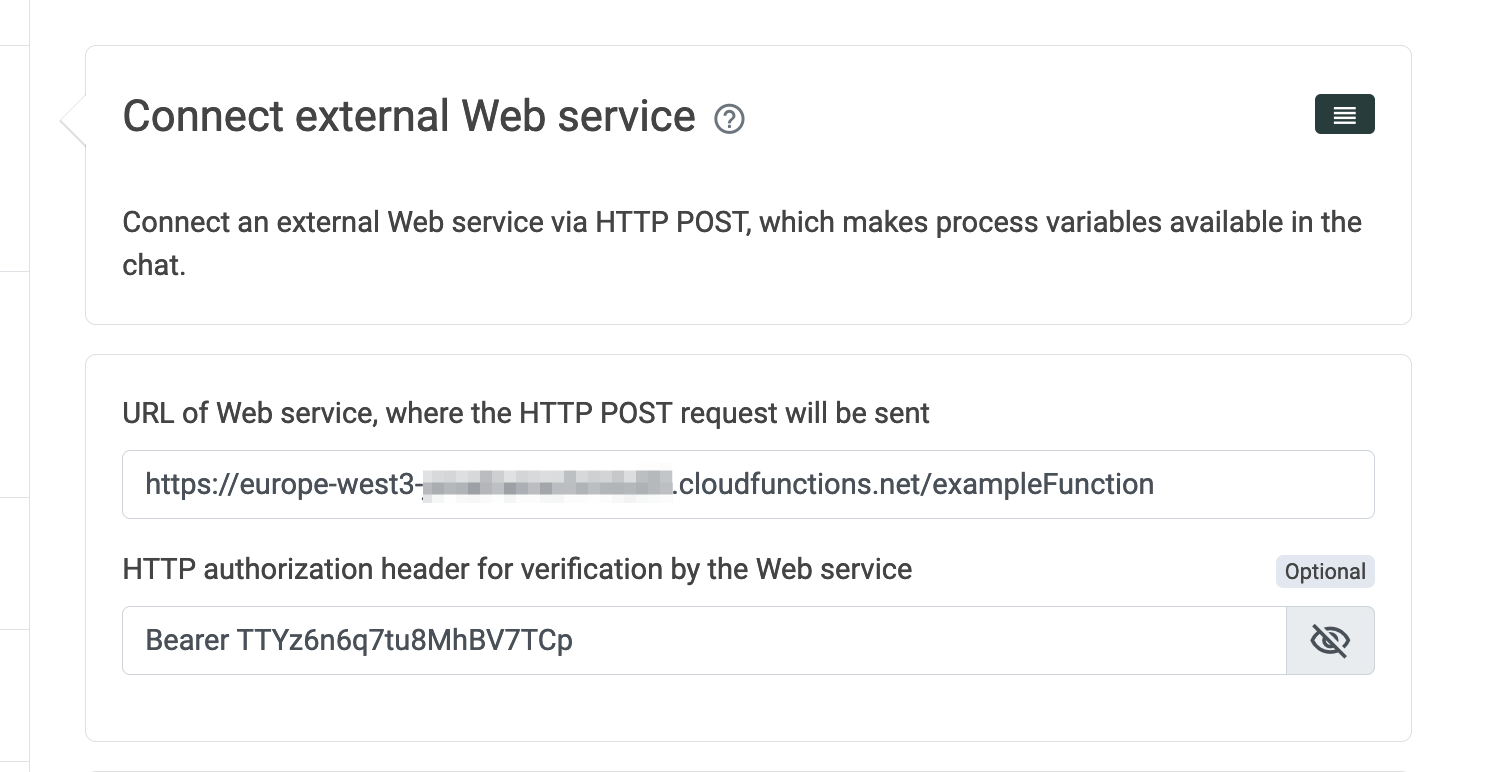
We will set the Bearer token in LoyJoy. You should create your own random token string for this purpose.
Integrating the Cloud Function into your experience
You can integrate the cloud function using the Web Service module in LoyJoy. Do to this, you copy the function URL from the Trigger section in the Google Cloud Console. You also have to copy the authorization from the function code to the Web Service module.

What data can I access inside the Cloud Function?
LoyJoy stores data in variables. These variables are key-value pairs where a string value is stored with an corresponding string key.
The variables of the experience will be available to the cloud function in the req.body.variables object.
Accessing user images / files from the experience
Images and other files are not stored directly in the string variable value. Instead, the ID of the storage object of the file in LoyJoy storage is saved. To retrieve the file, an additional variable is created with the key <key>_url. The value of the <key>_url variable will give you an URL where you can retrieve the file data from.
To be able to make a request to the URL, you have to use a API token created in the LoyJoy backend set as bearer authentication.
For example:
fetch("http://stable.loyjoy.com/api/variable/data/2e8eba13-8384-402e-94f2-aa2b7e044933", {
    headers: {
        'Authorization': 'Bearer eyJ0eXAiOiJKV1QiLCJhb...Jvk3yc4OiZSyzW3xiUDqHNNoPutqjO8glkE'
    }
})